PONY FARM A-FRAME
September 15 - October 24, 2016
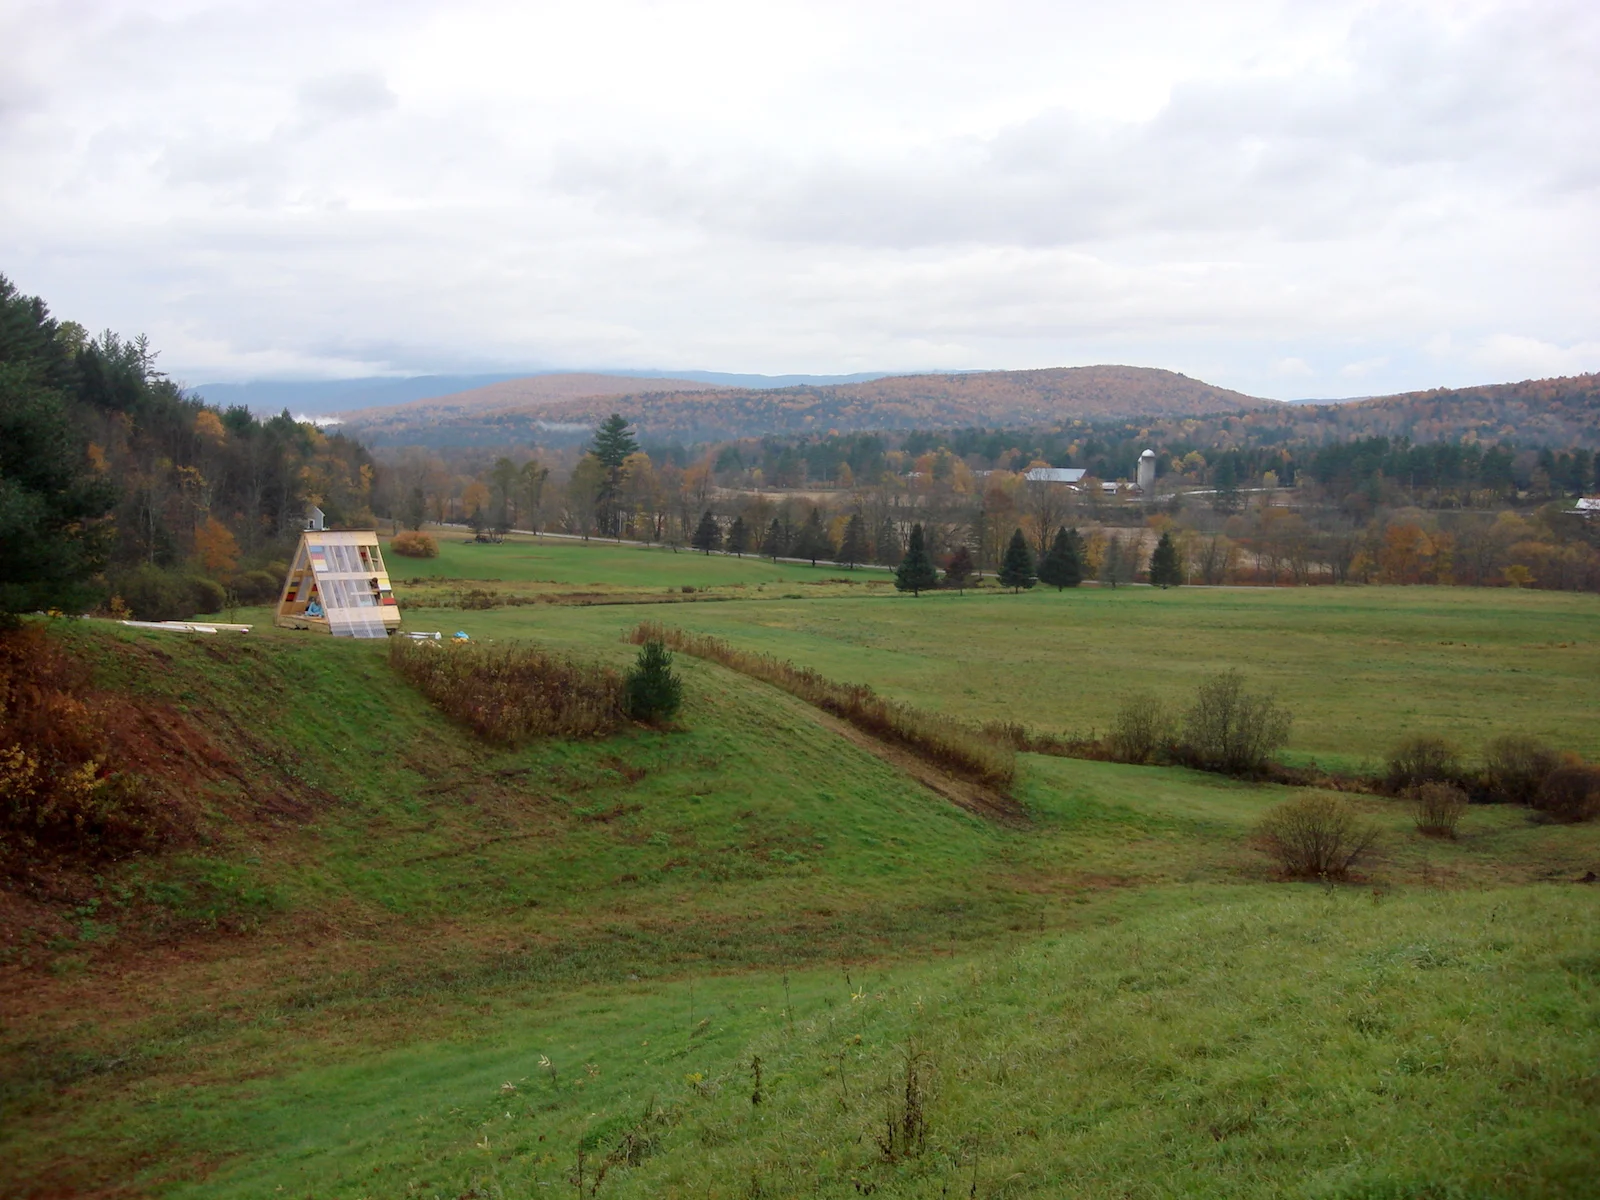
Pony Farm A-Frame
September 15 - October 24, 2016
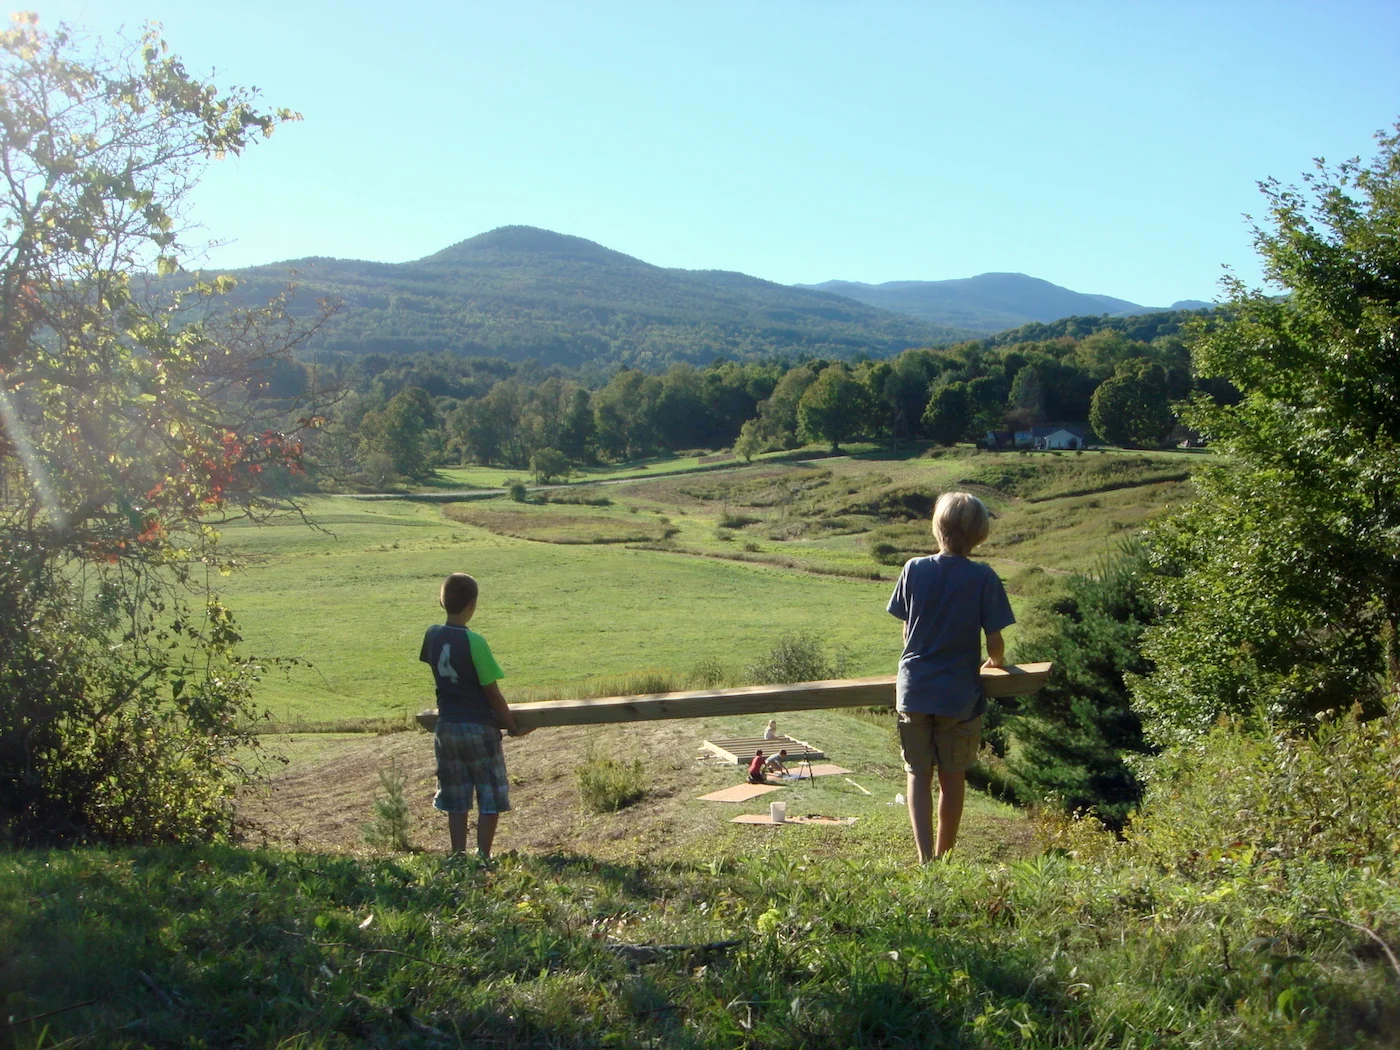
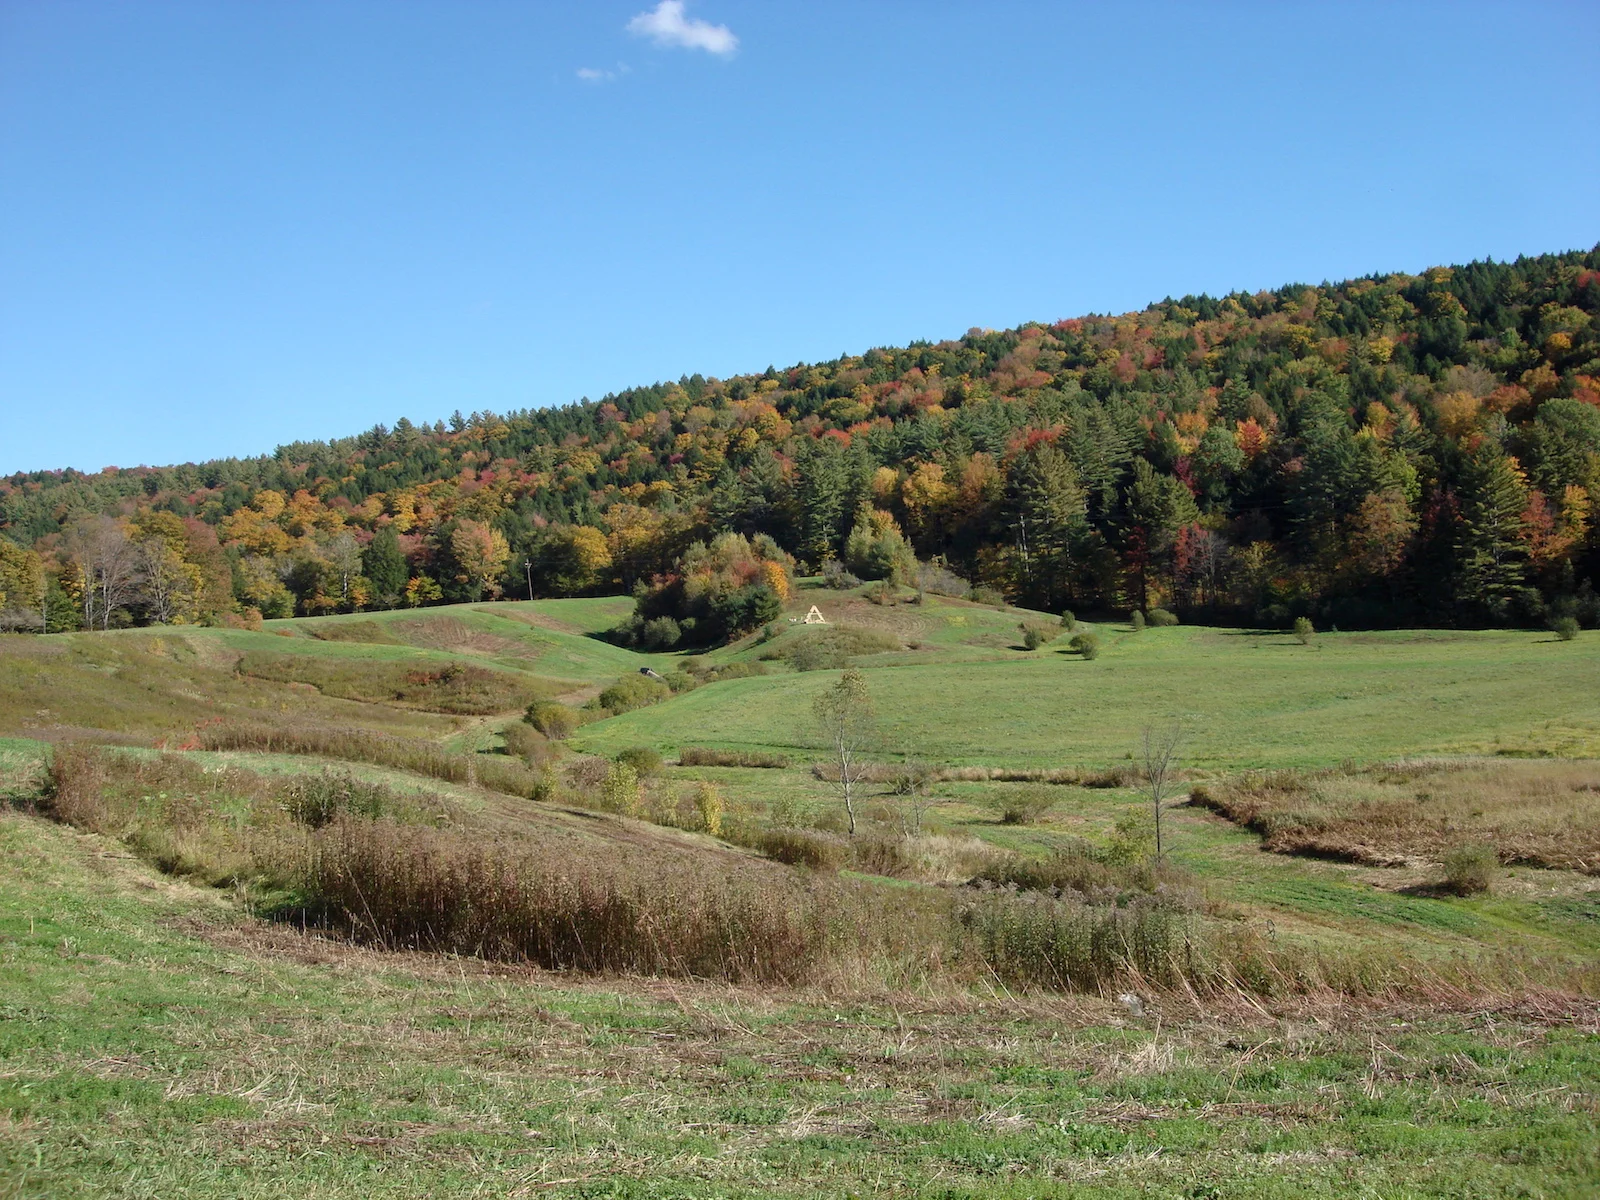
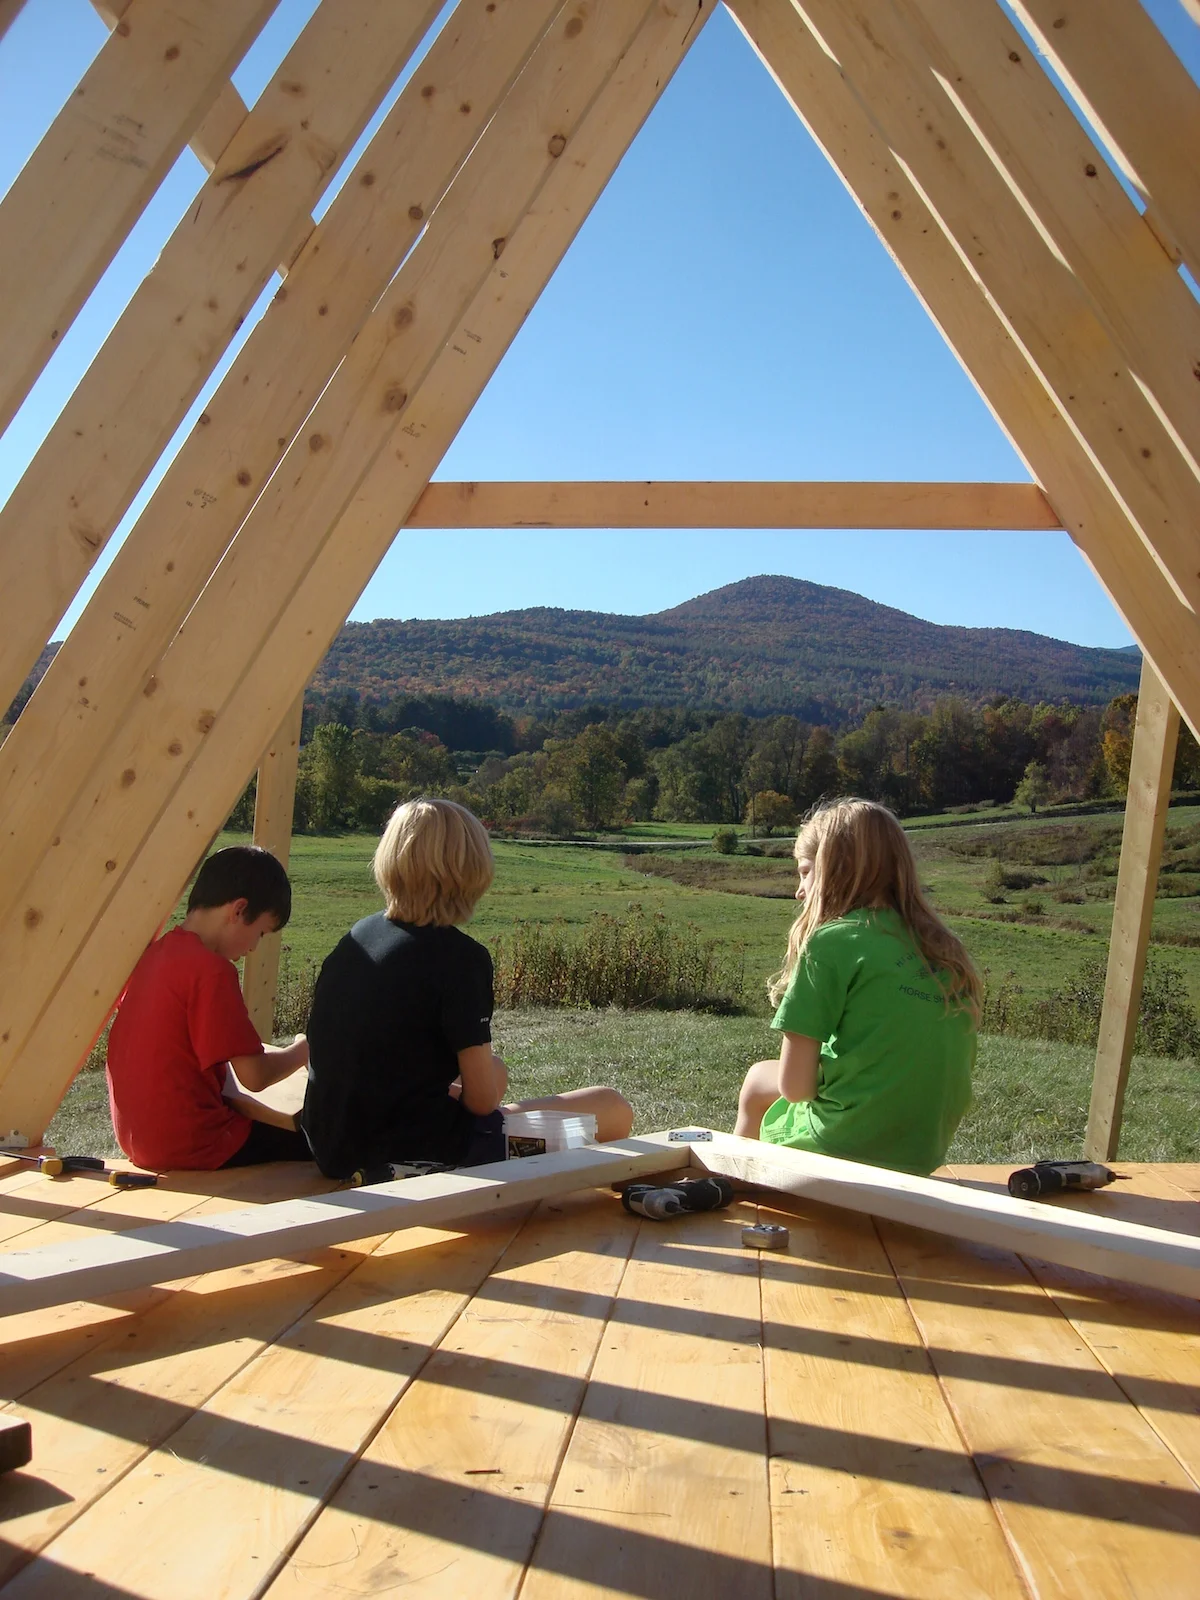
Over the course of 6 weeks, kids gathered after school to build a permanent structure at Pony Farm in Moretown, Vermont. The structure is an equilateral triangle on an 8' x 10' deck. Kids, ages 7-12, met one afternoon per week to build and learn about various aspects of the structure, including framing the deck, raising wall studs, and attaching polycarbonate roofing. The shelter will serve as a gathering space for future educational programs at Pony Farm. Read an article about the project at kidsvt.com.
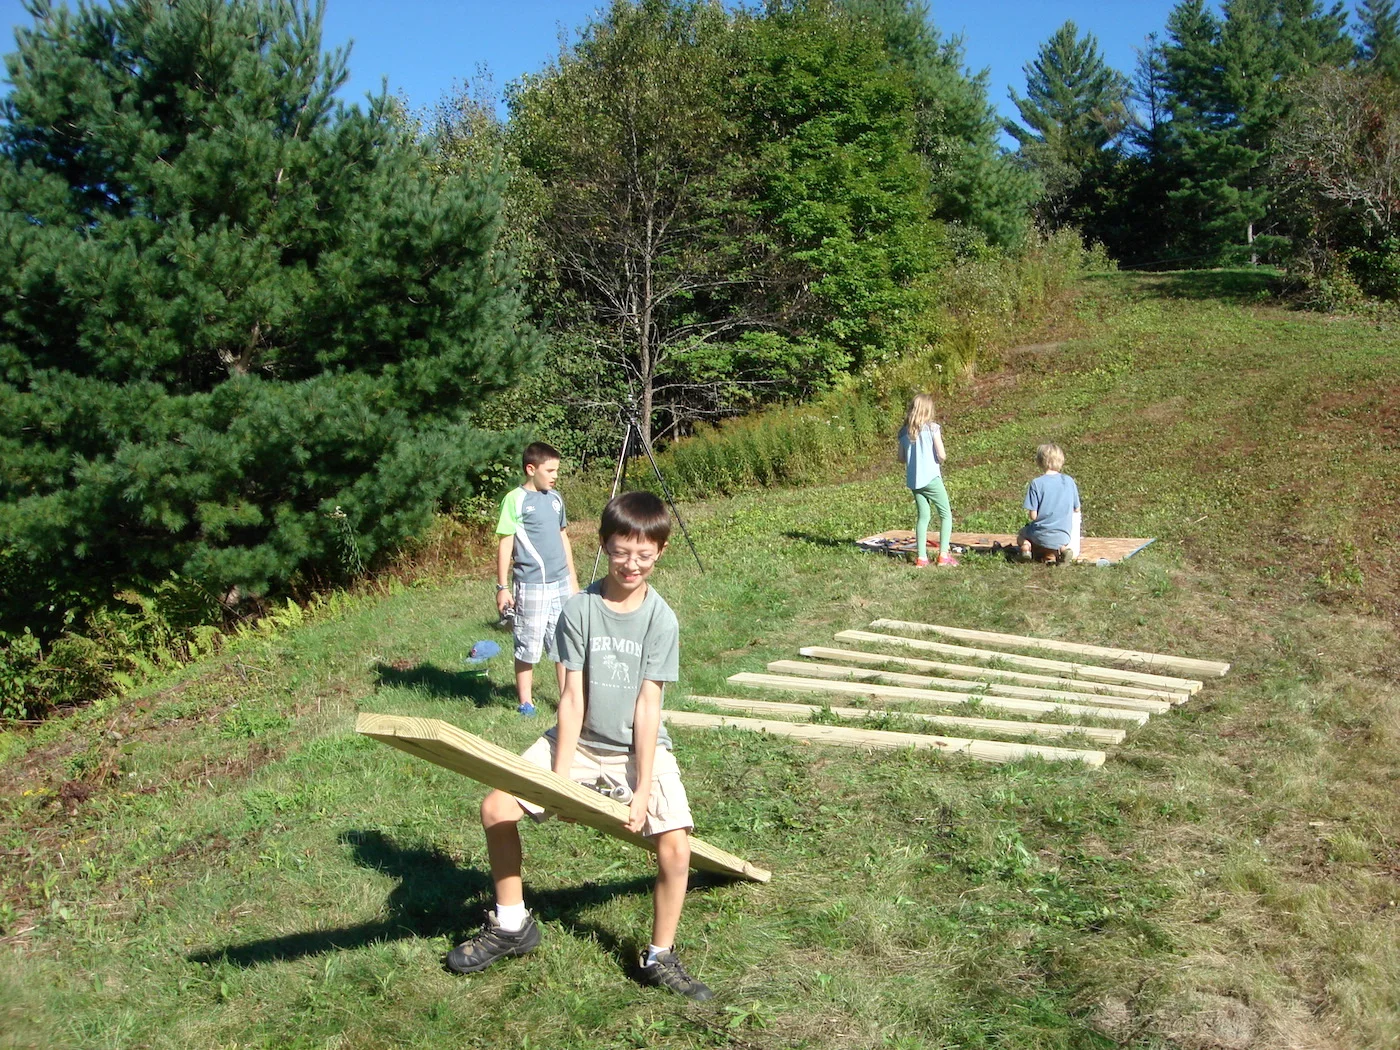
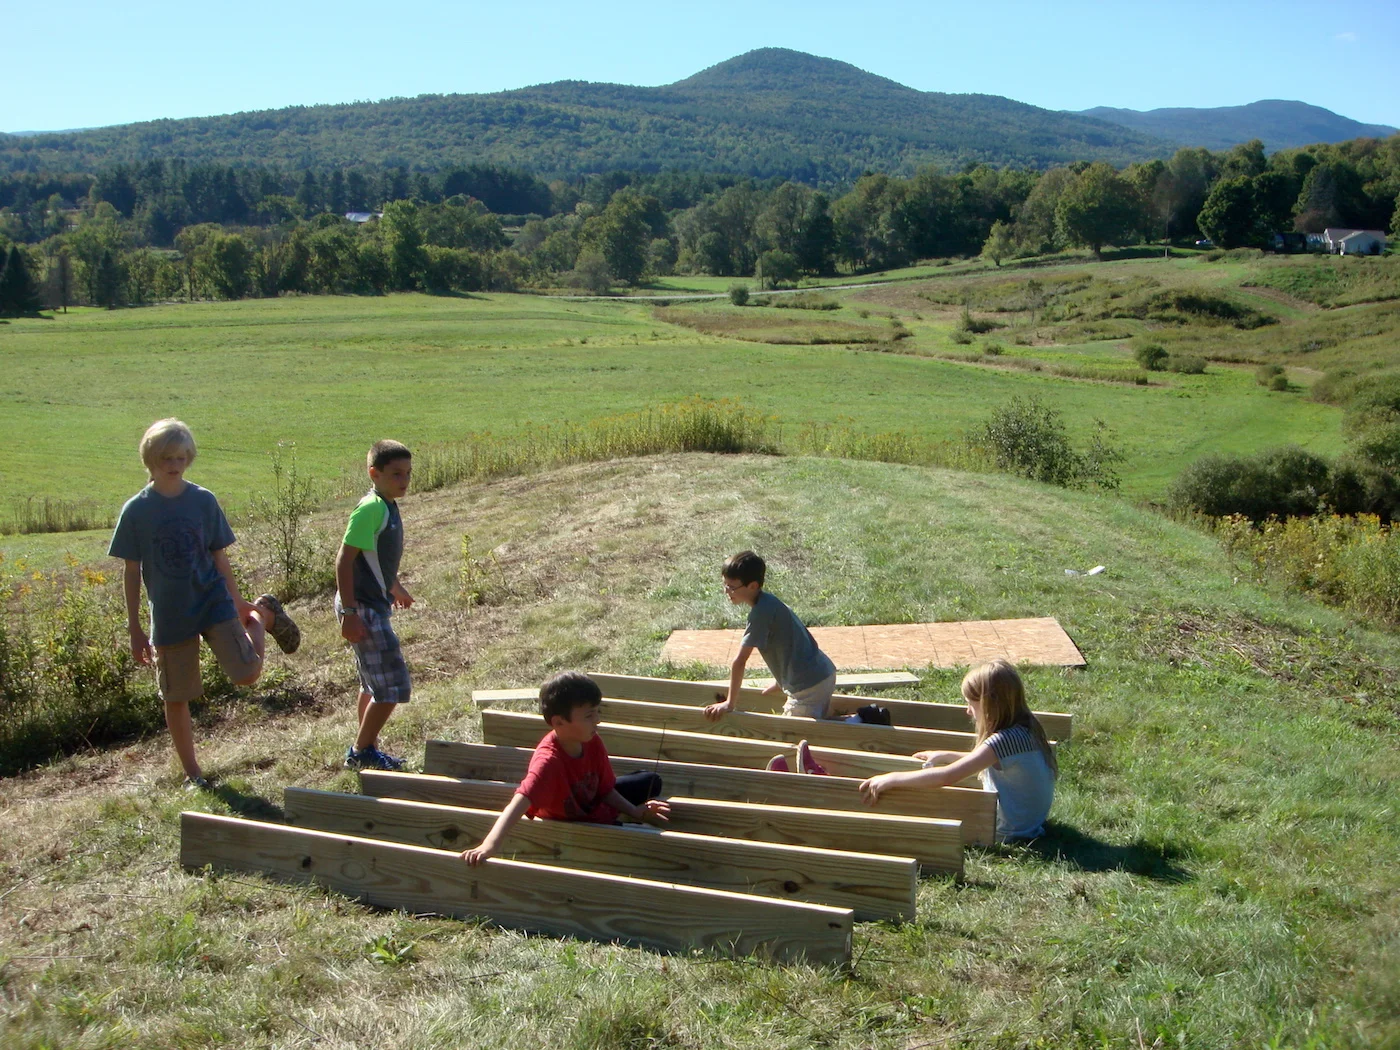
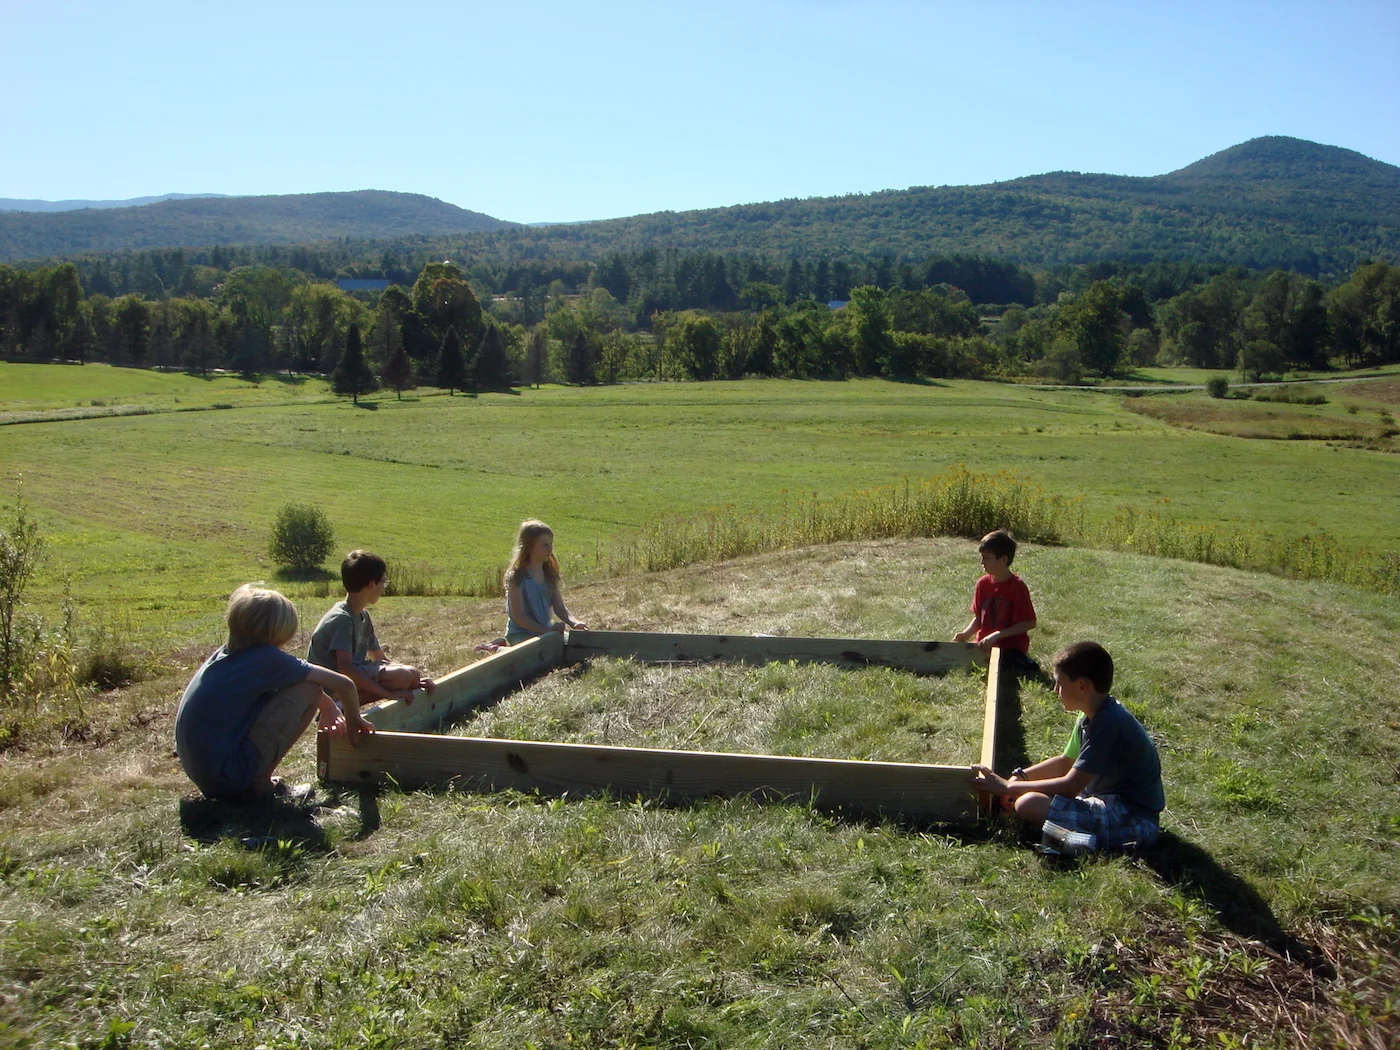
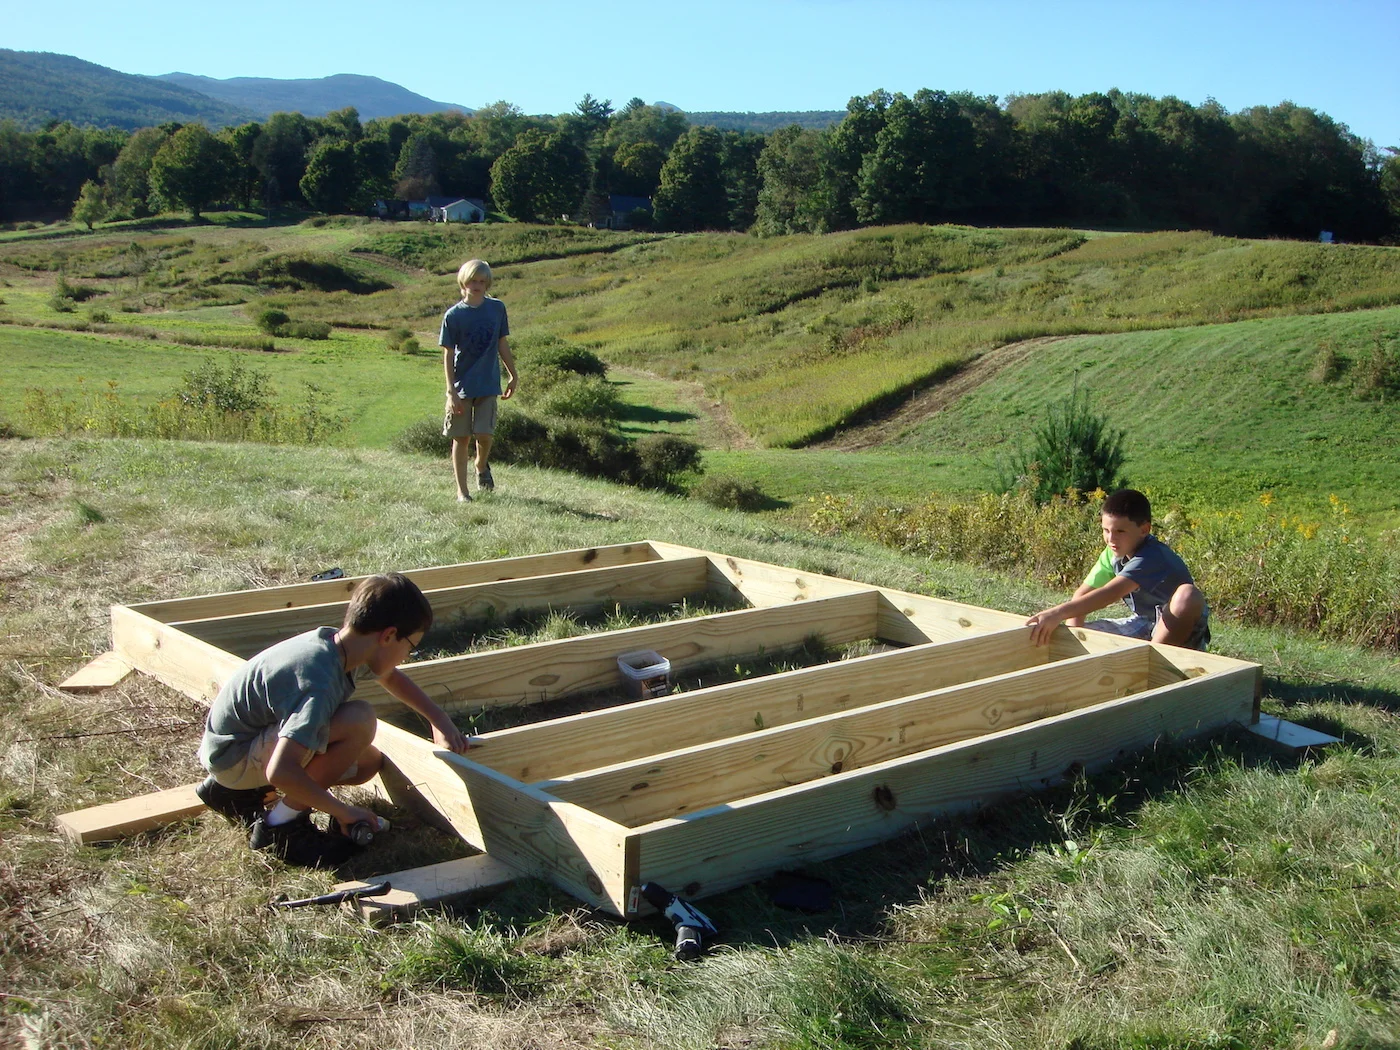
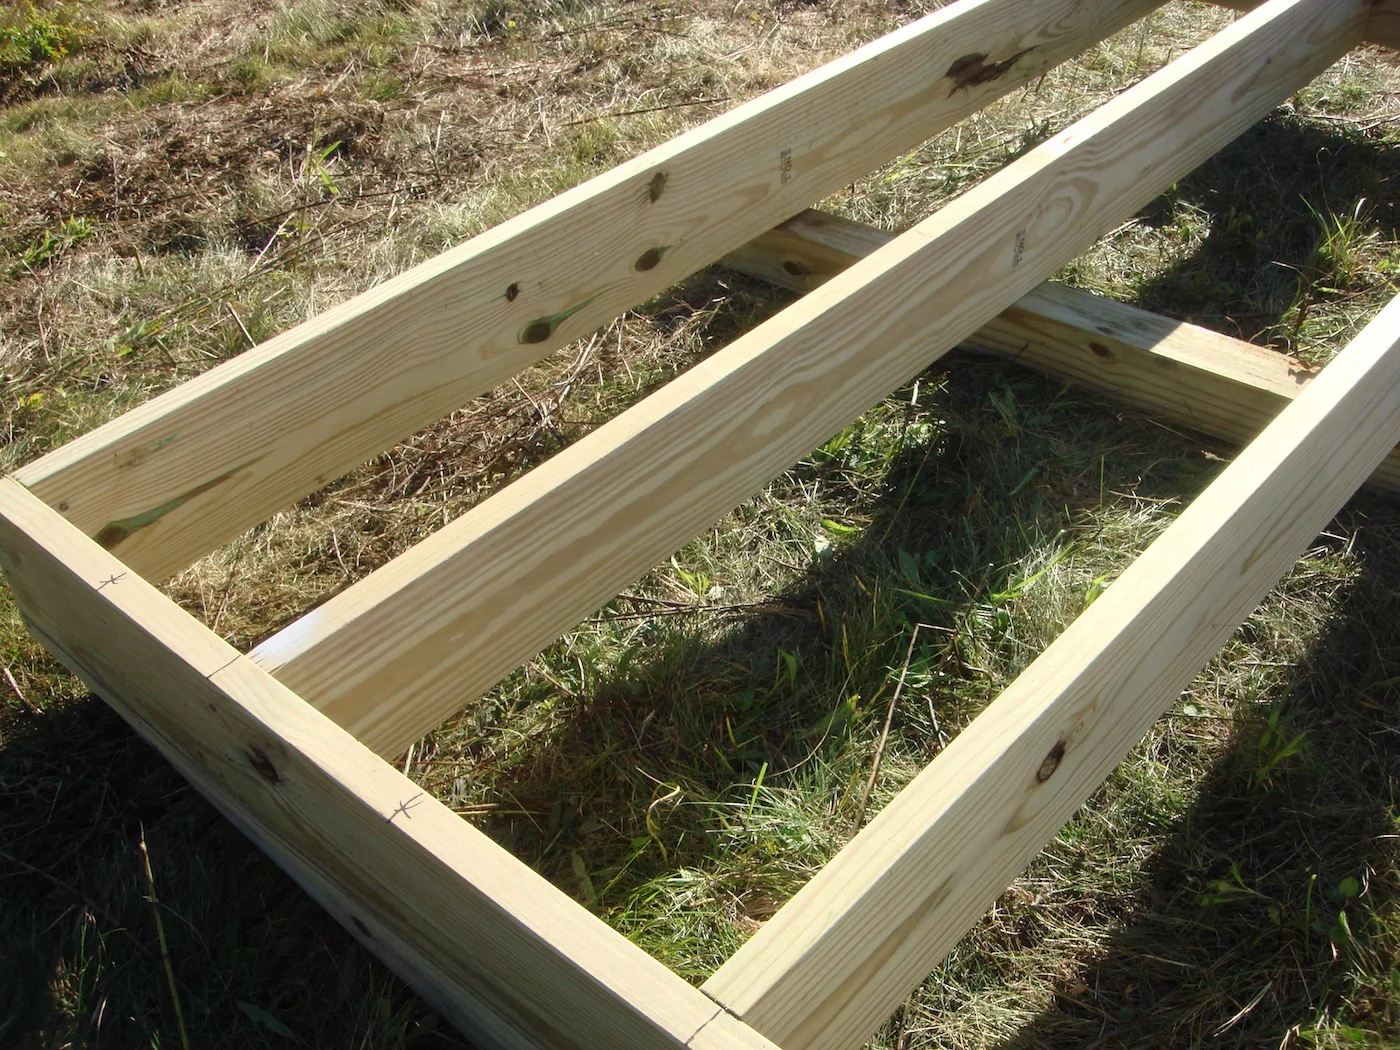
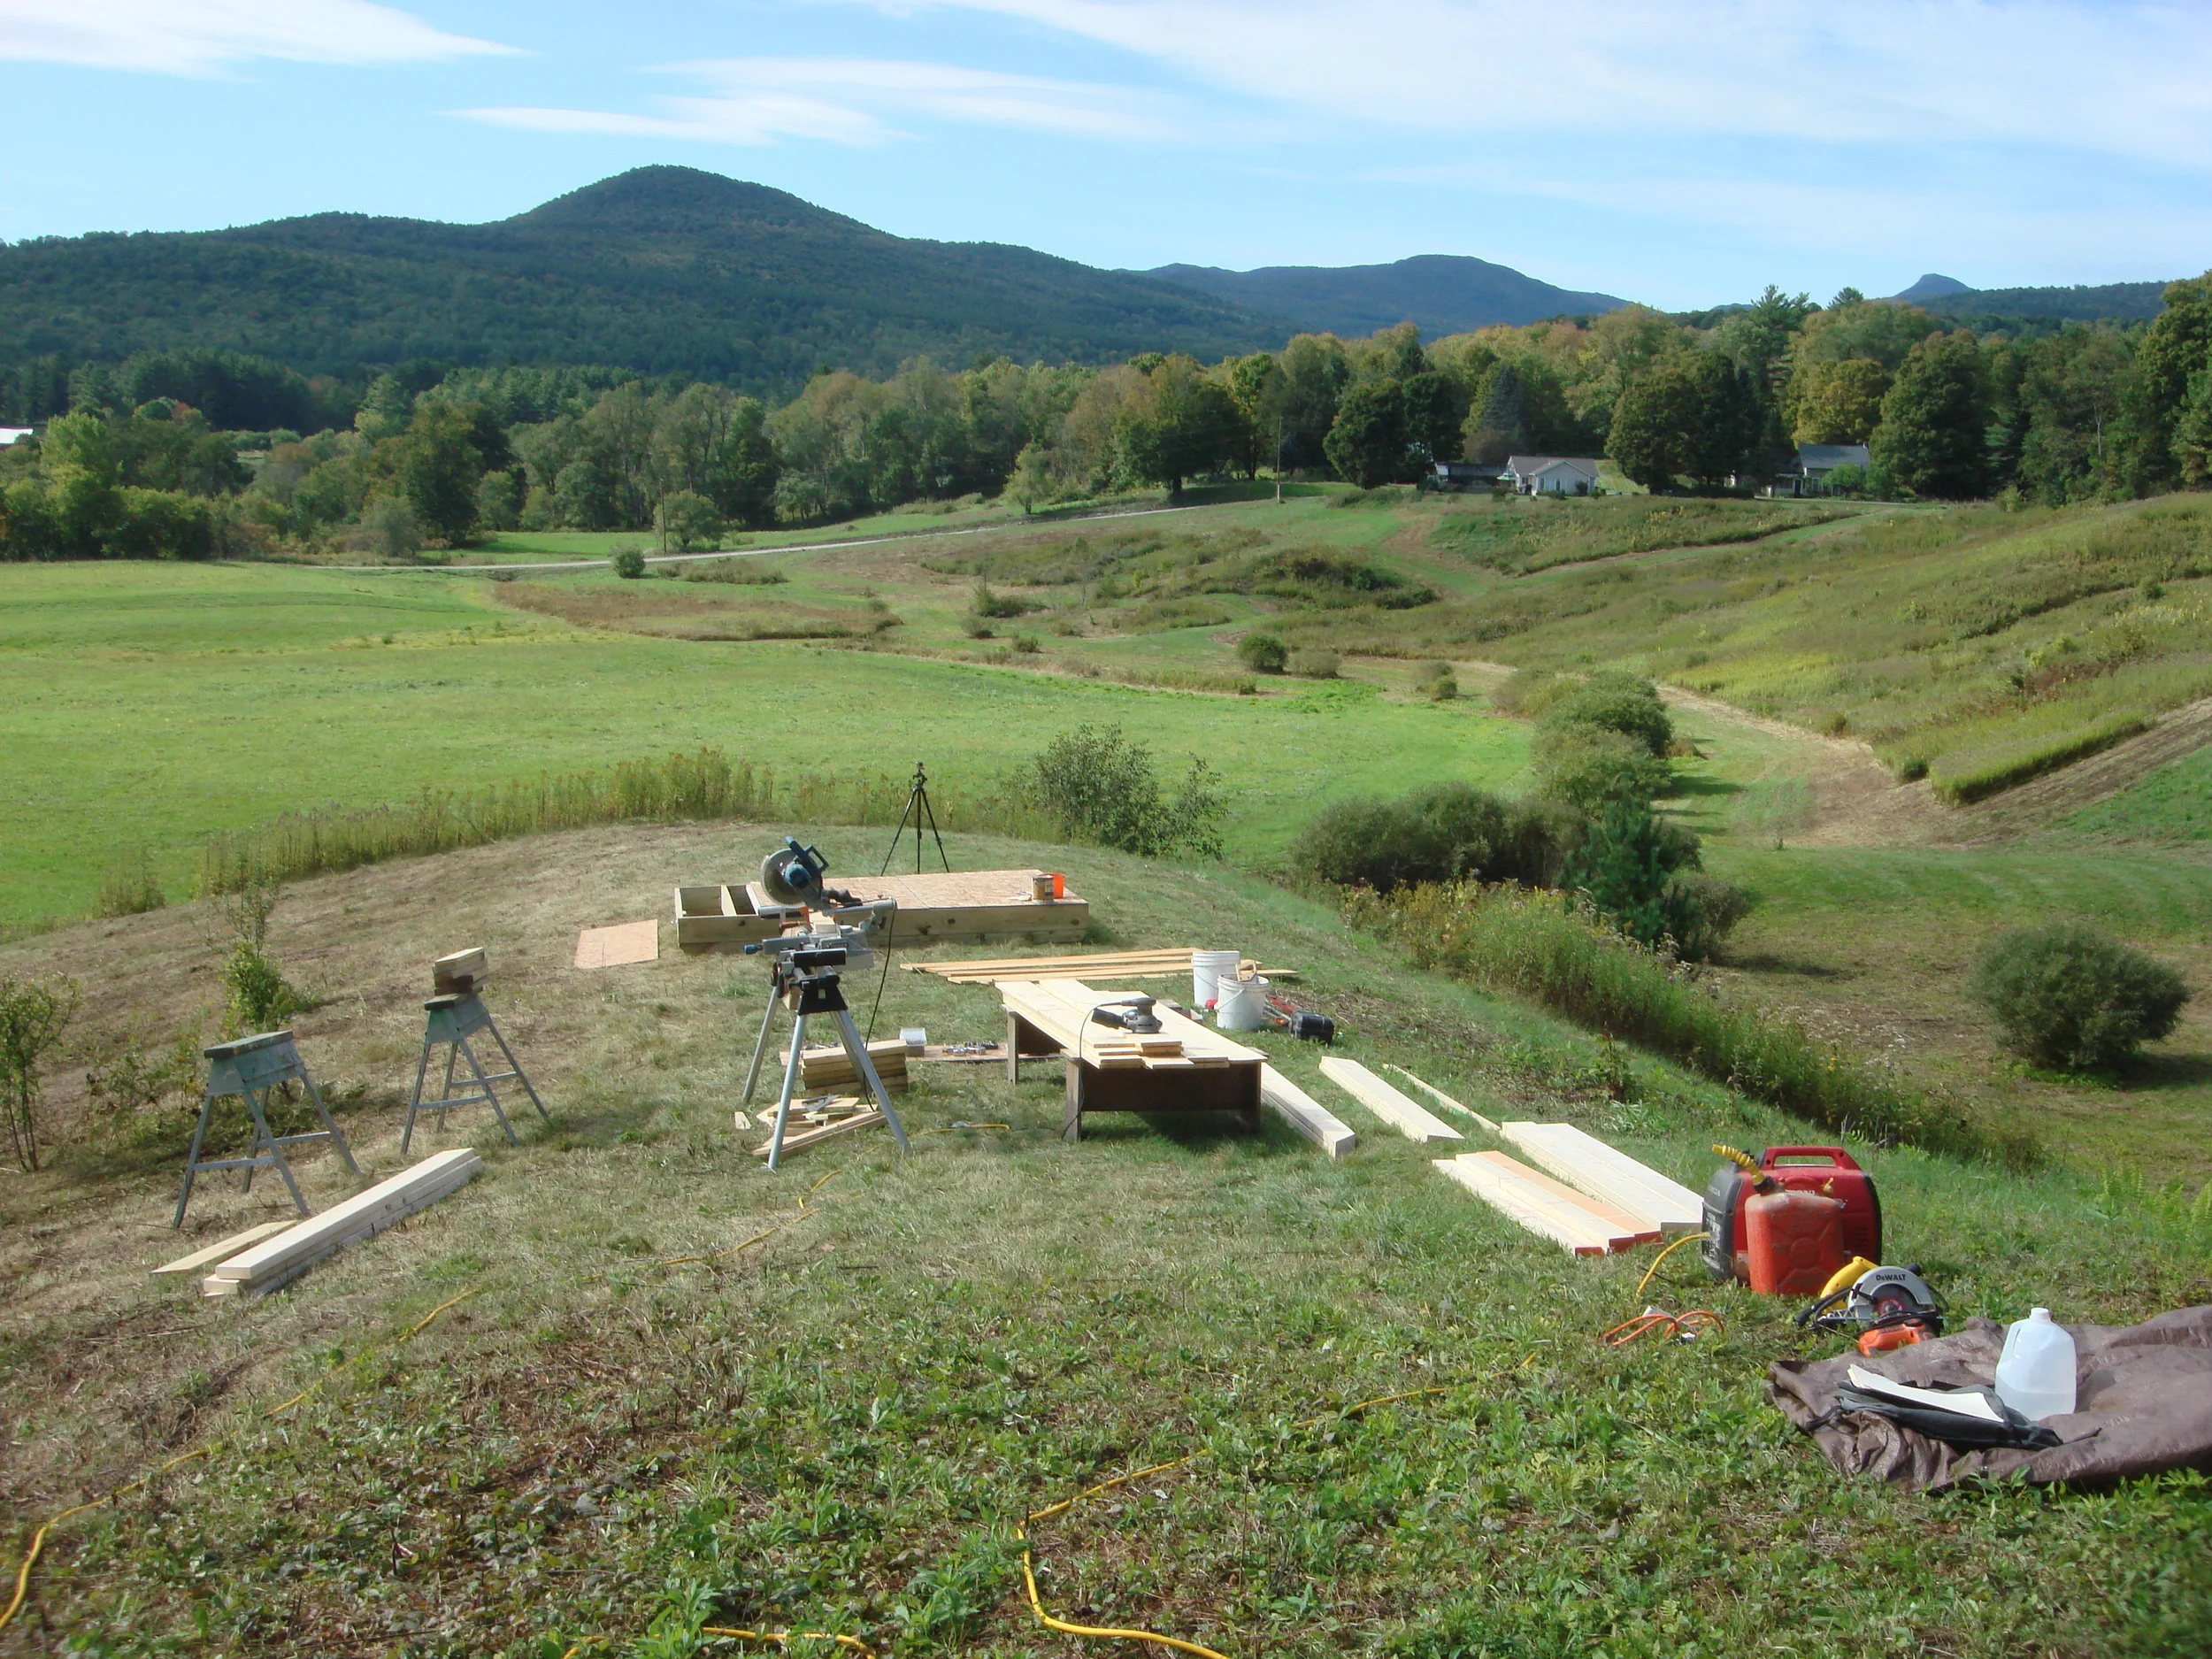
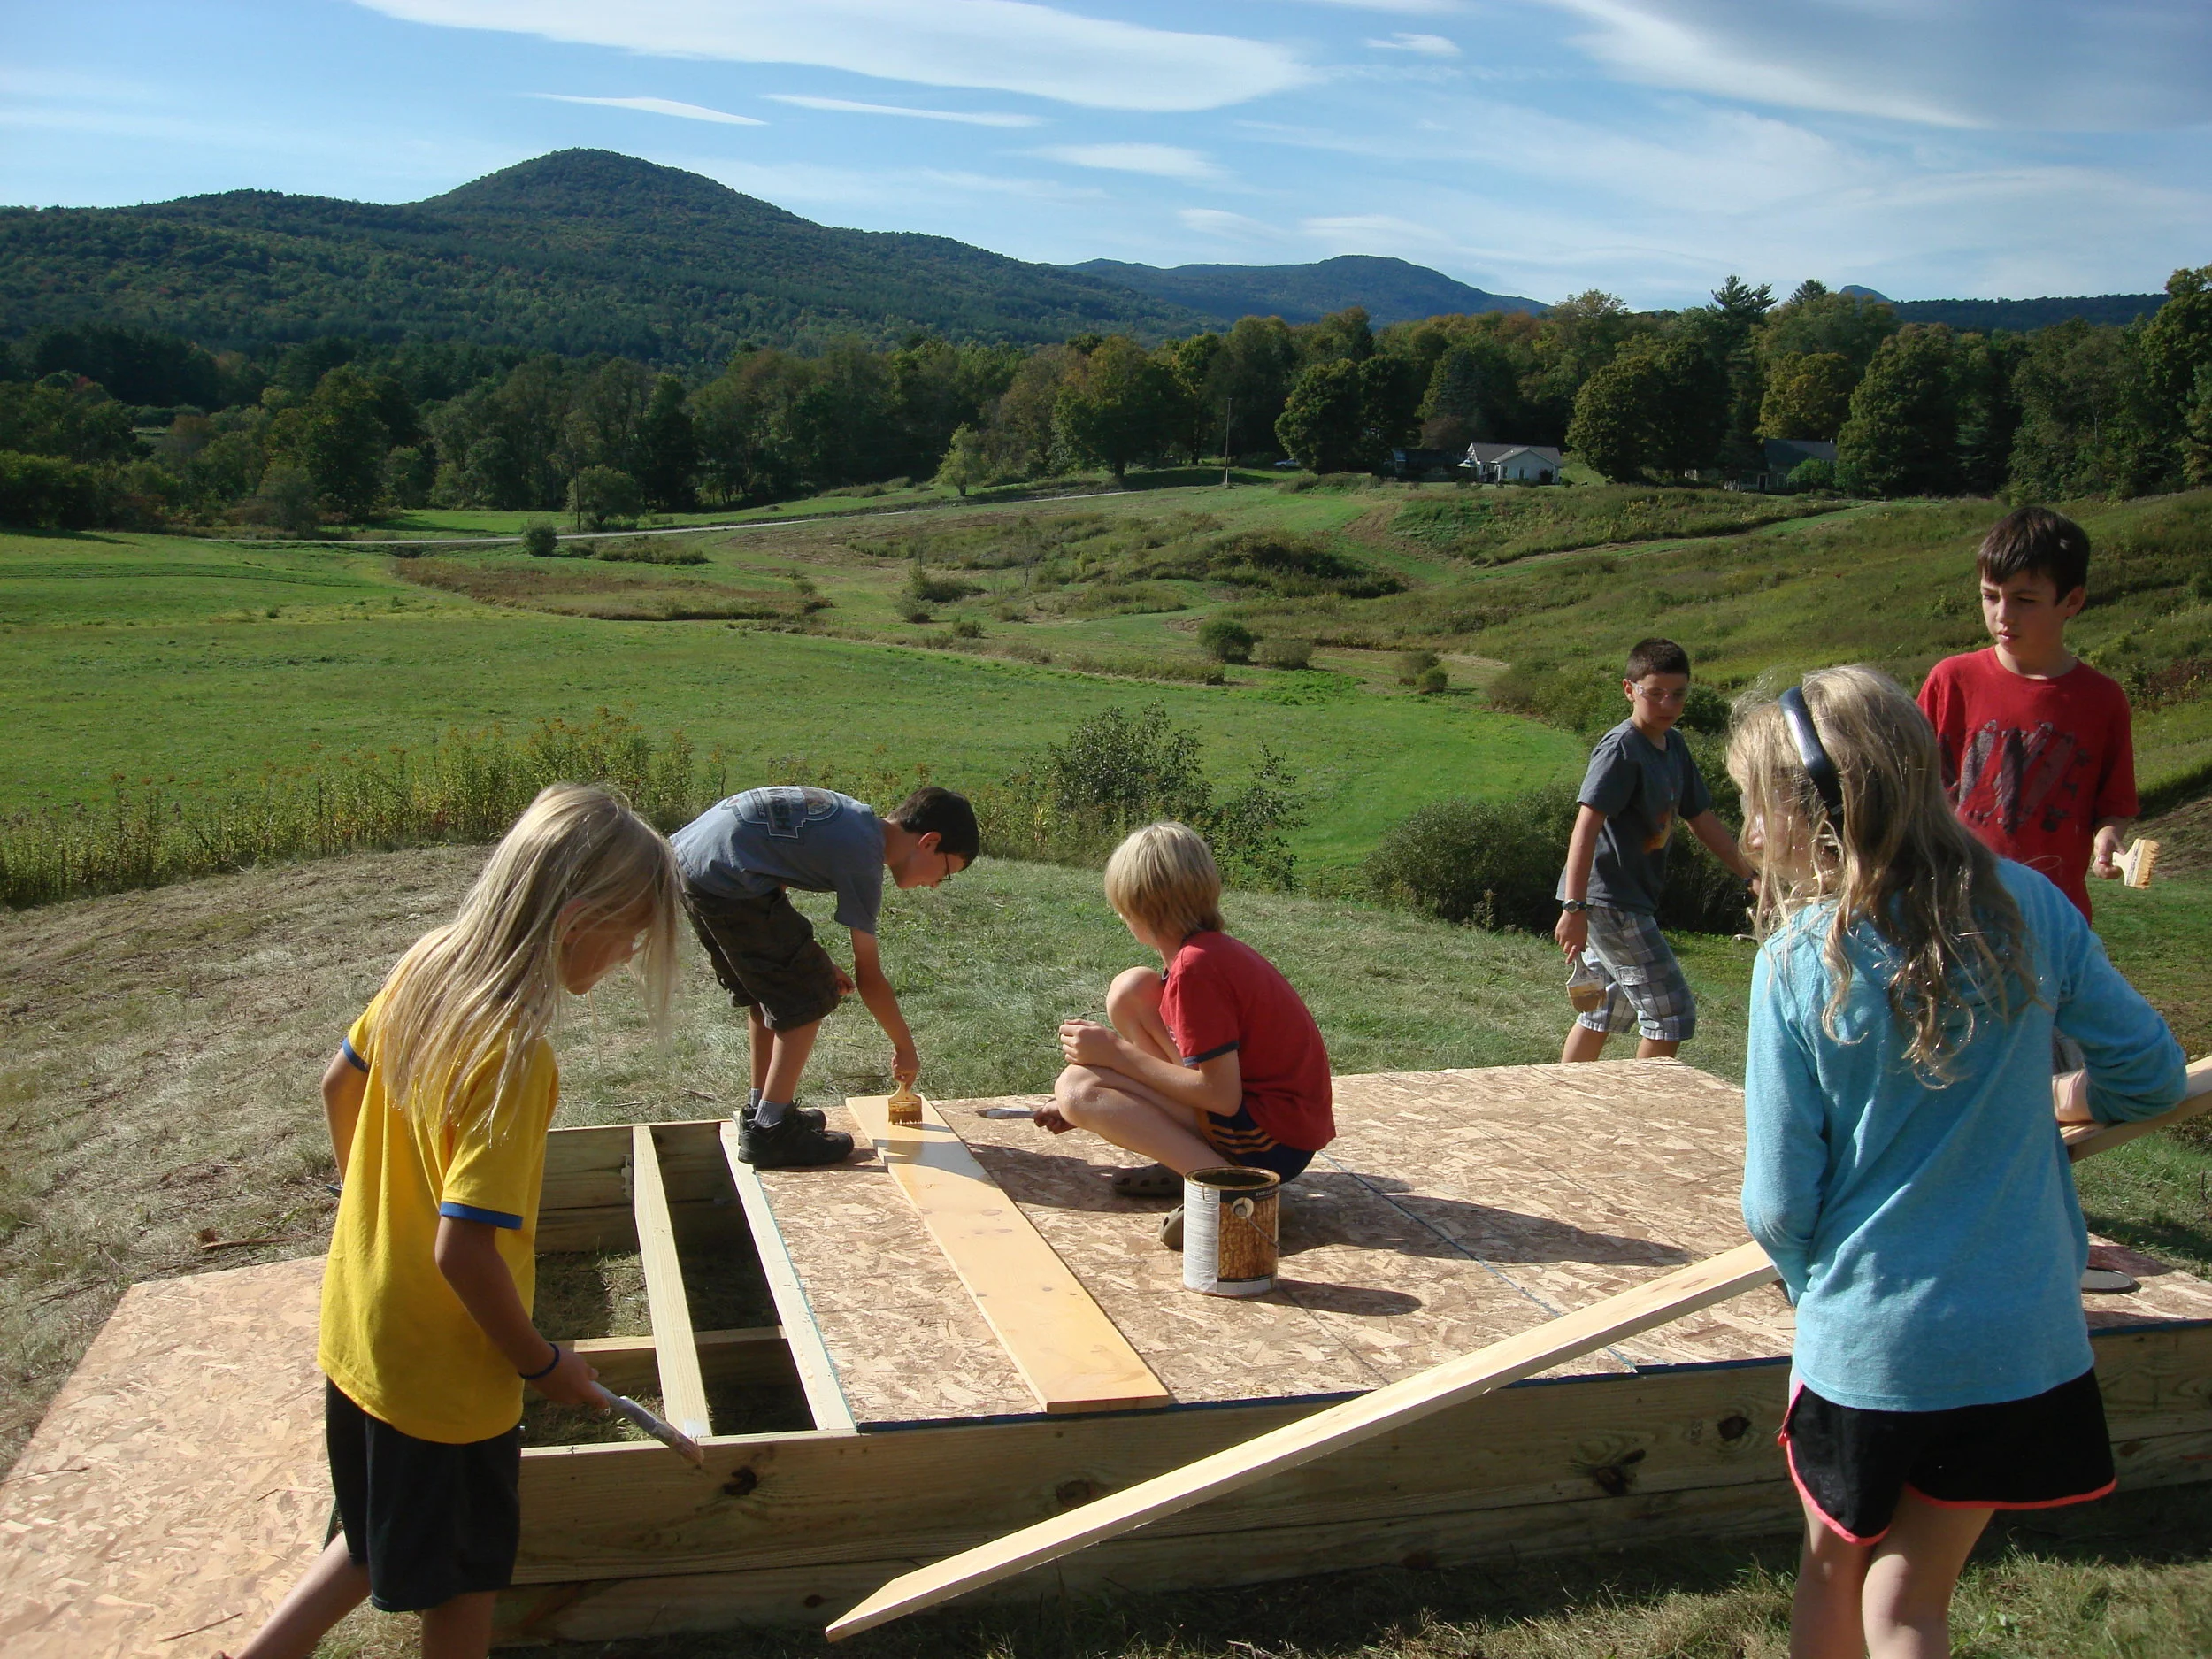
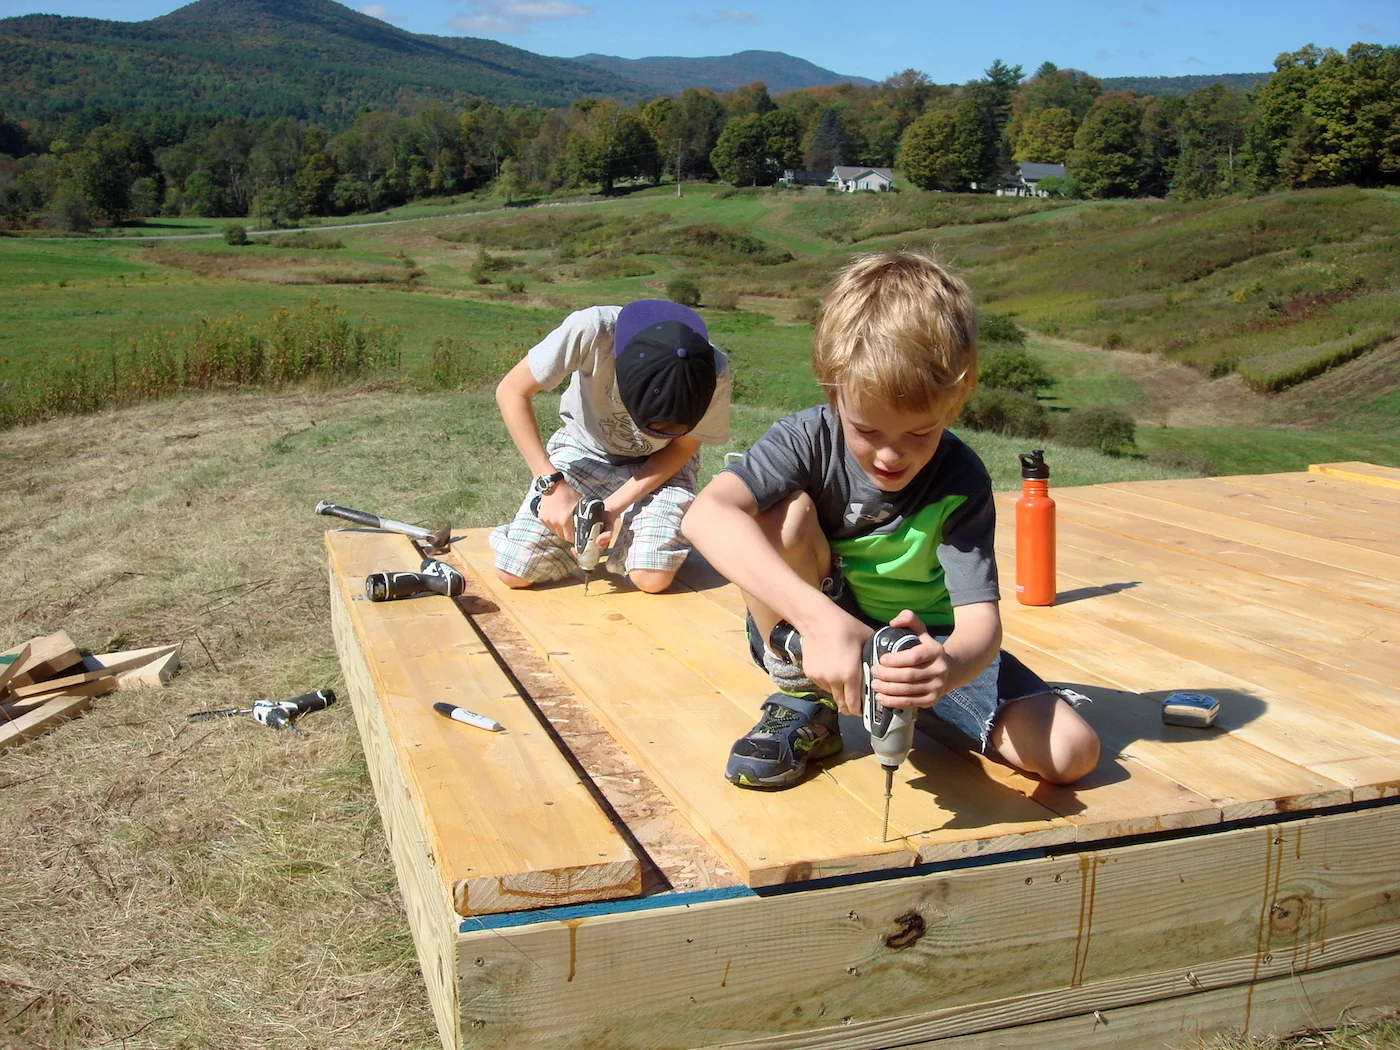
Session 1: Framing Platform
September 15, 2016
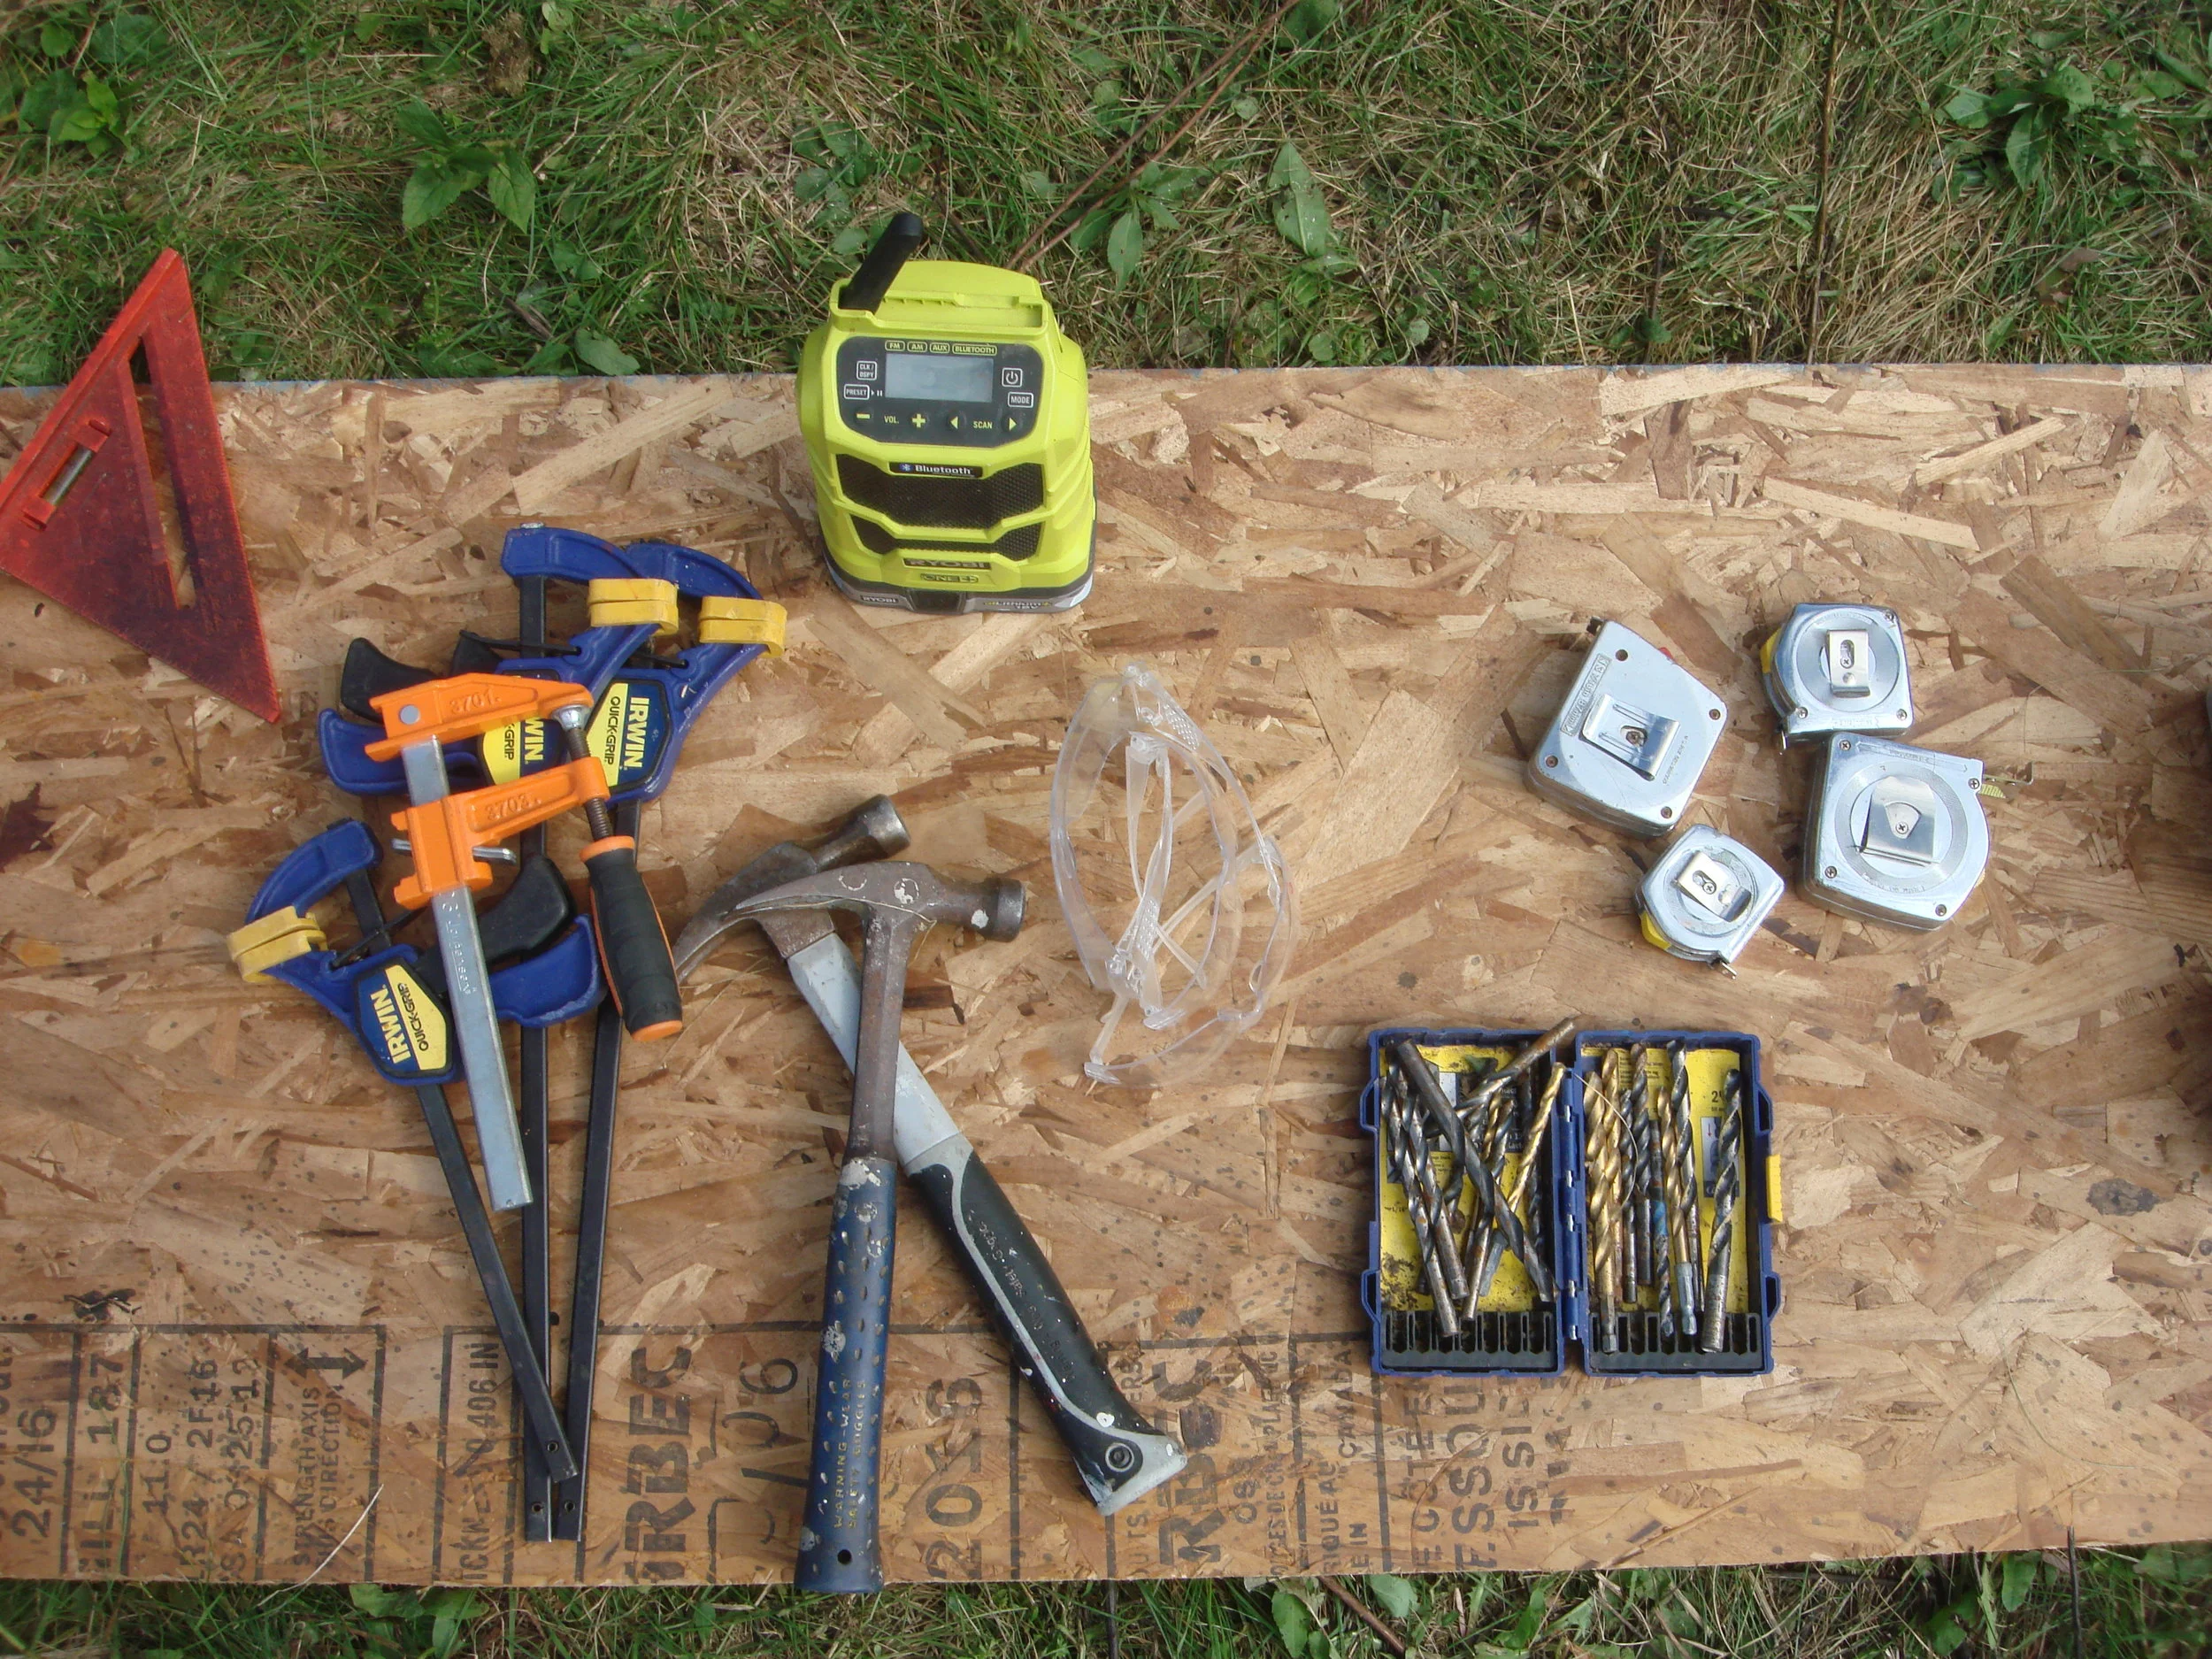
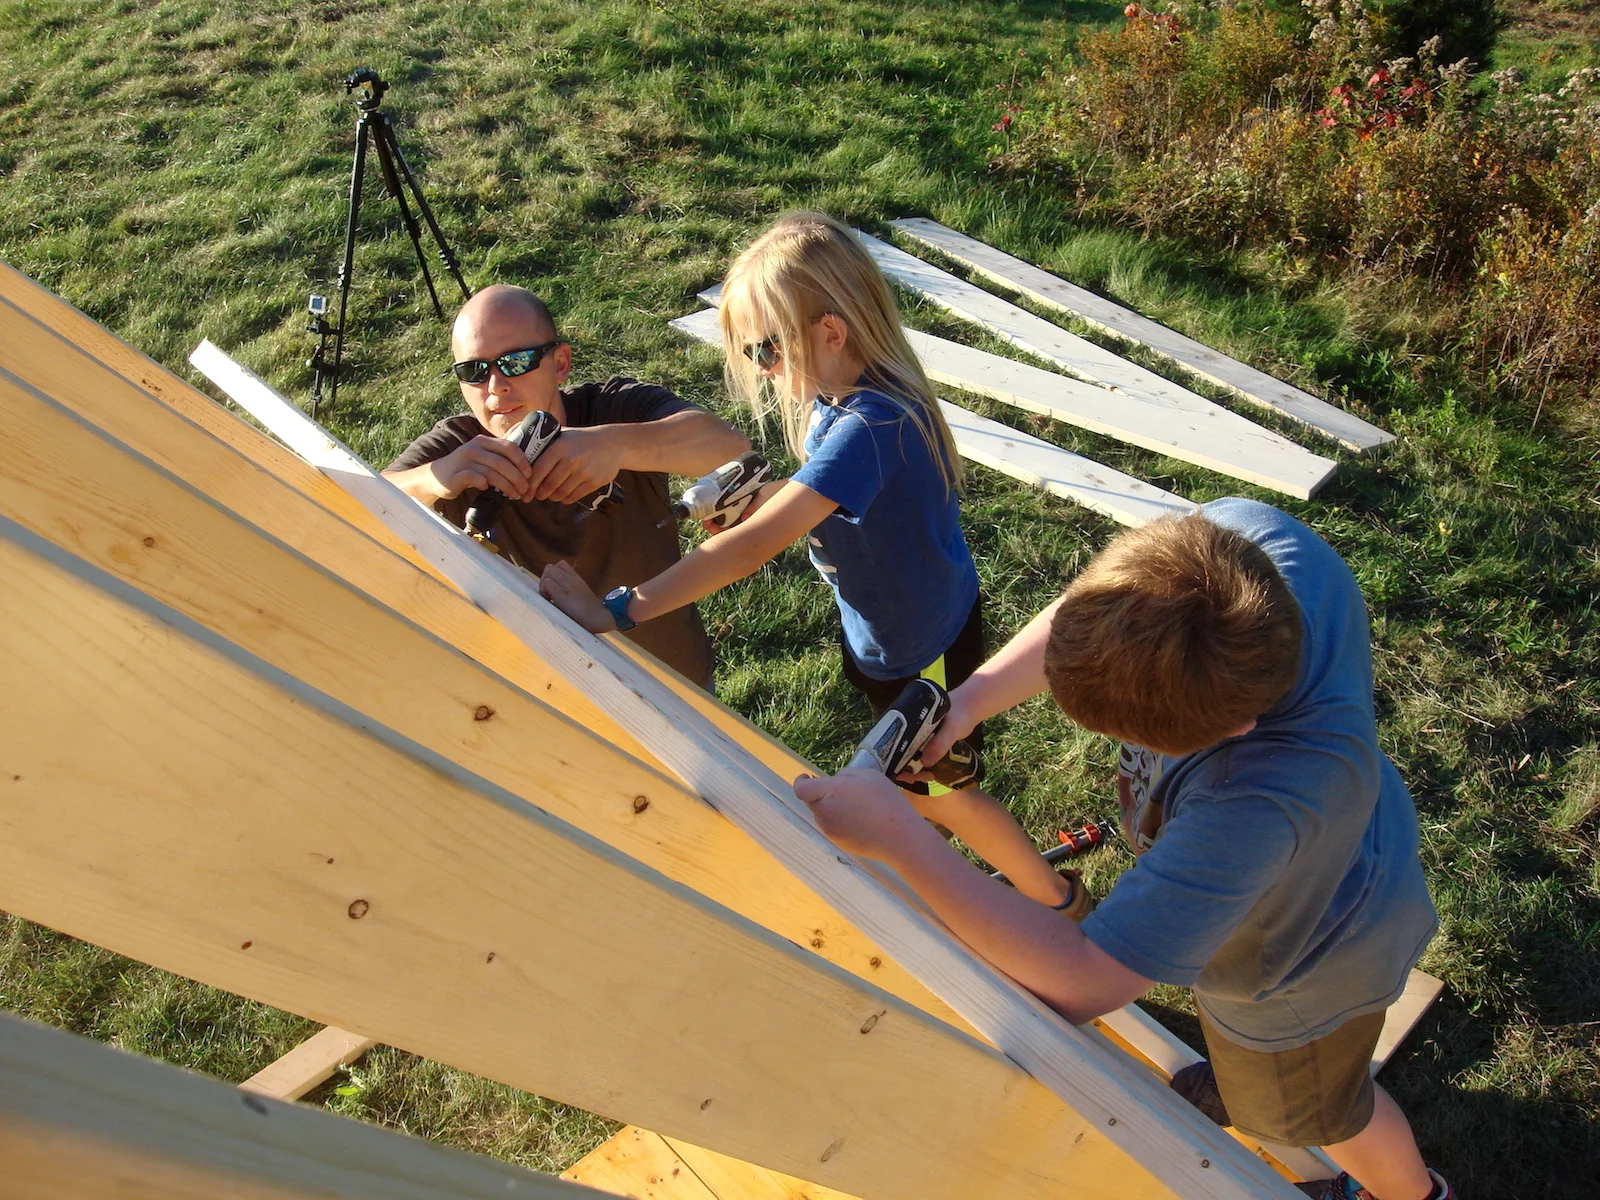
Our first afternoon at Pony Farm consisted of a tool safety training and an overview of the project and materials. After a demonstration on how to frame a deck the group picked up their drills and began constructing the 8'x10' base for our structure. In 2 hours the group of kids assembled the frame and began laying the subflooring.

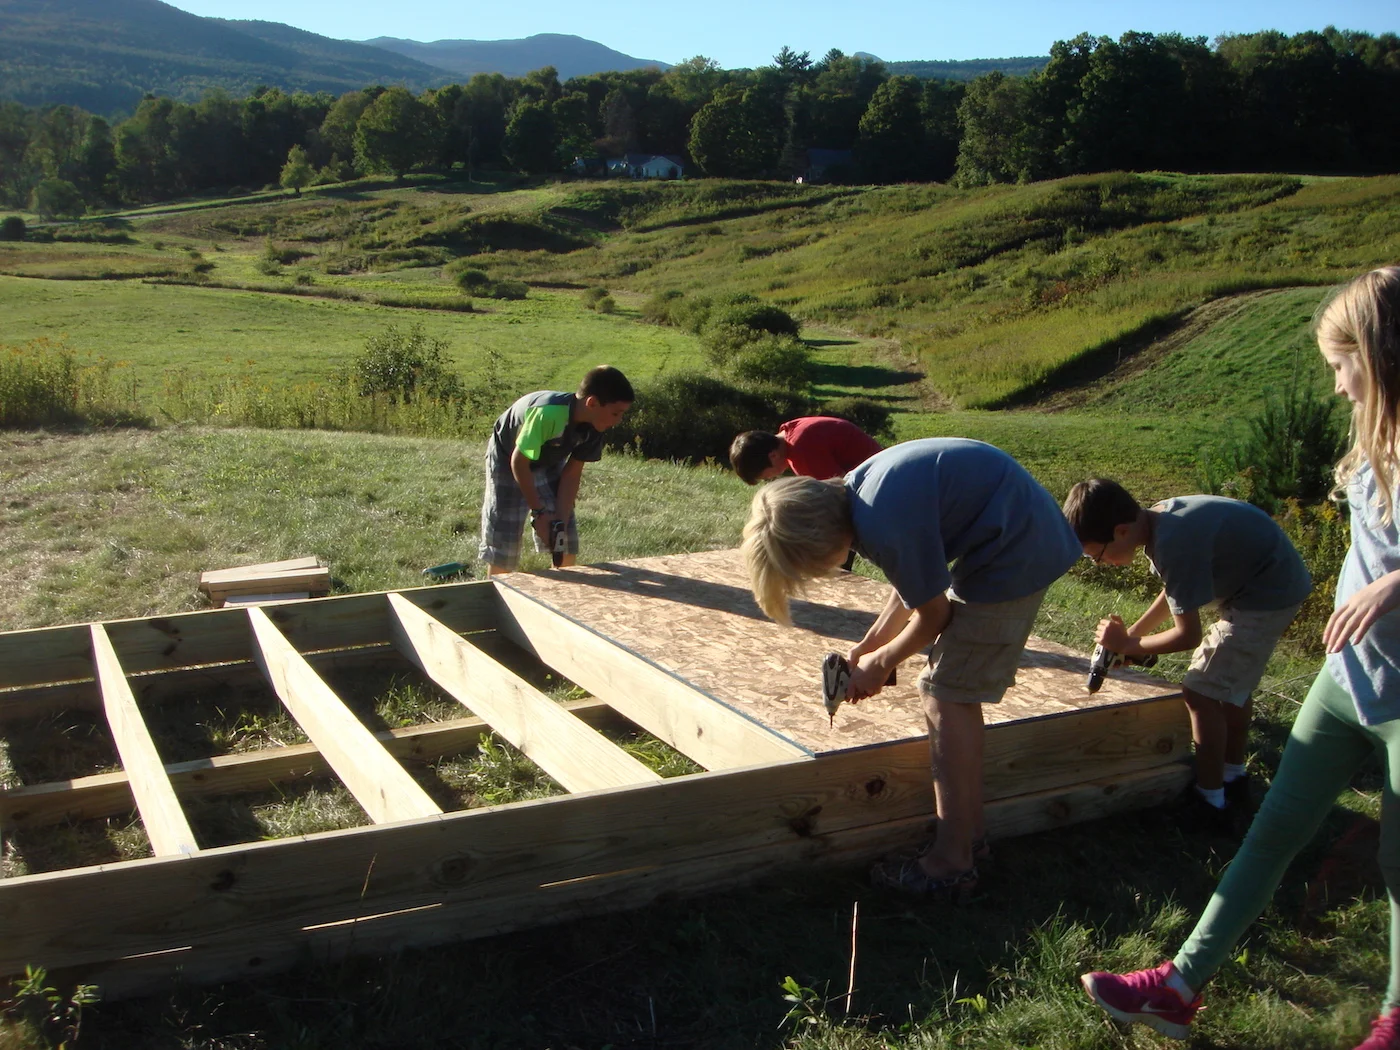
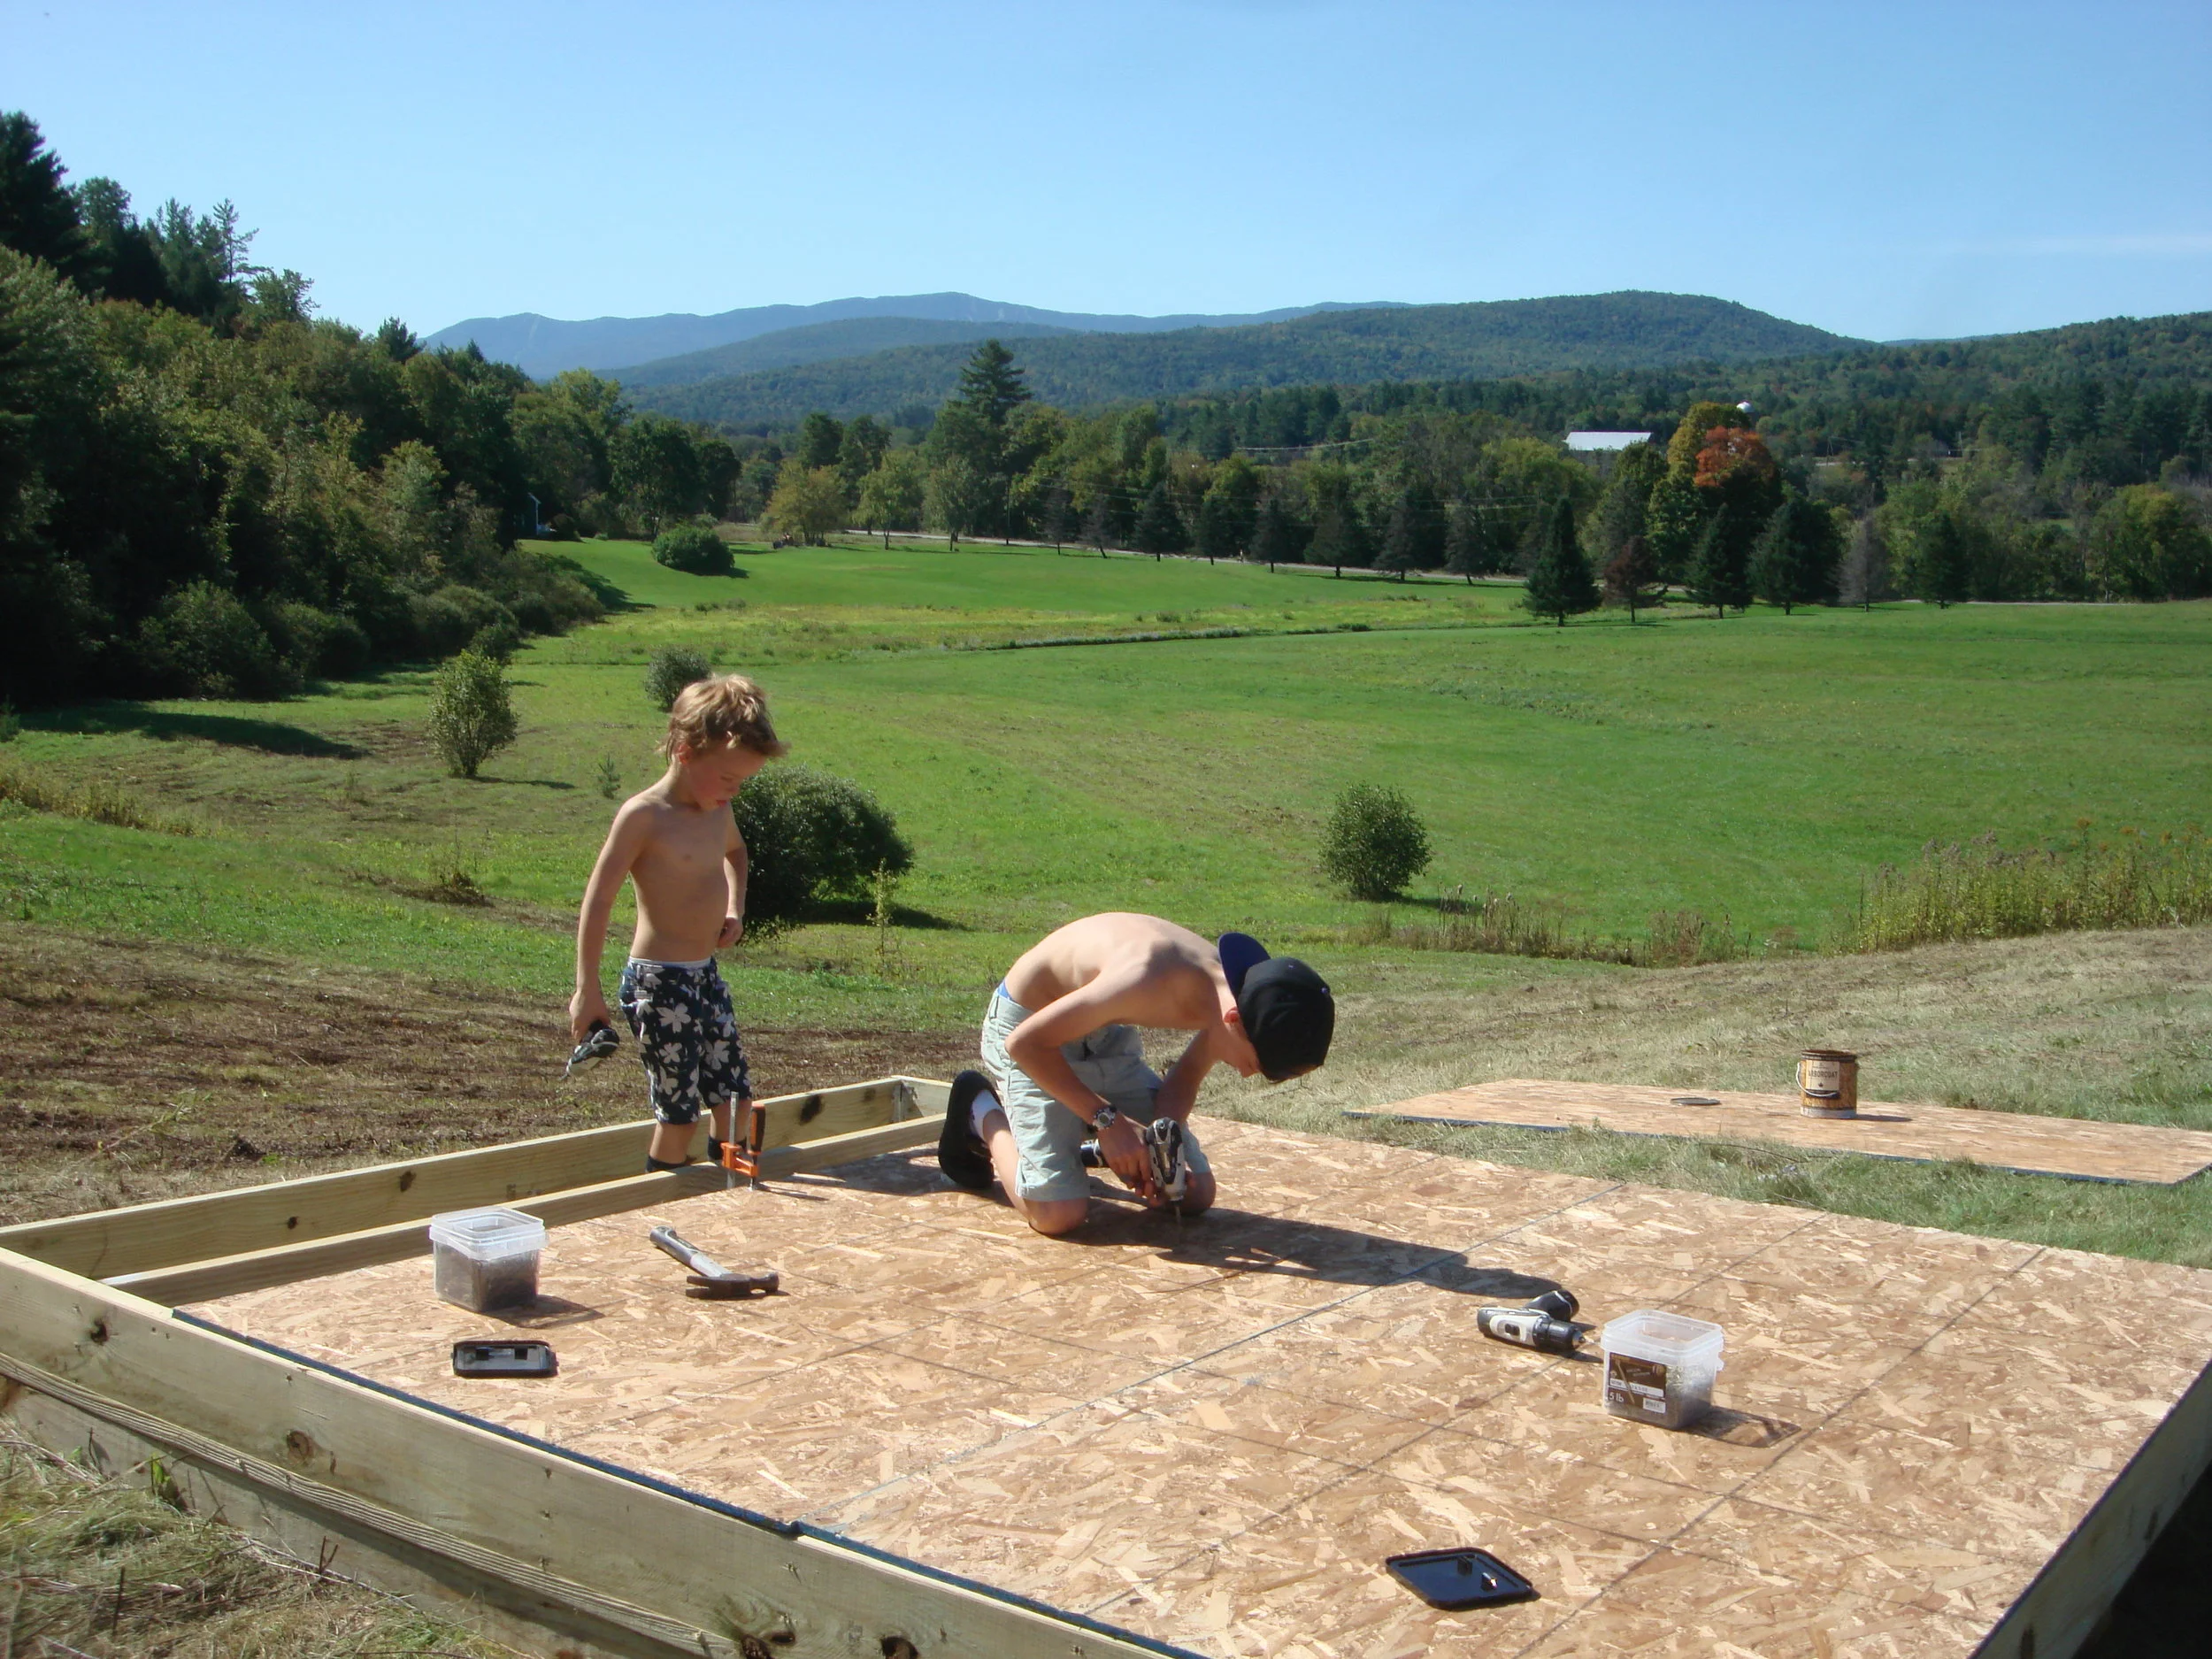
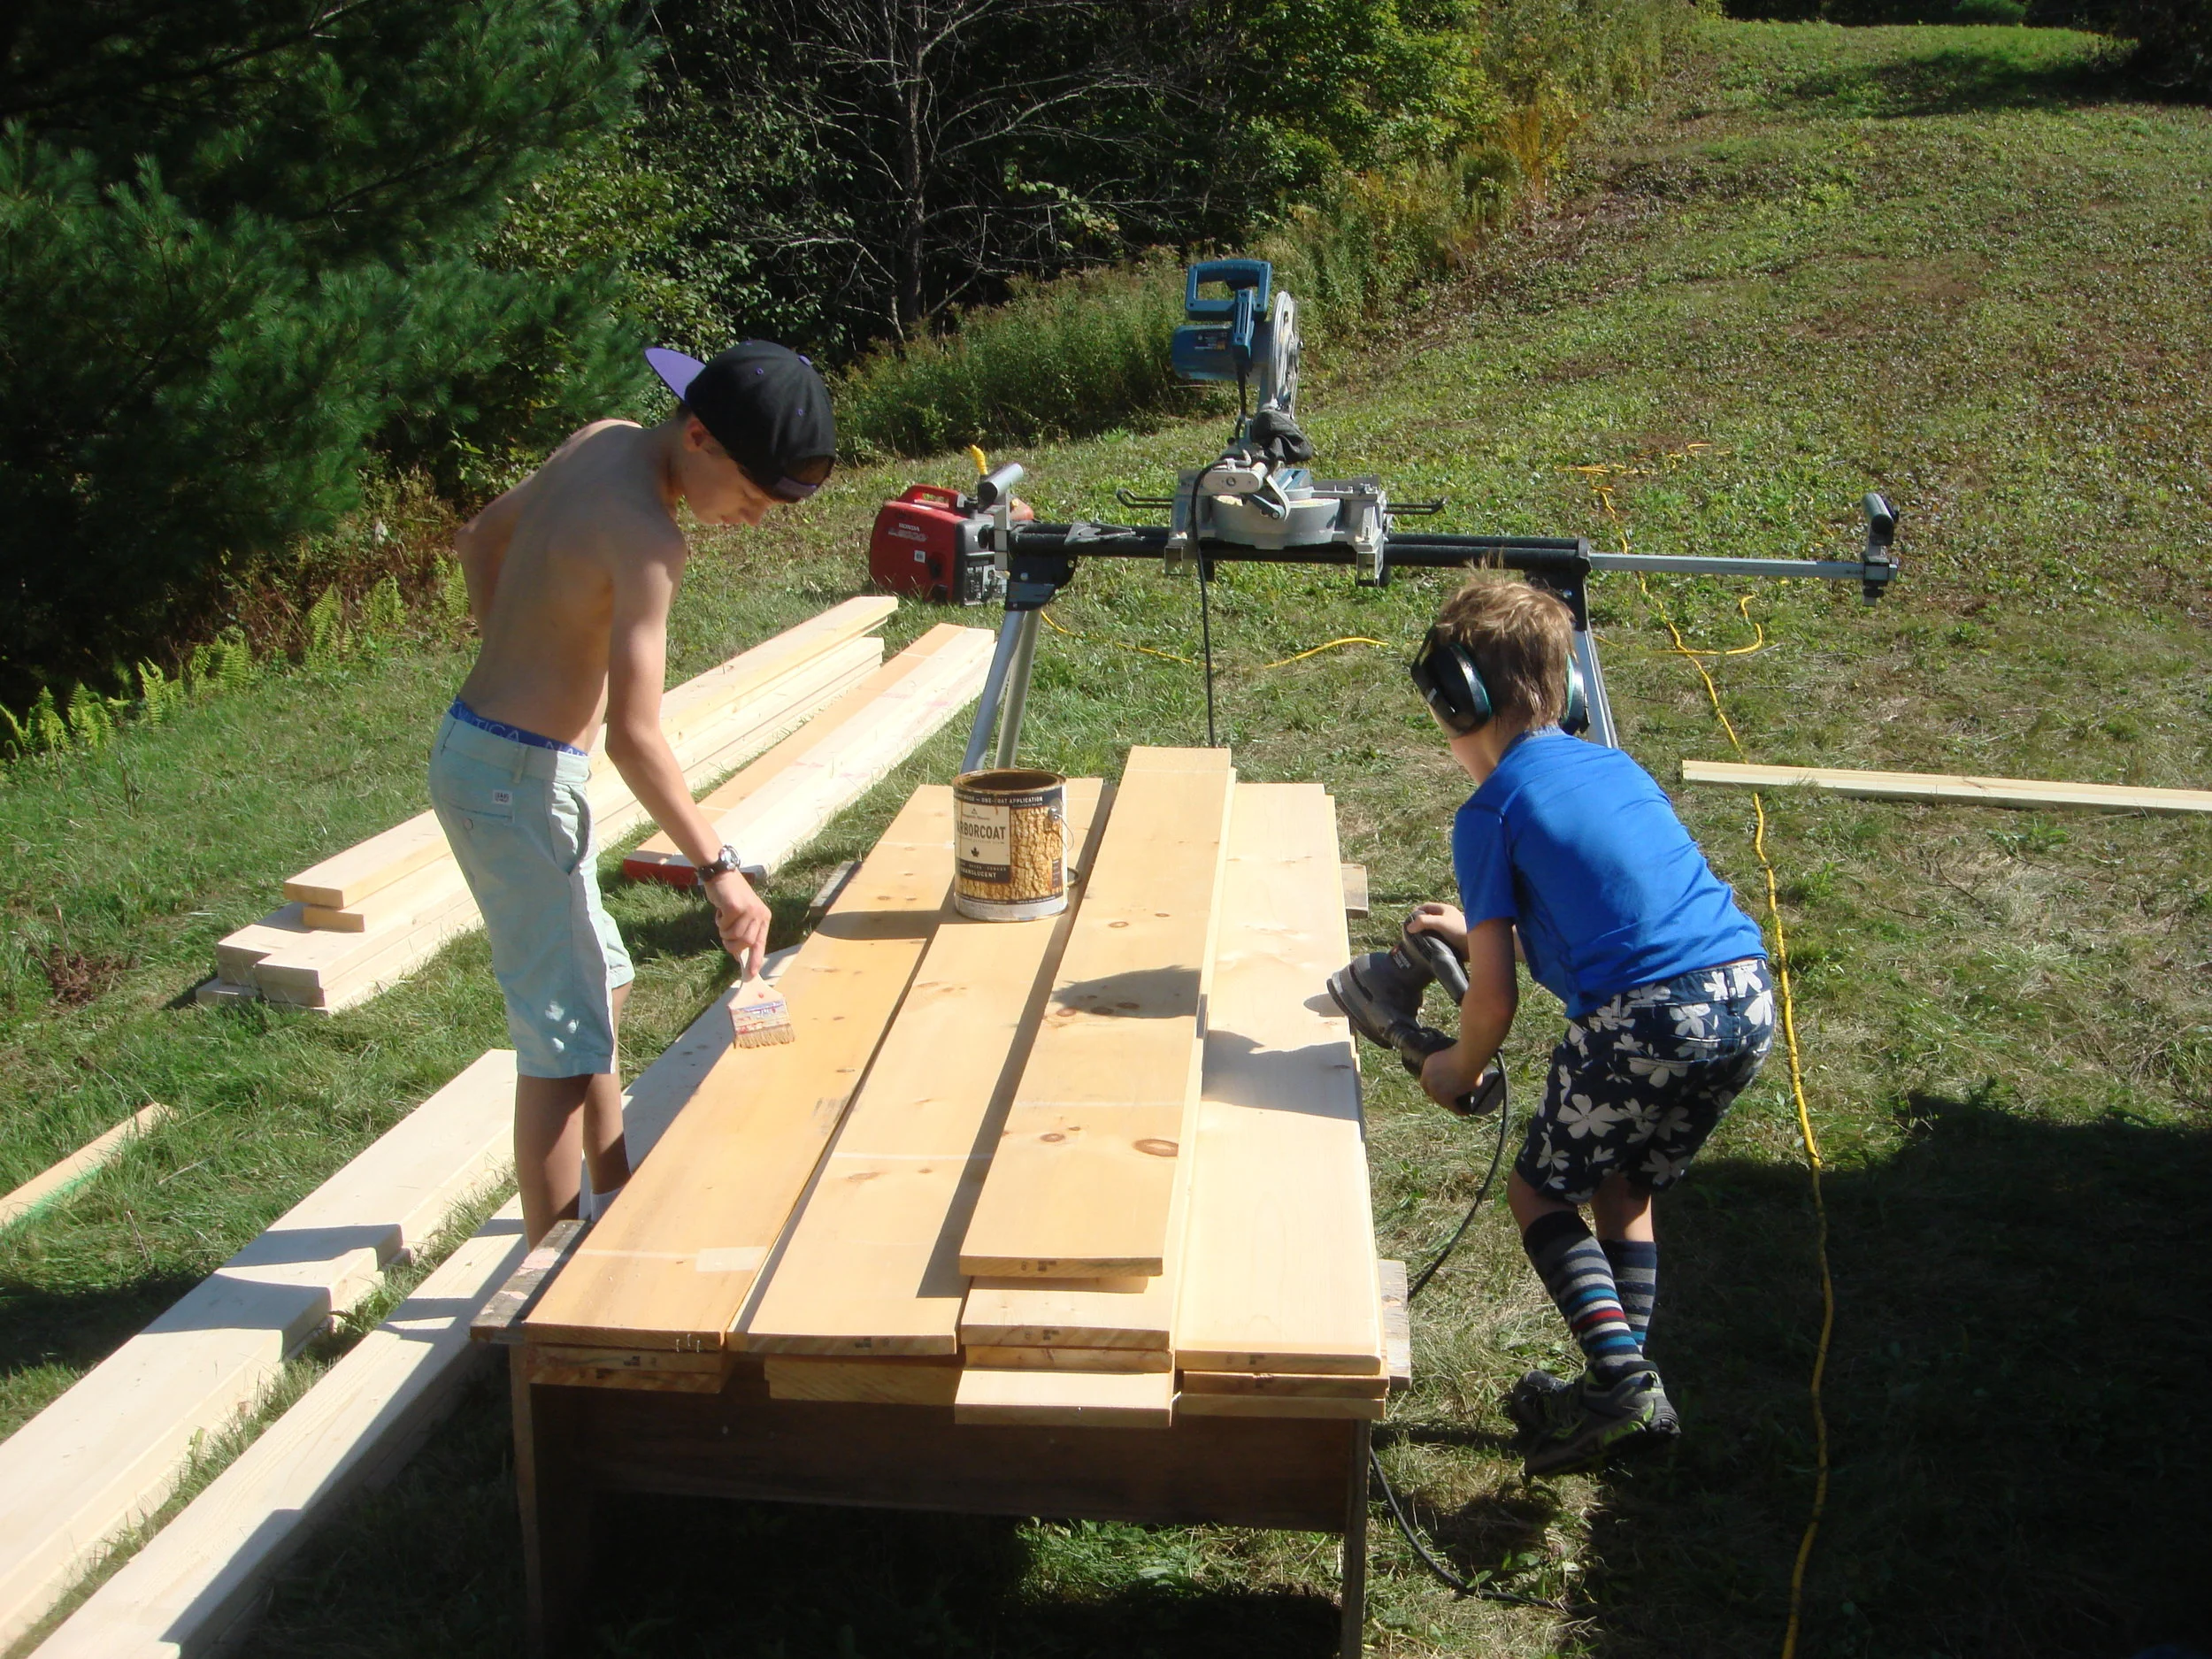
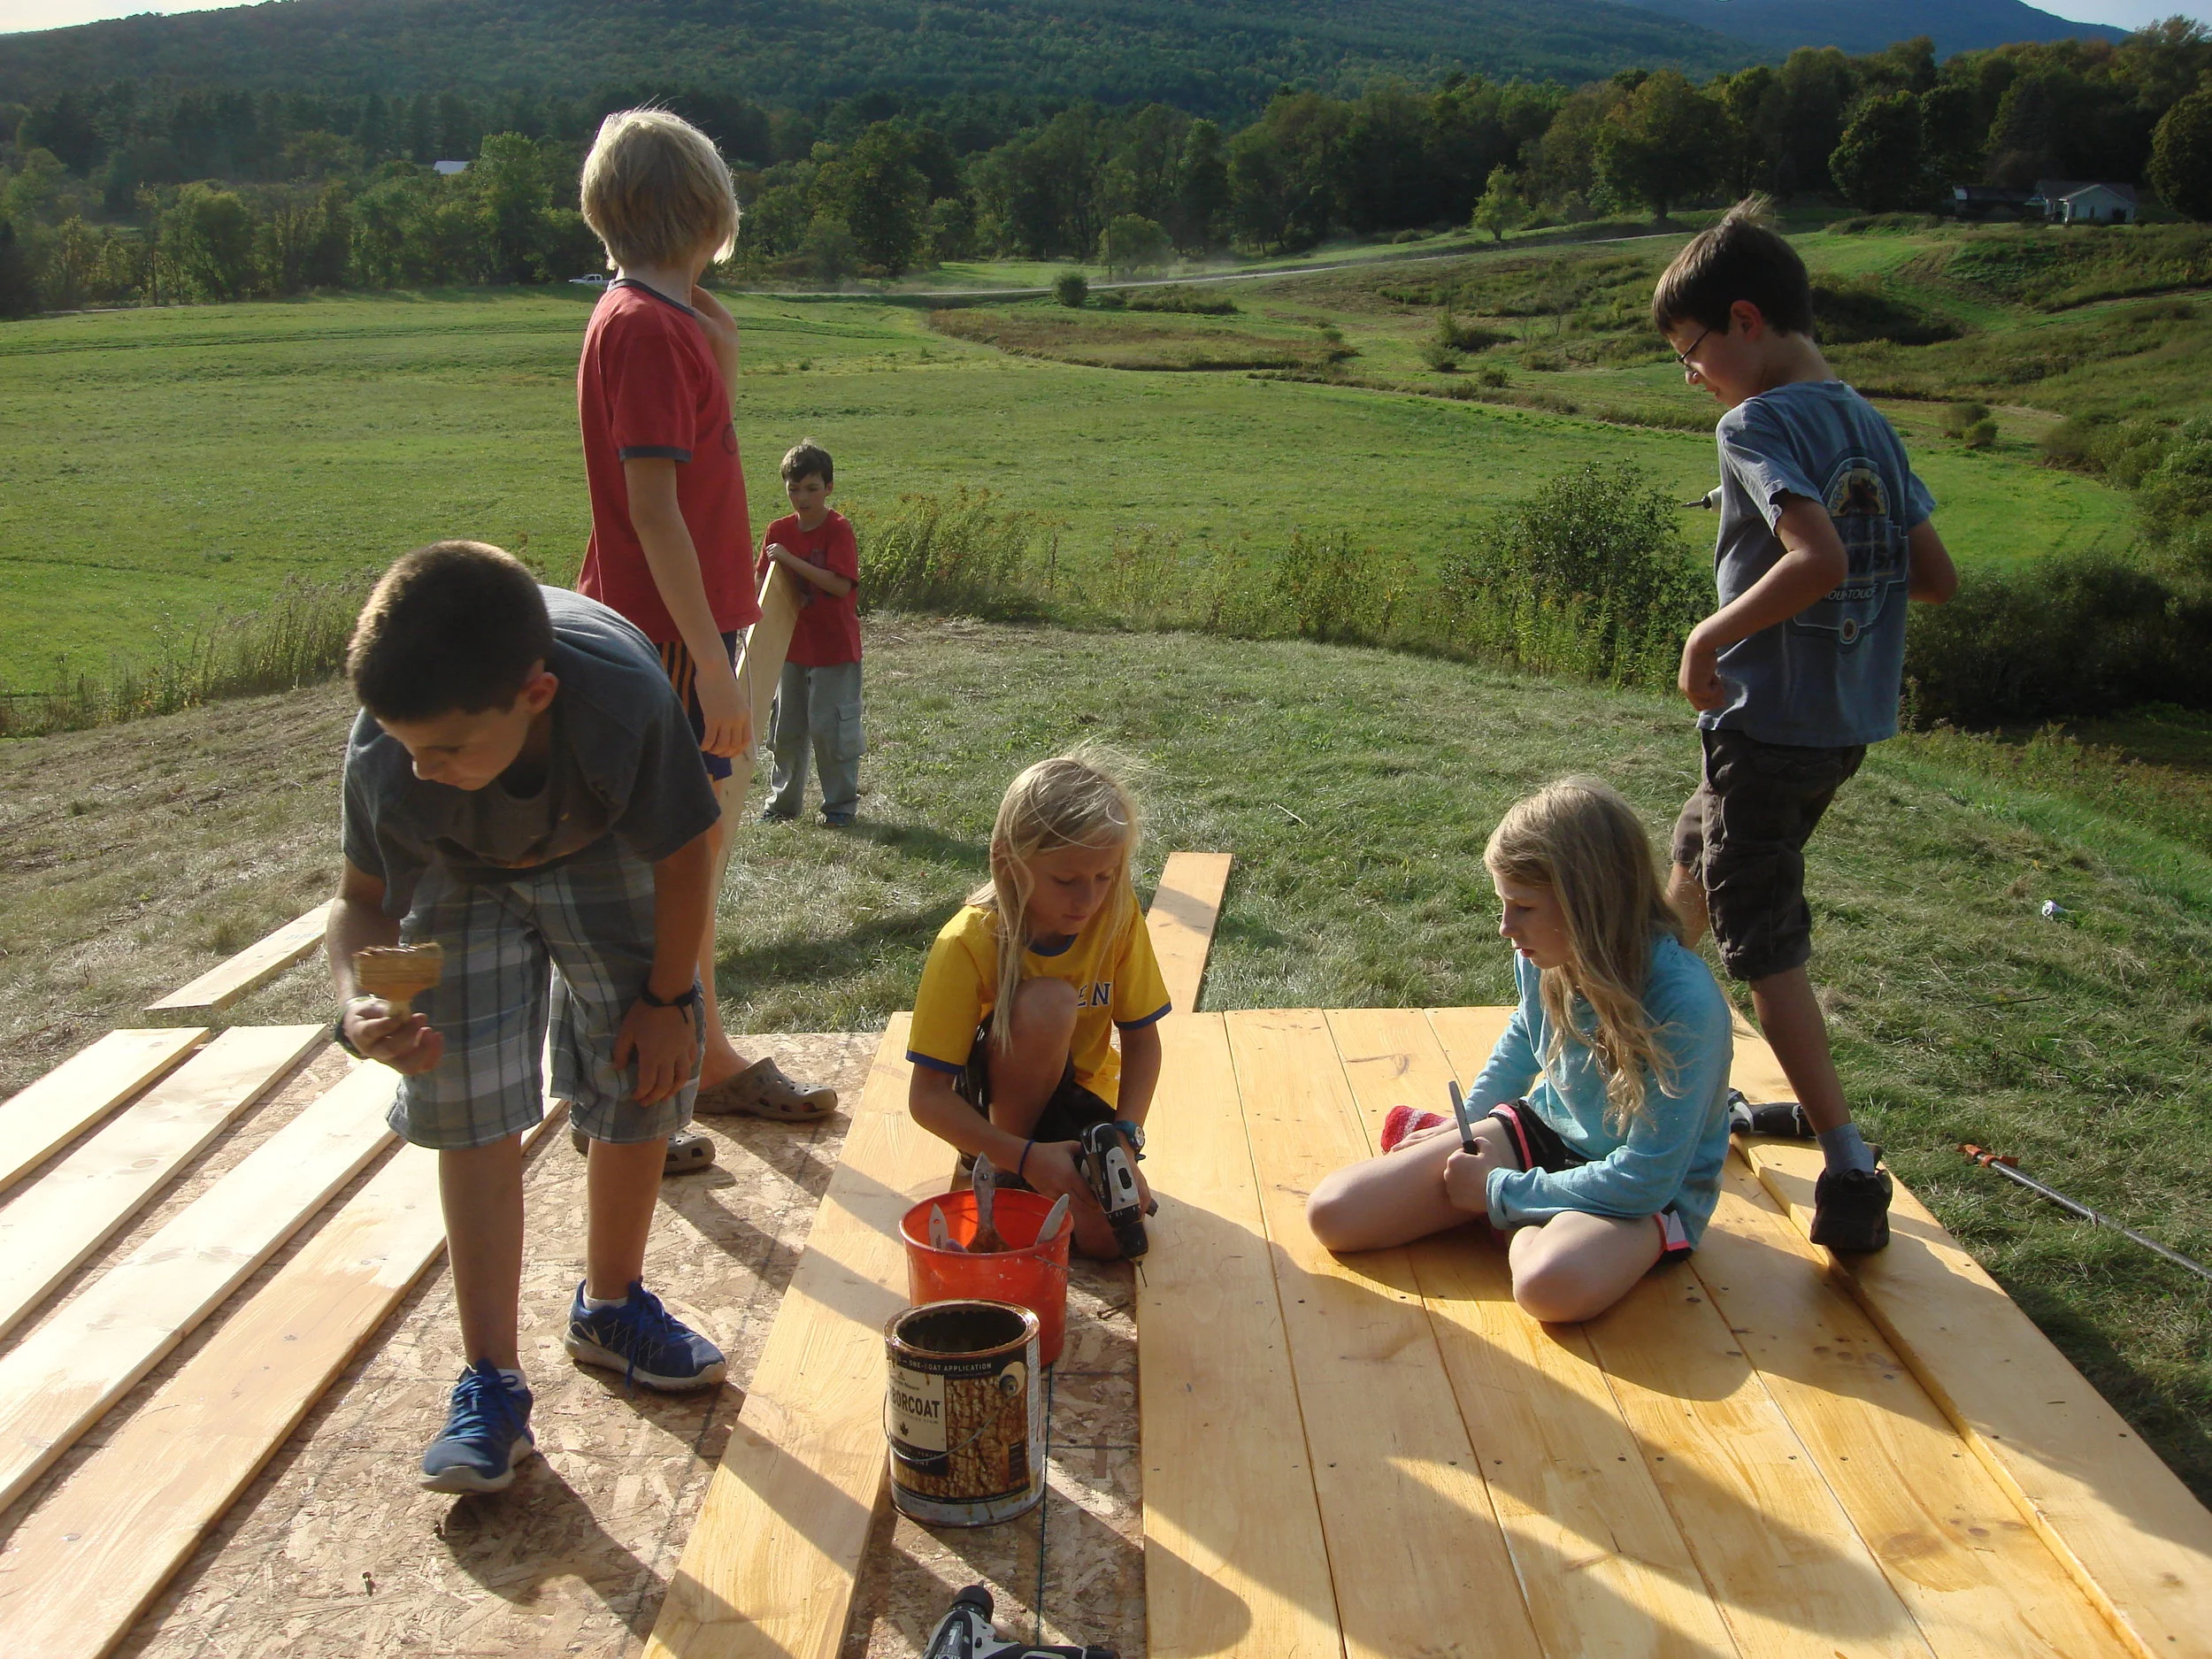
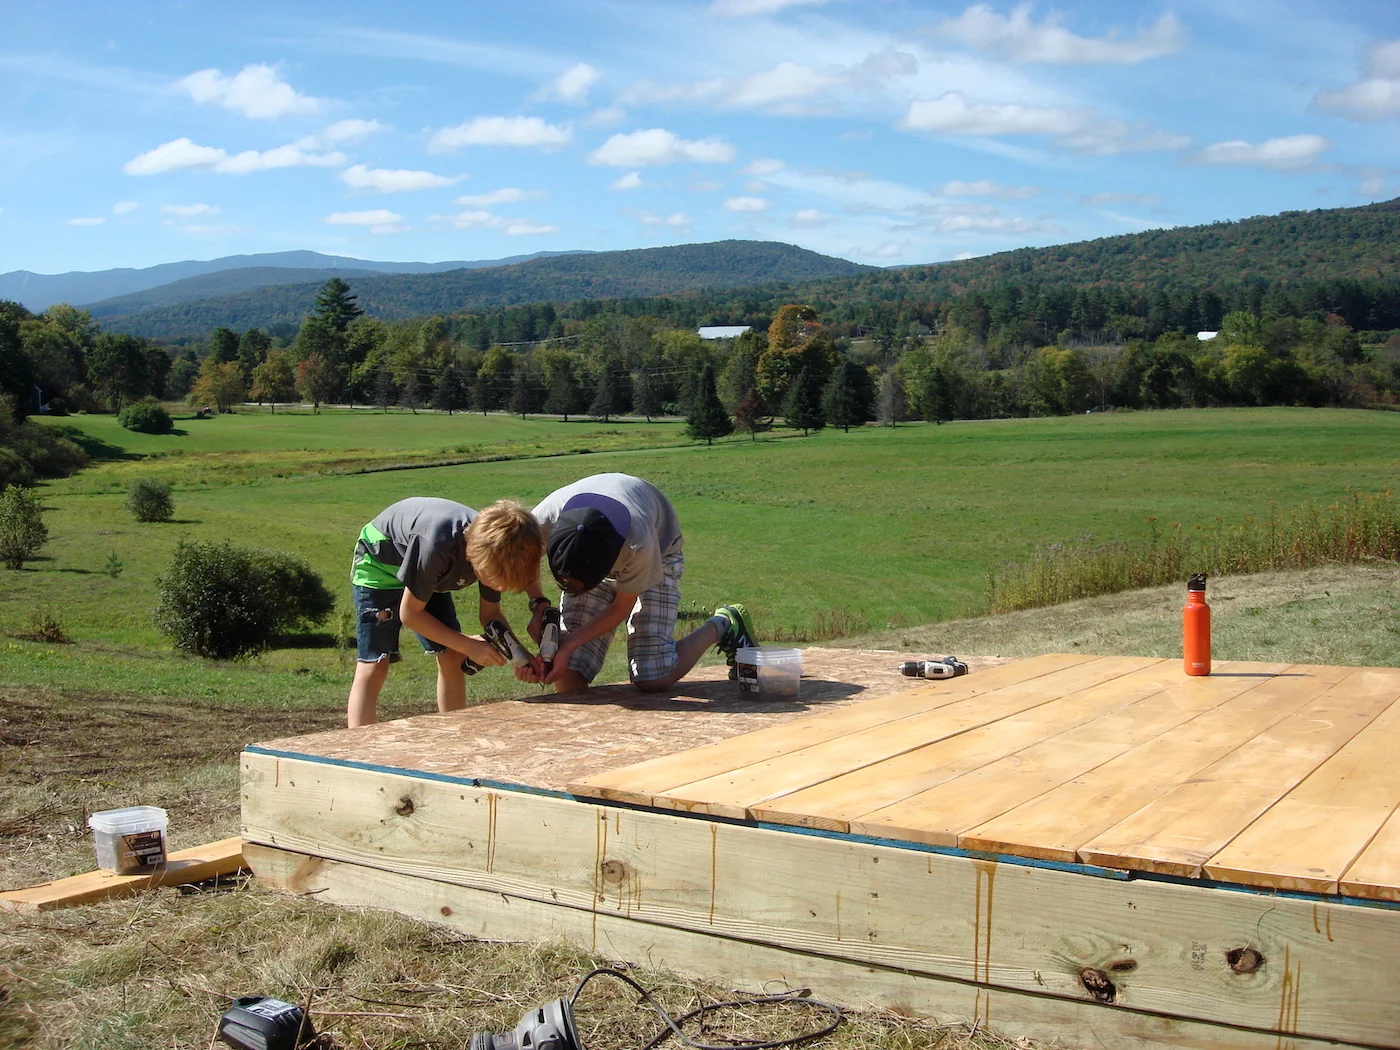
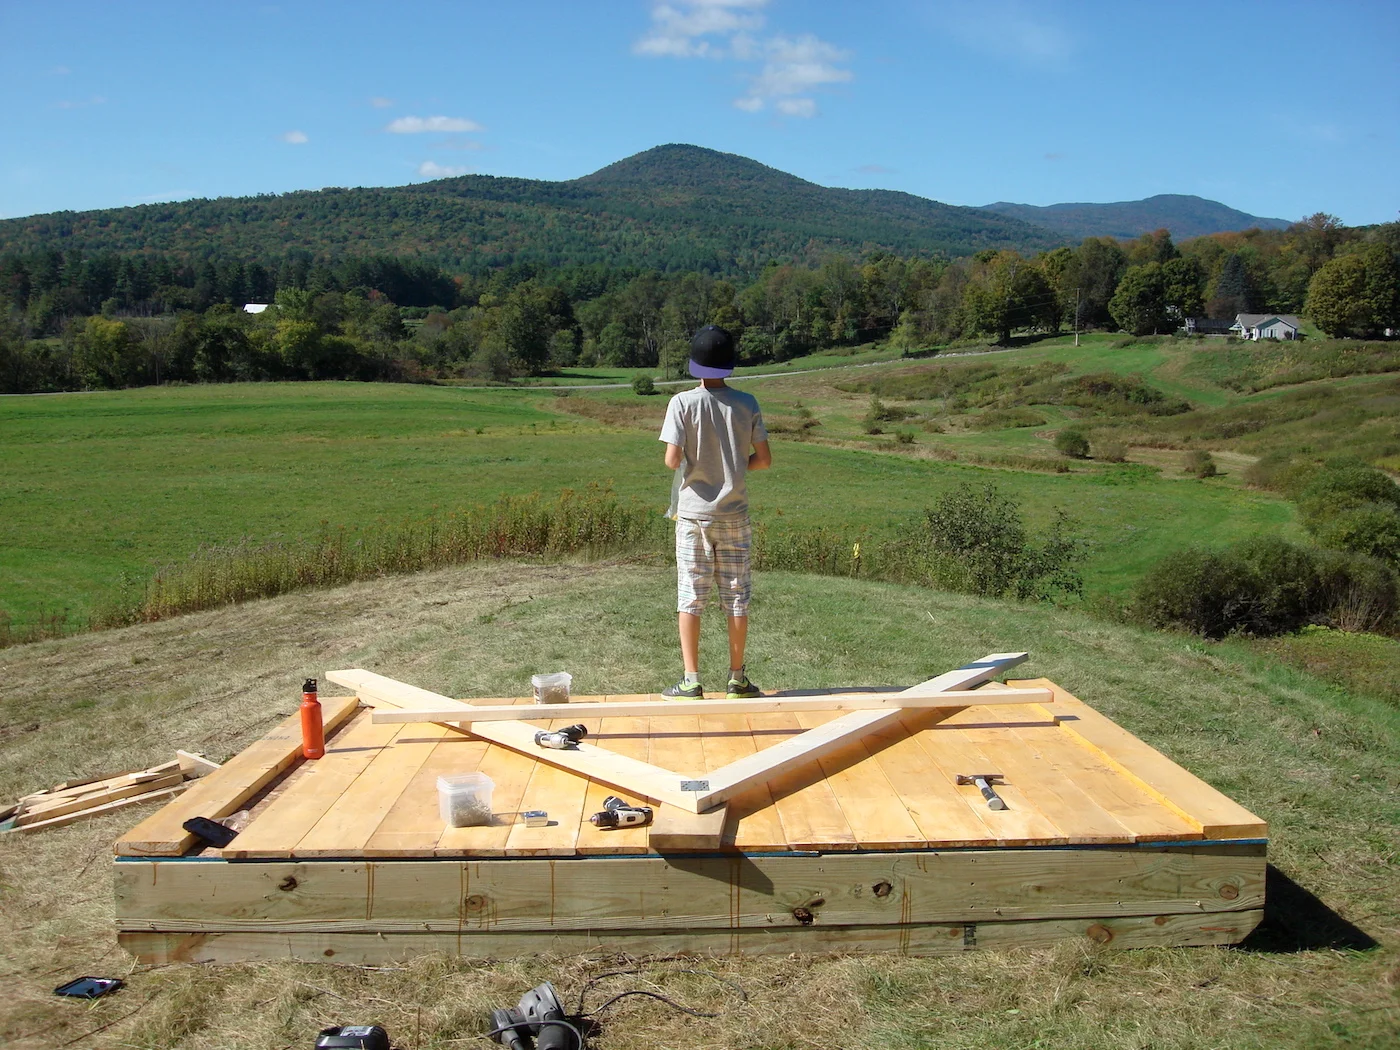
Session 2: Floorboards
September 22, 2016
Throughout the second build day the group alternated between tasks to complete the installation of the floorboards. Tasks included laying the sub-flooring, beveling the edges of the floorboards, staining the floorboards, and screwing the floorboards onto the deck.


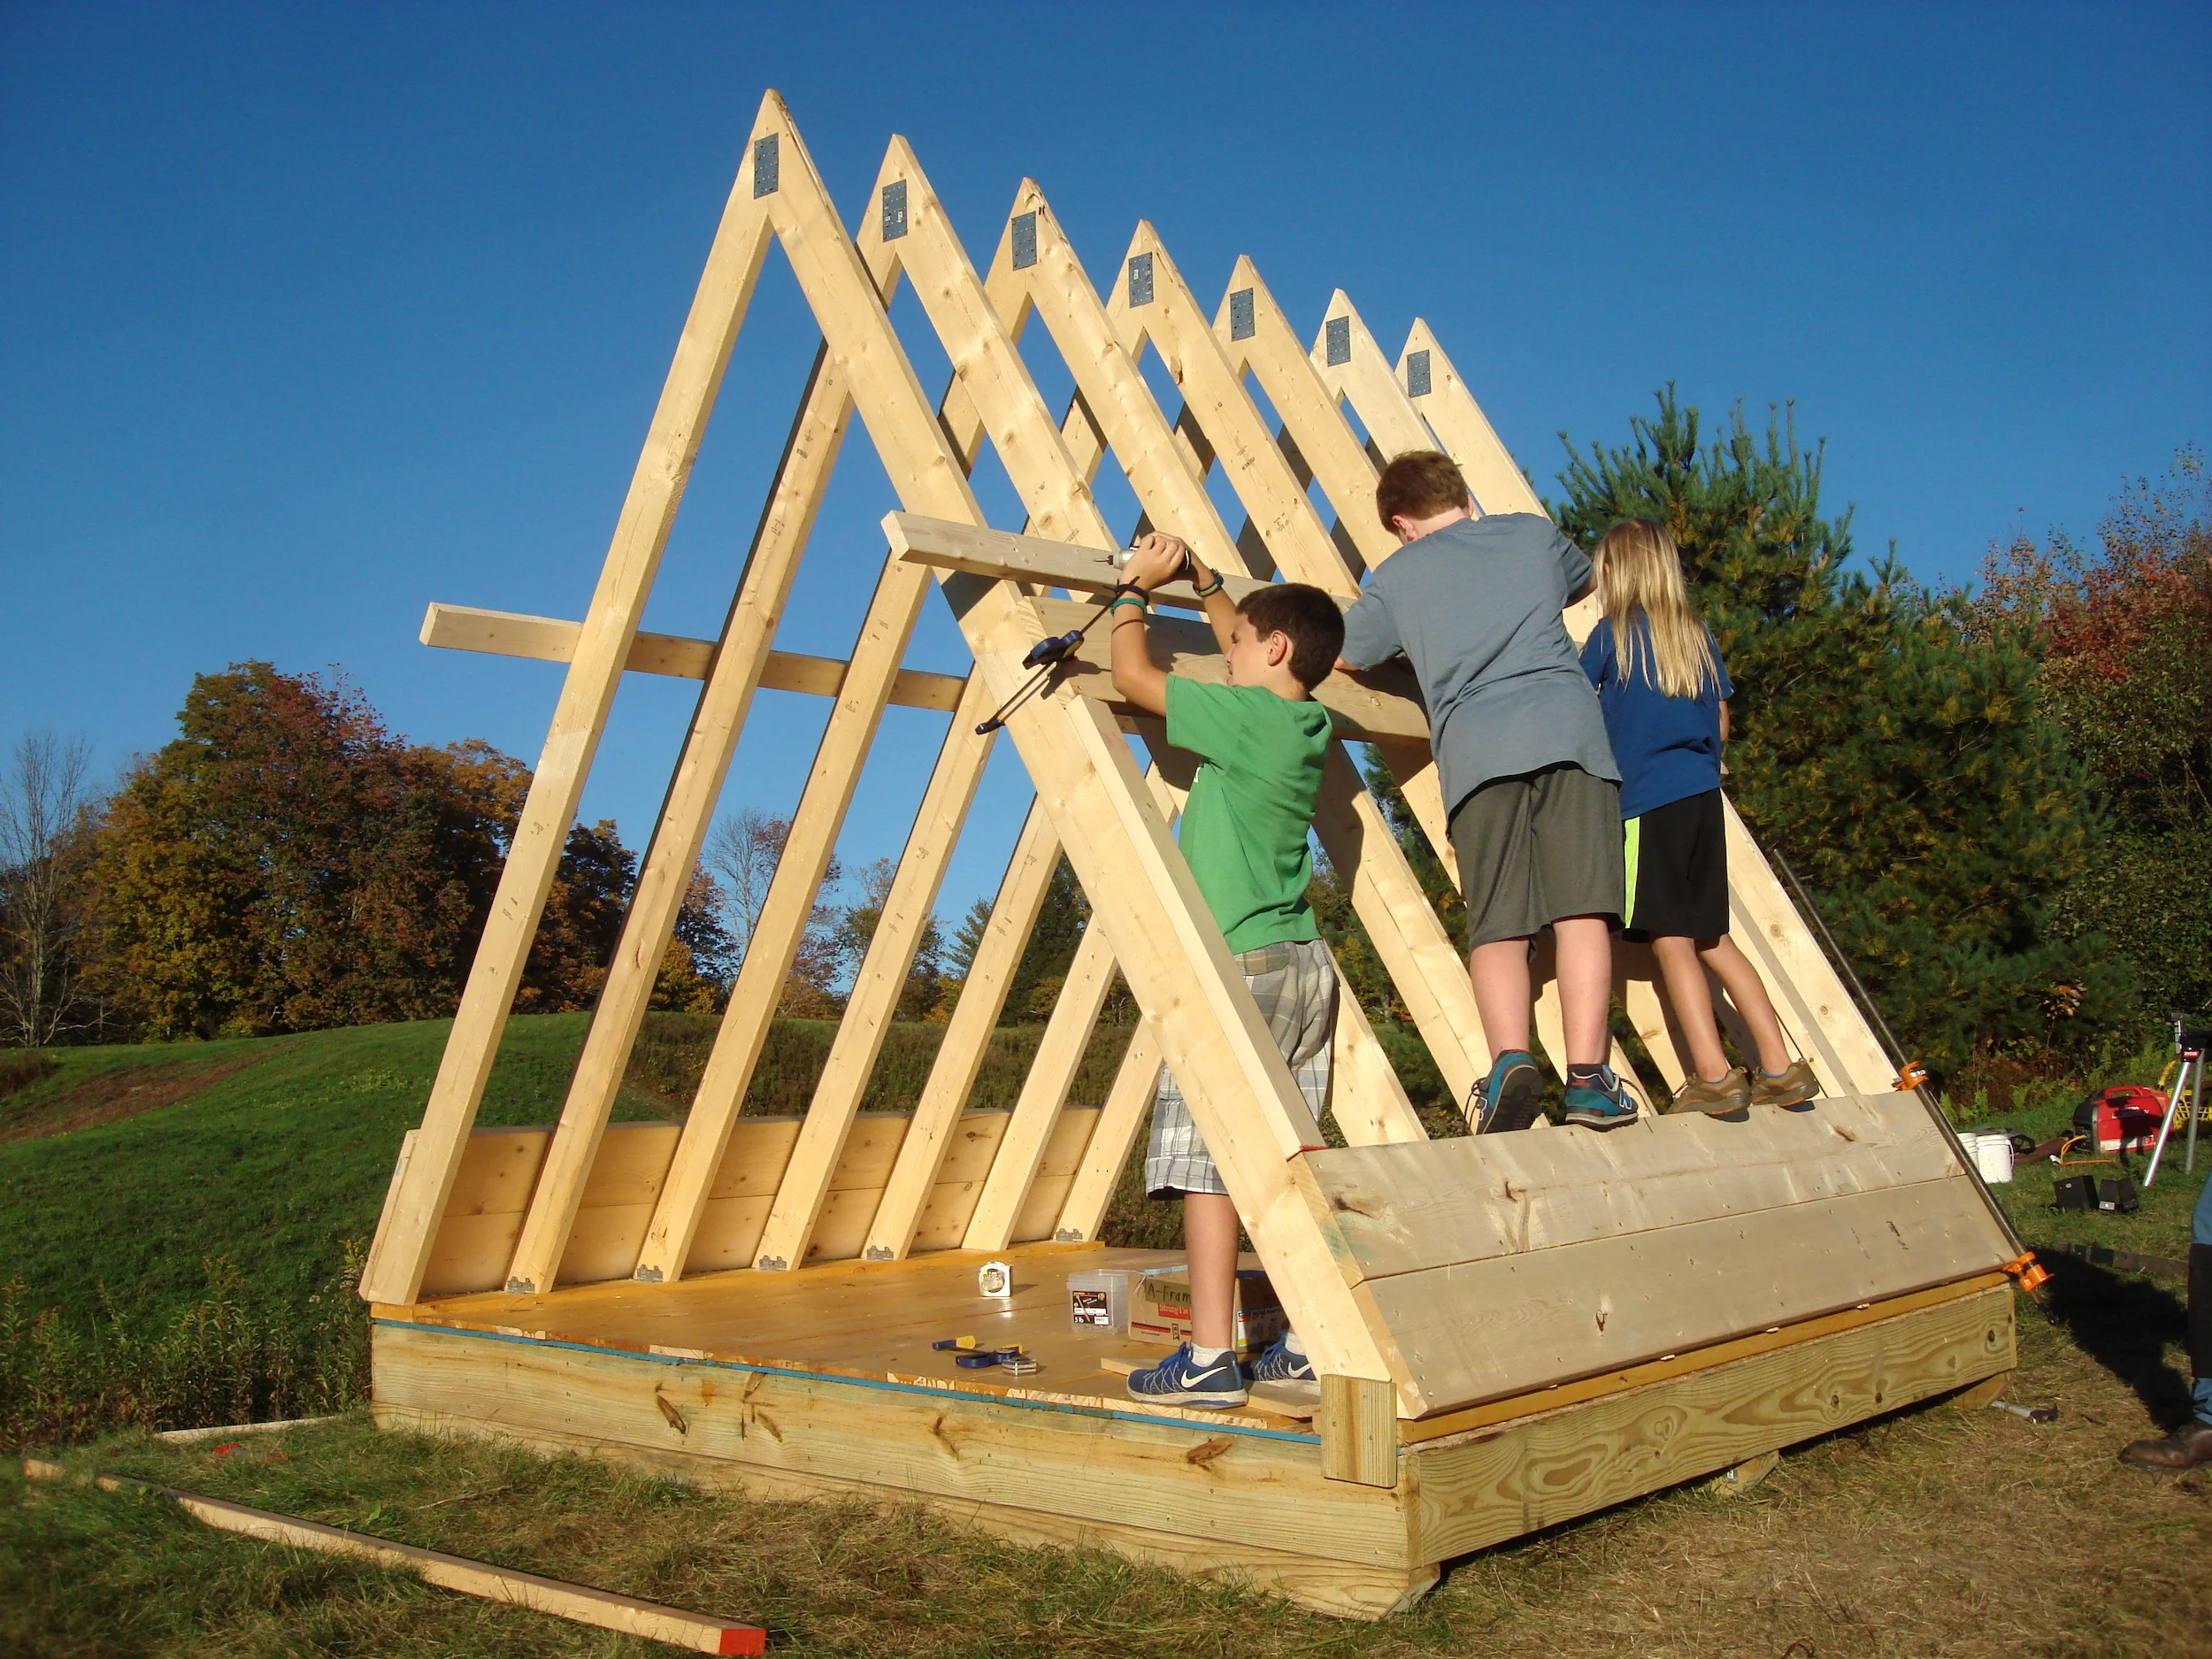
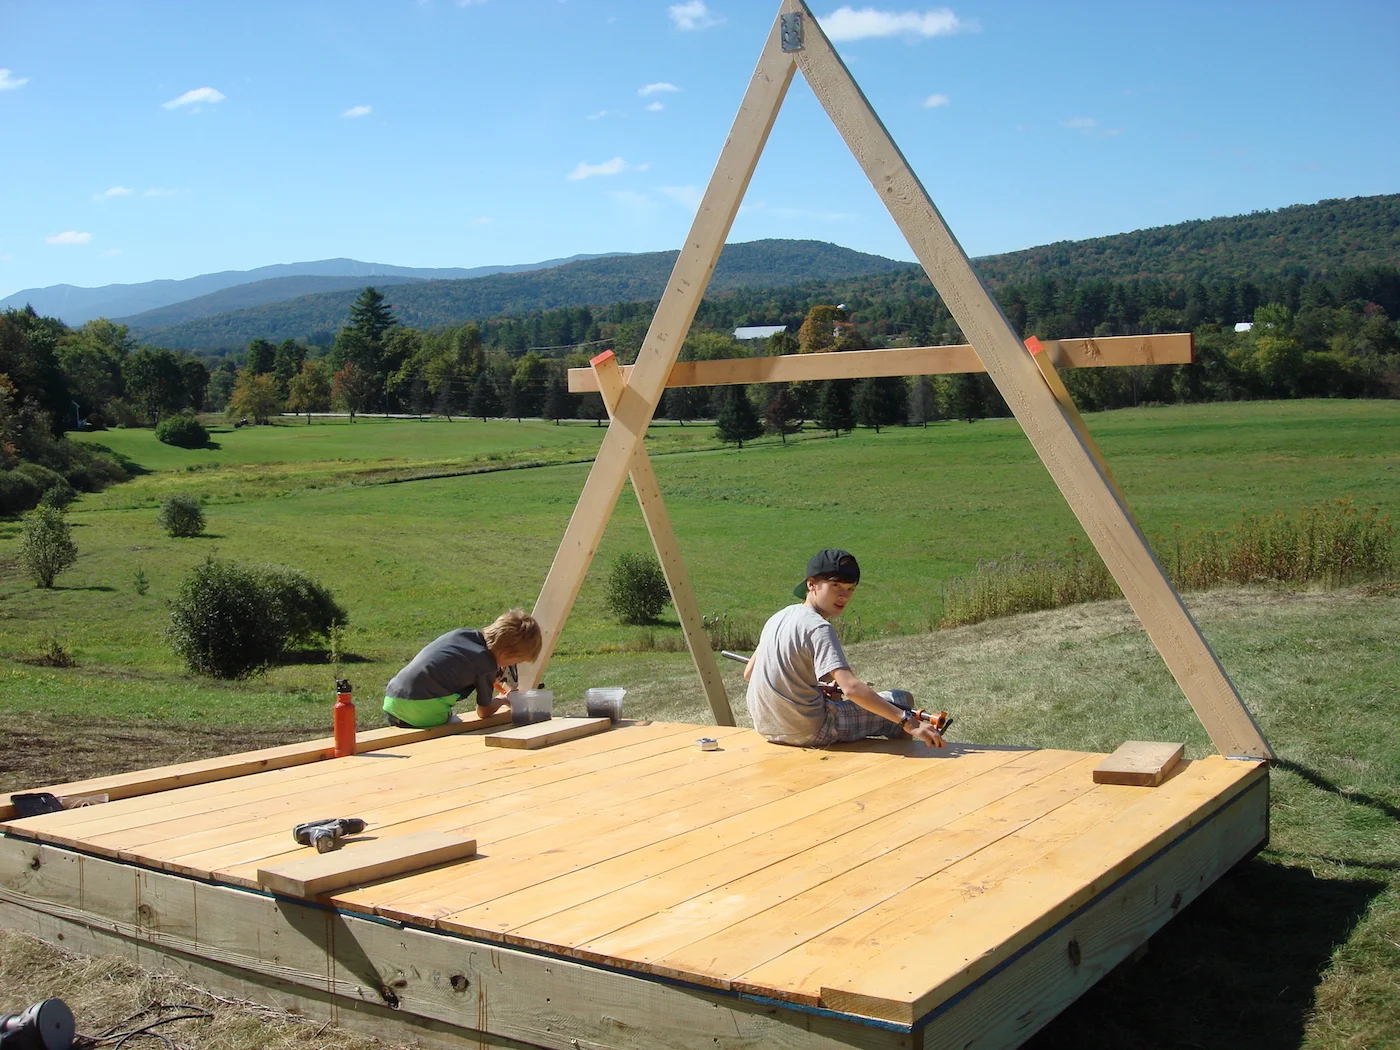
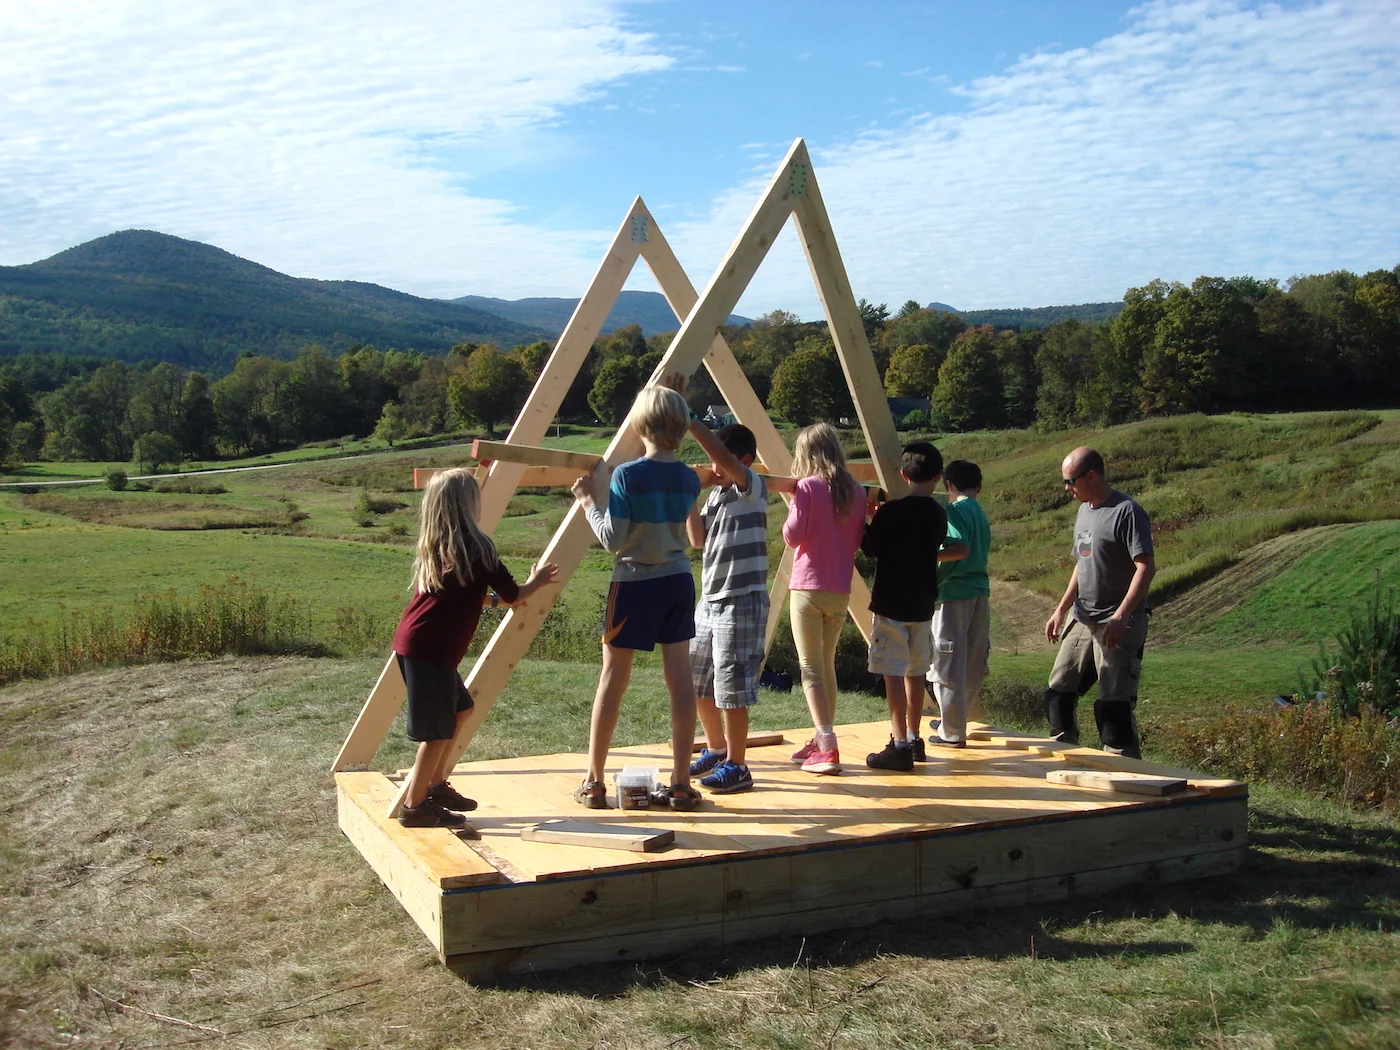
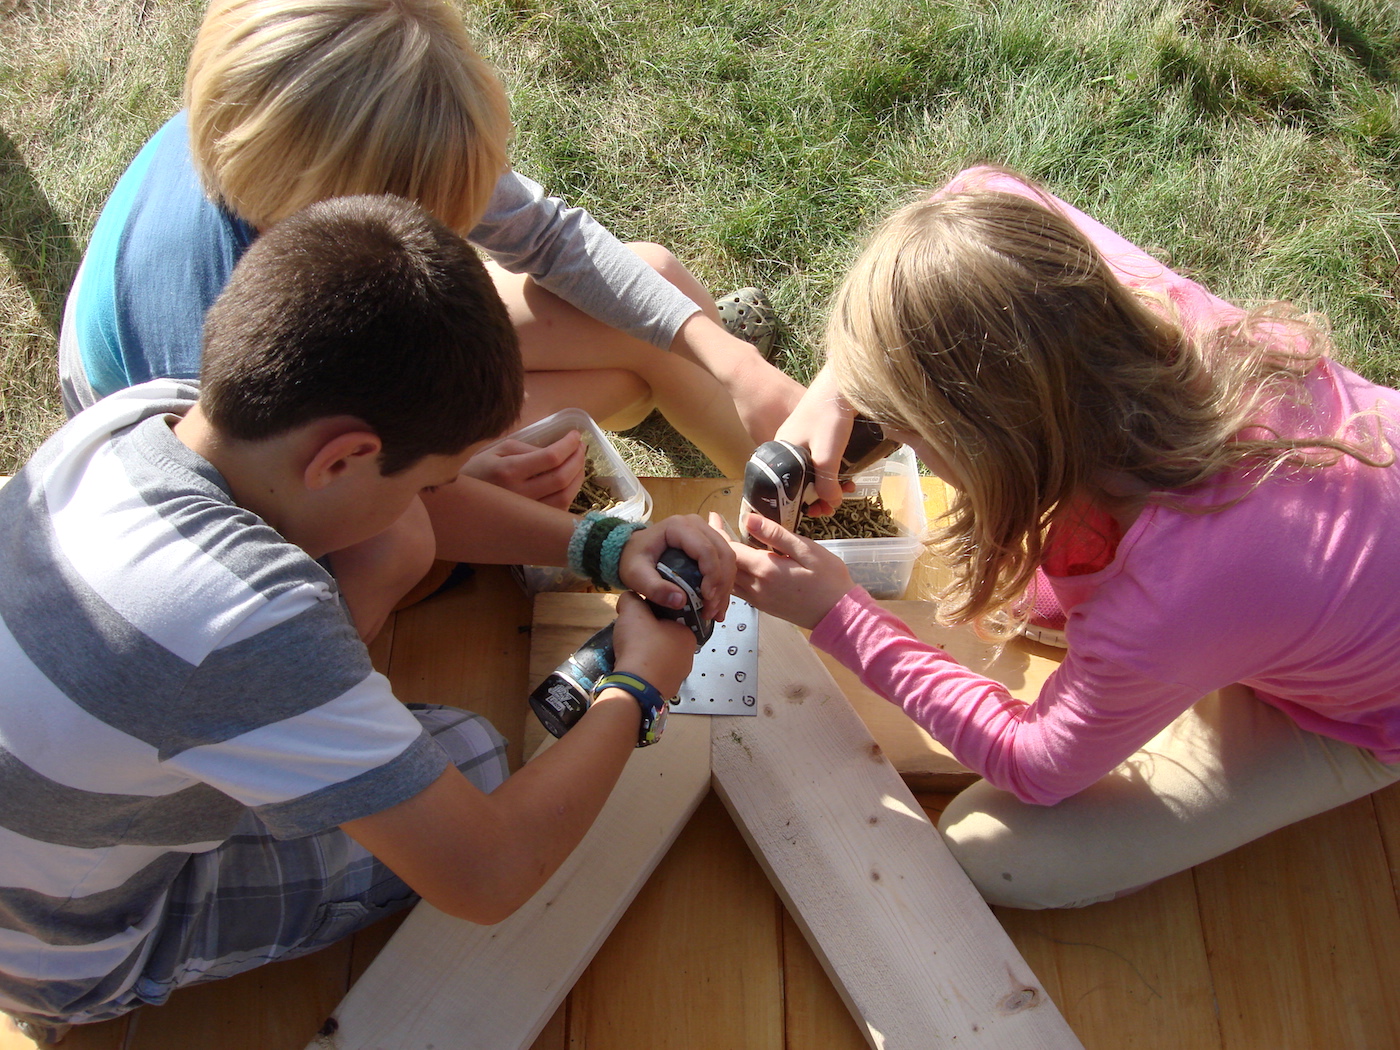
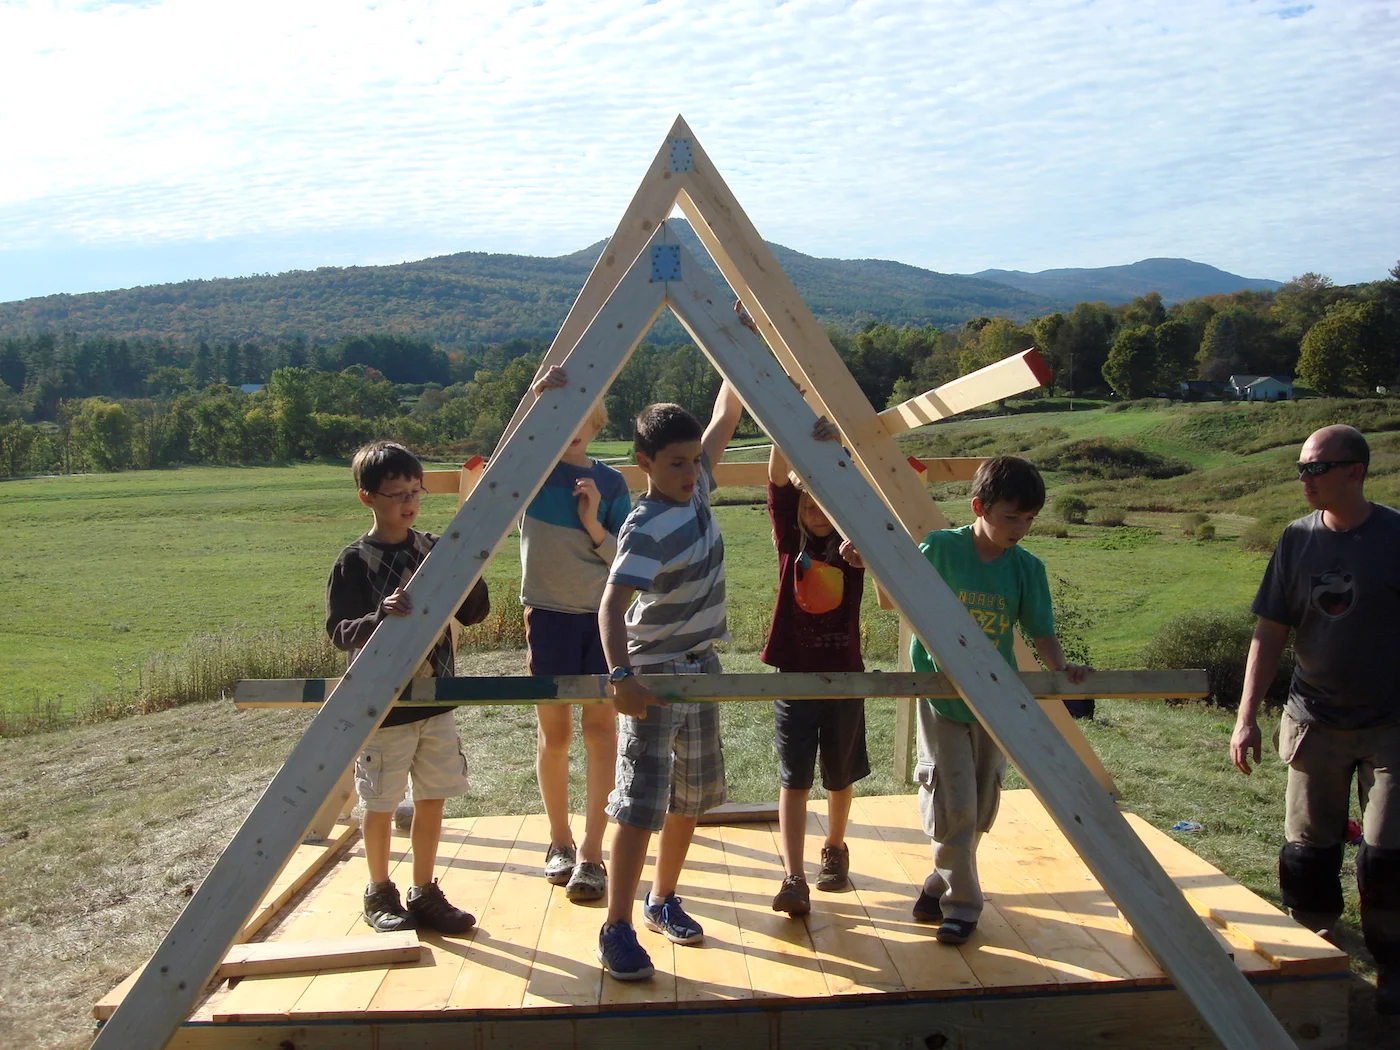
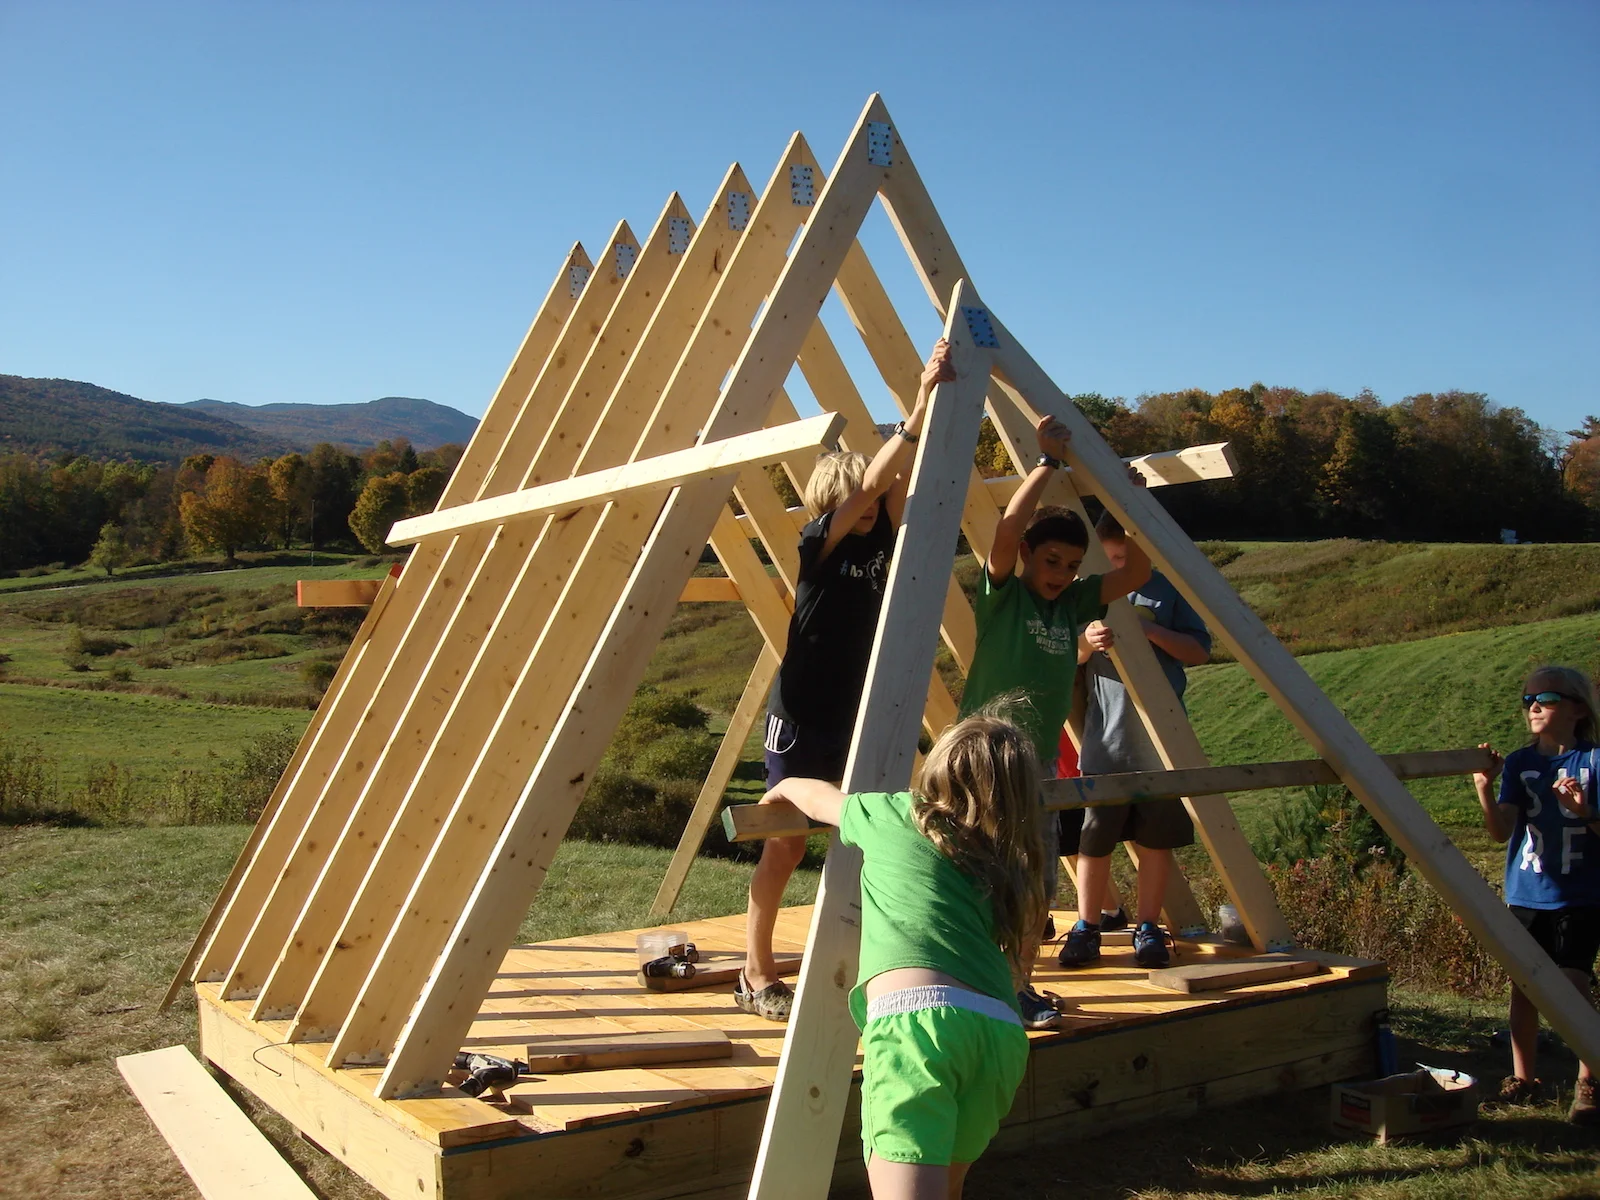
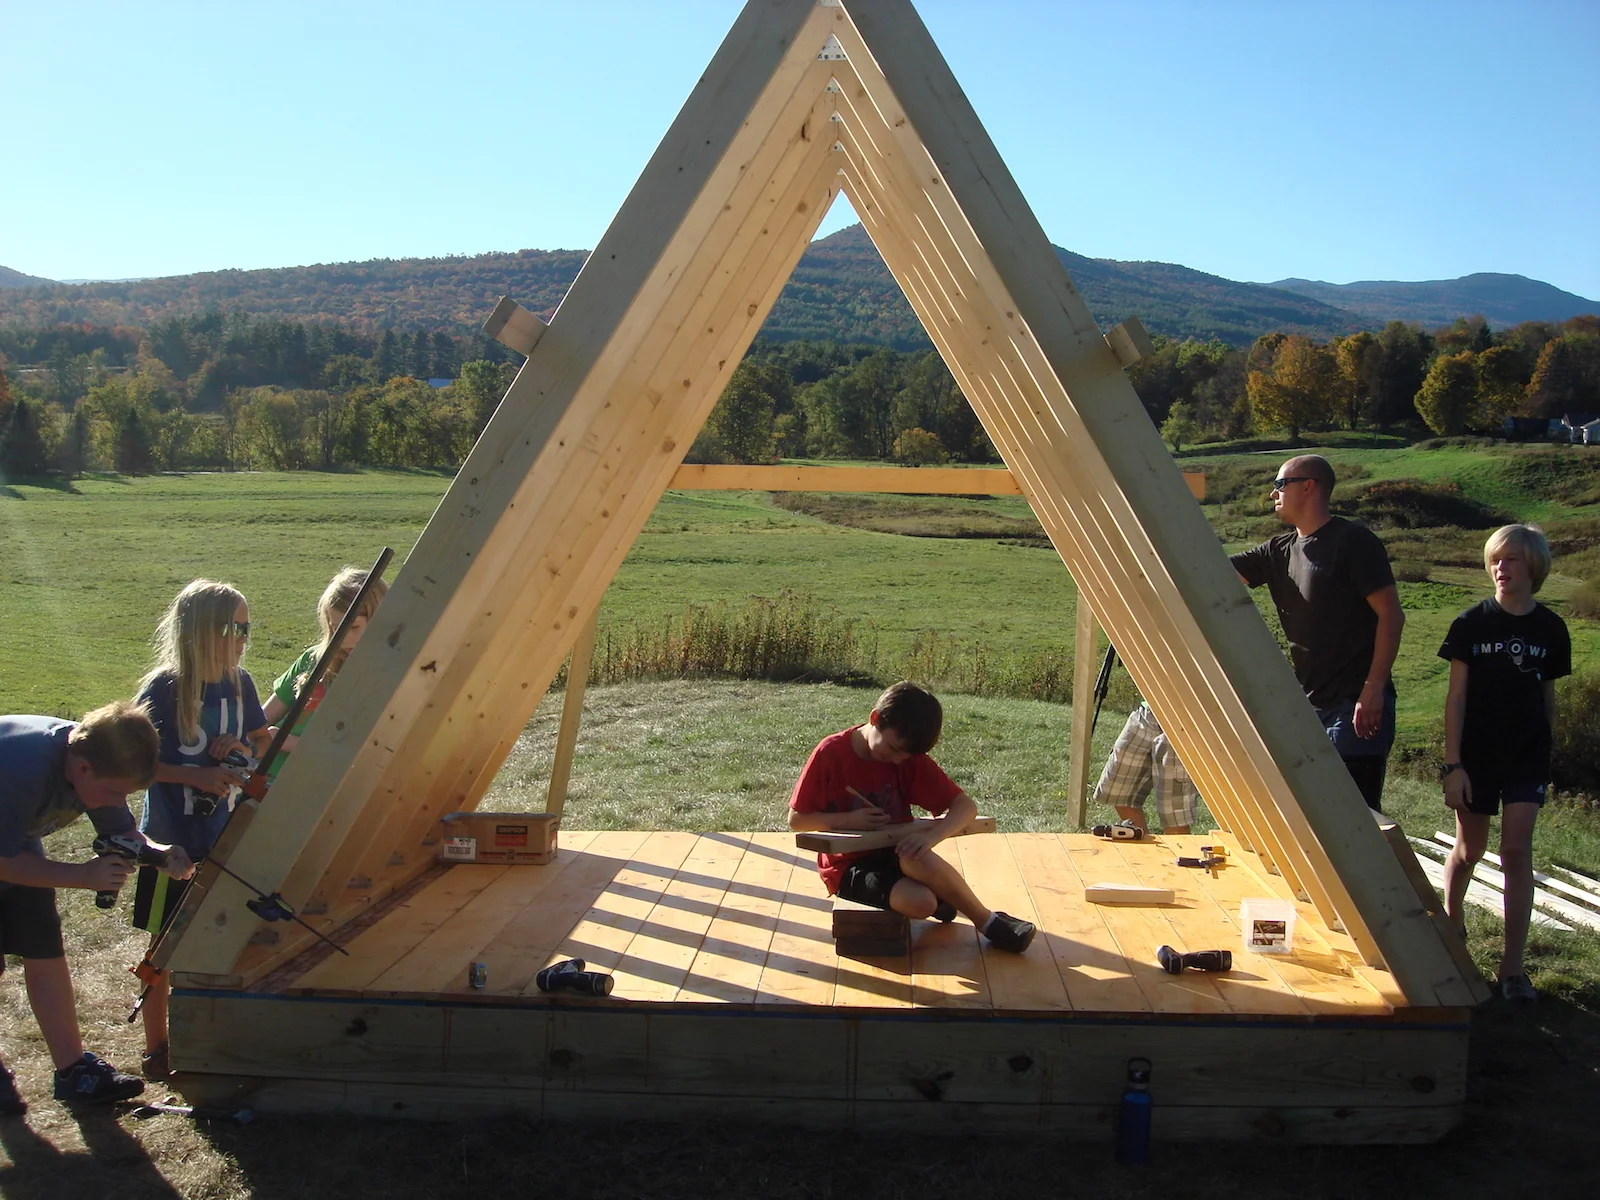
Session 3: Wall Studs
September 29, 2016
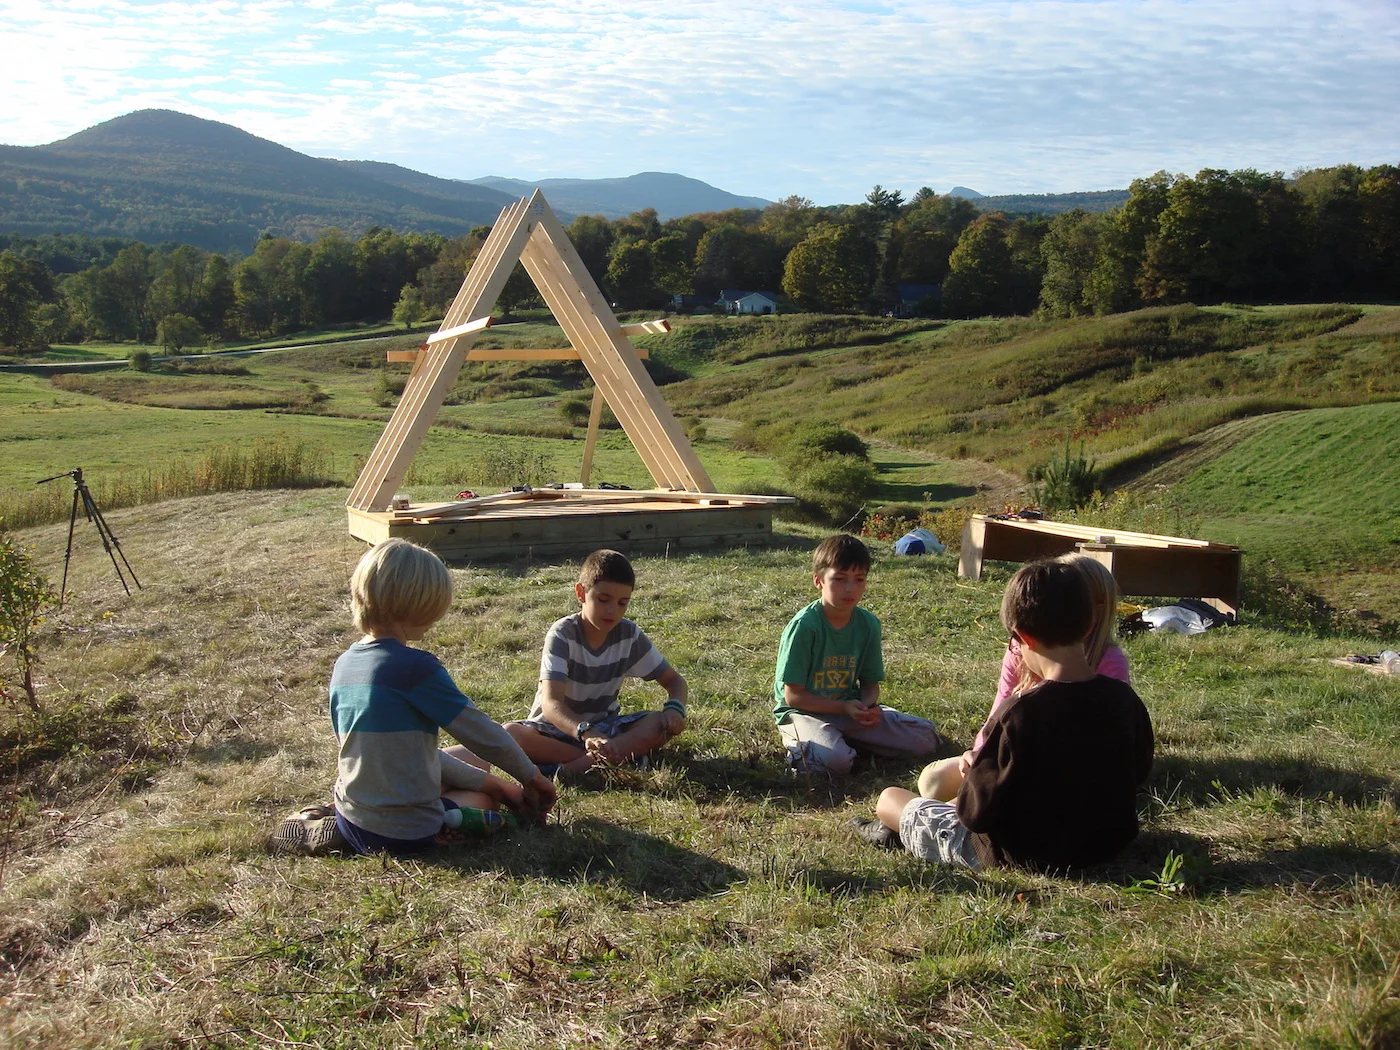
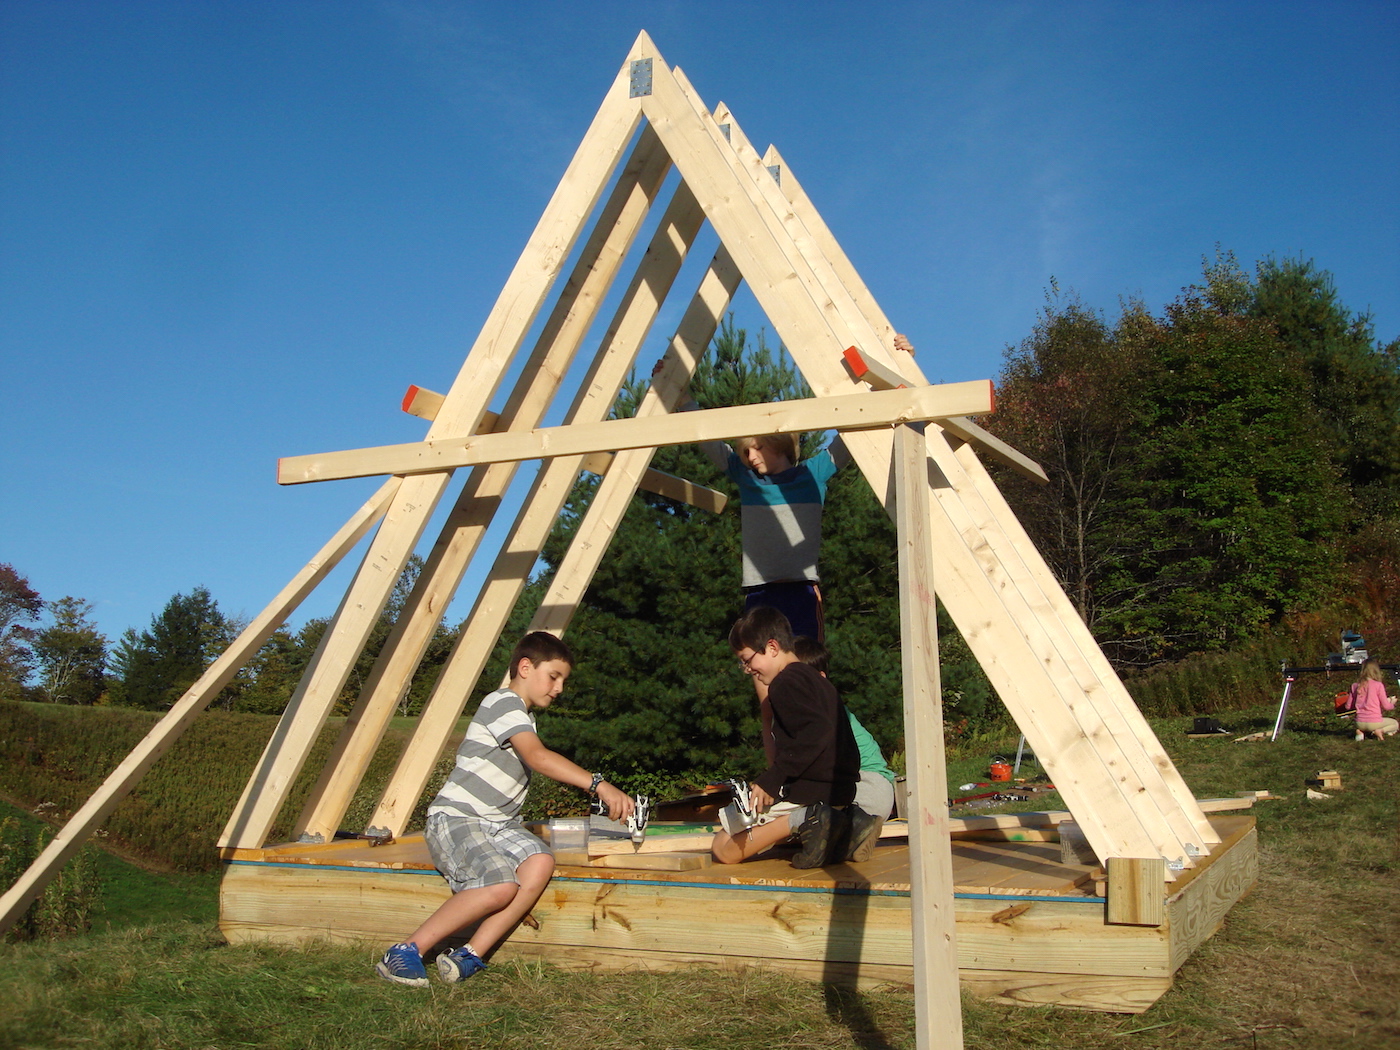
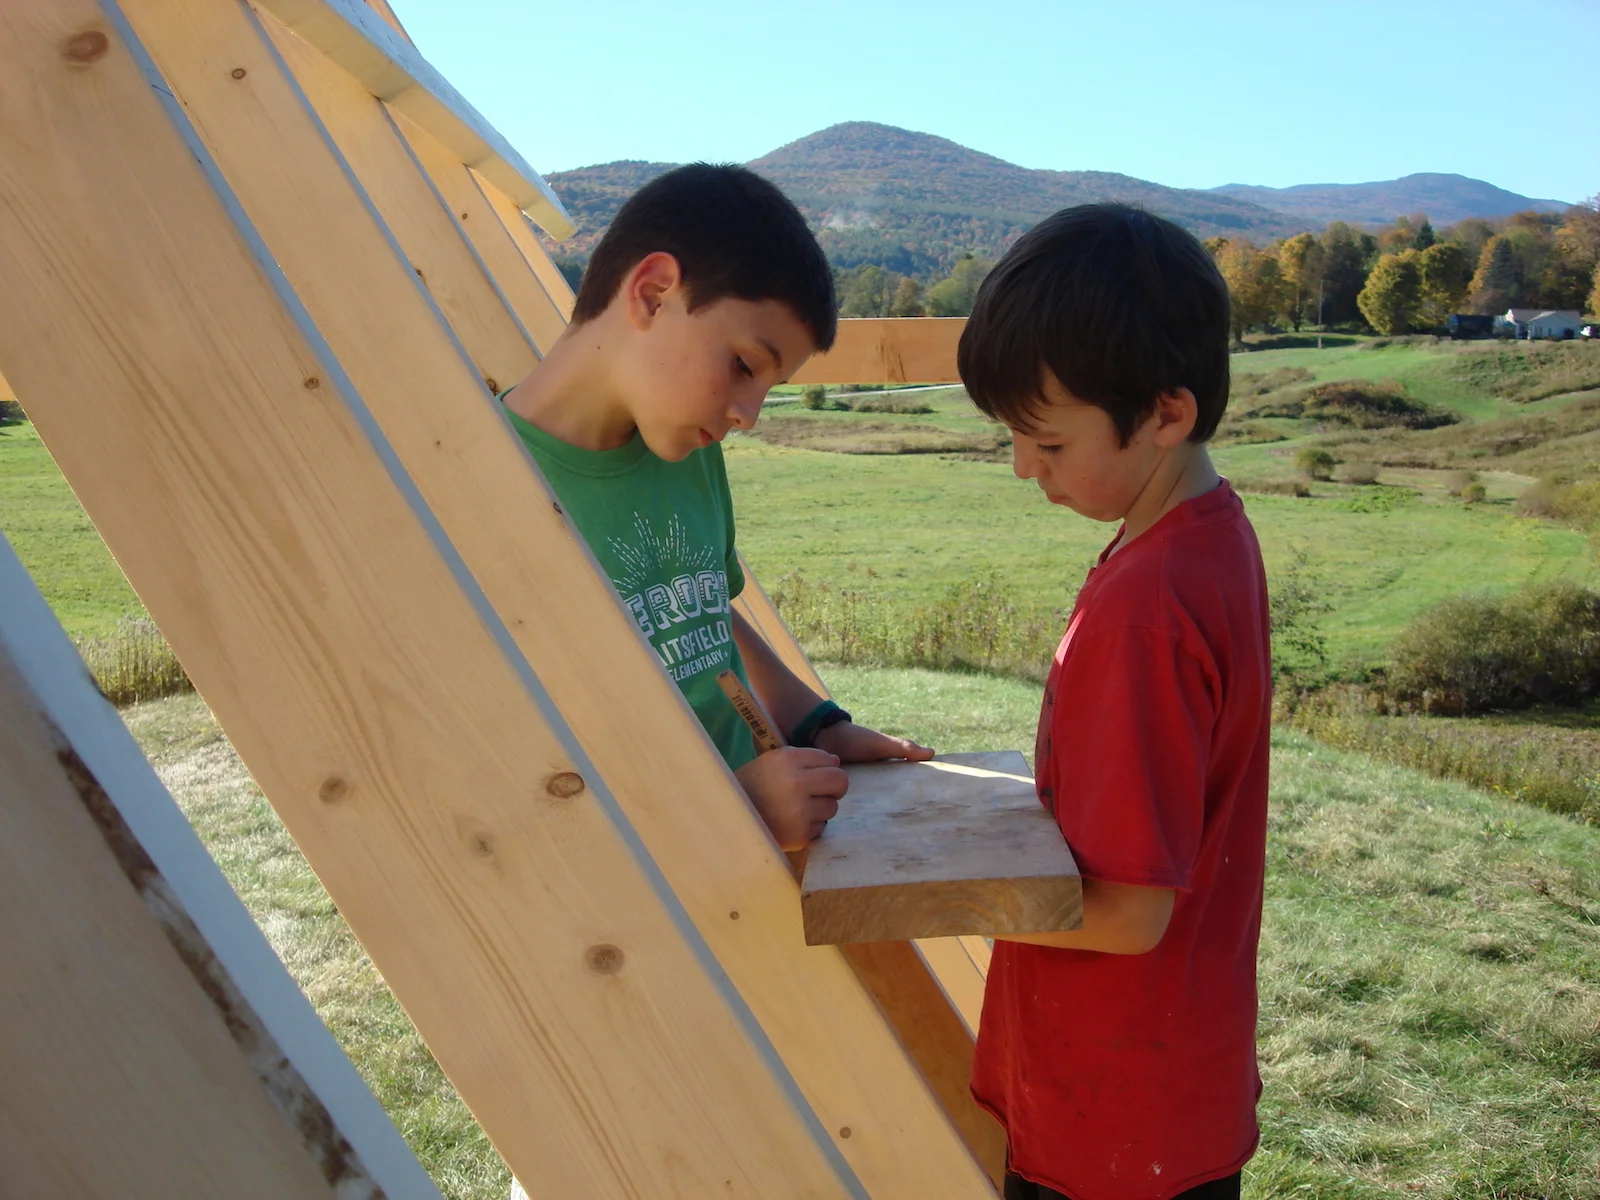
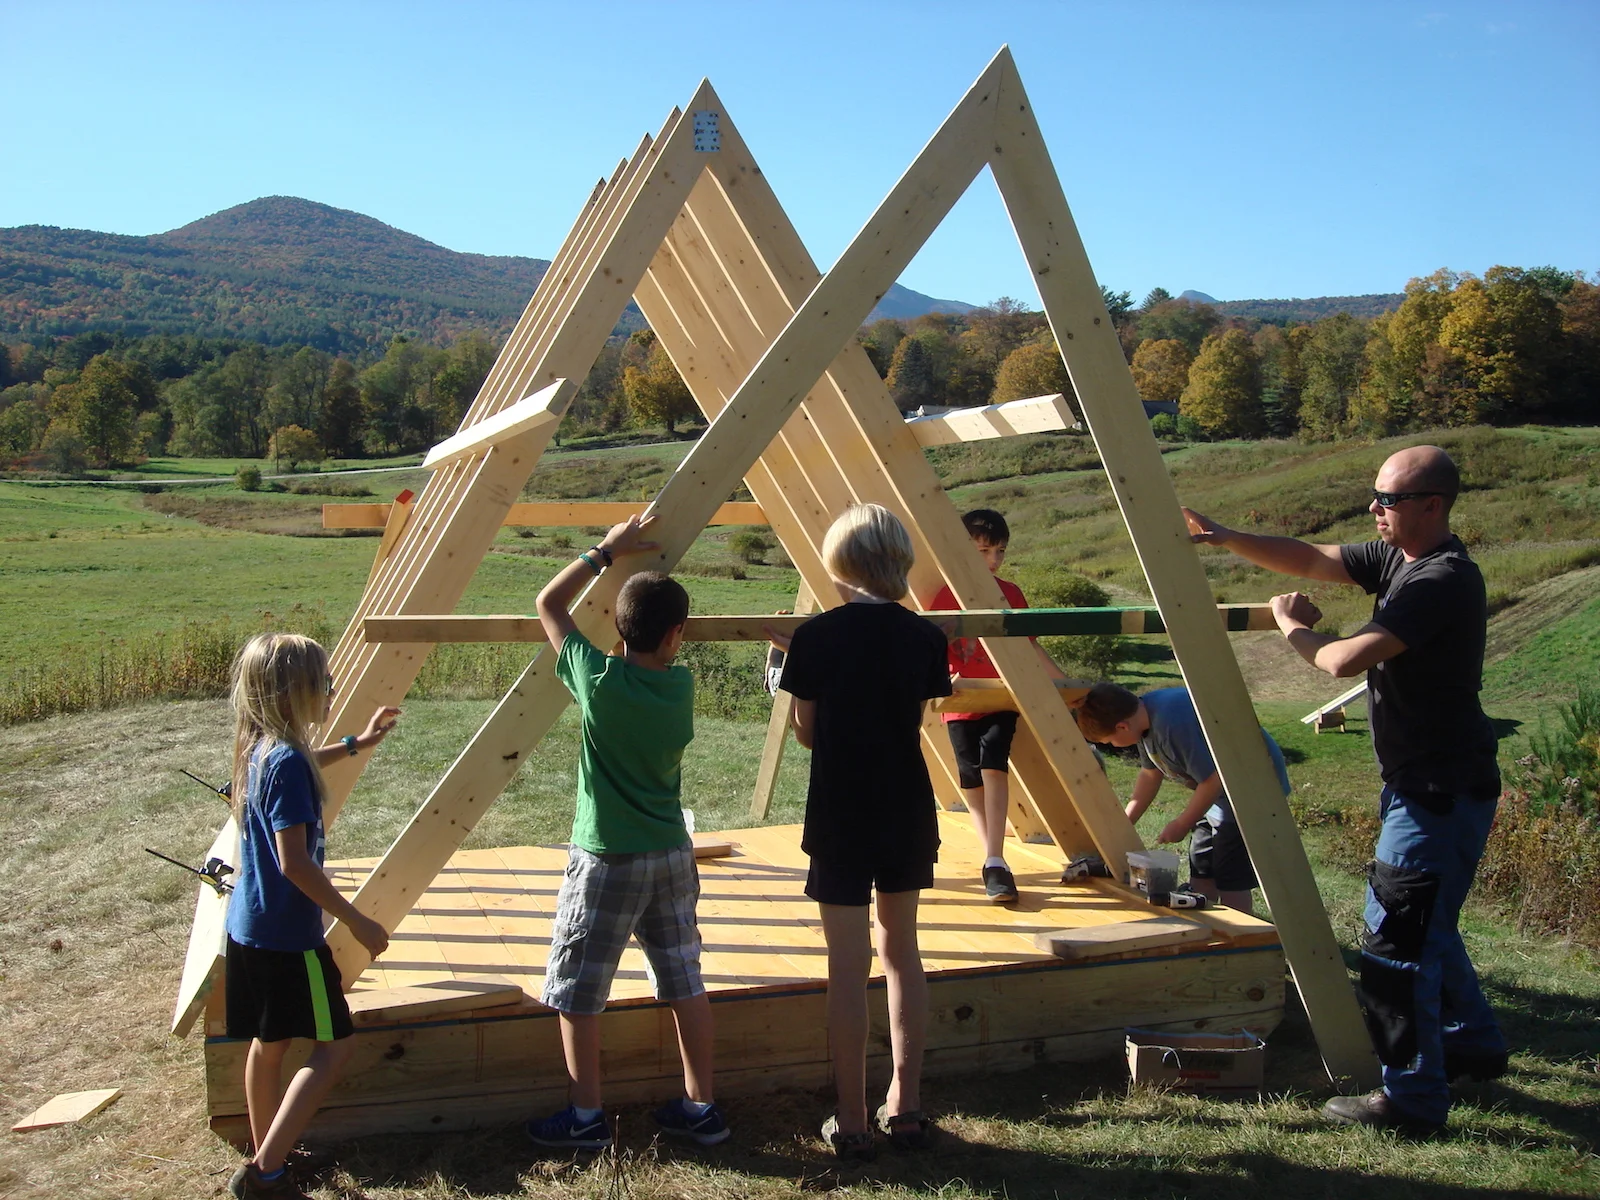
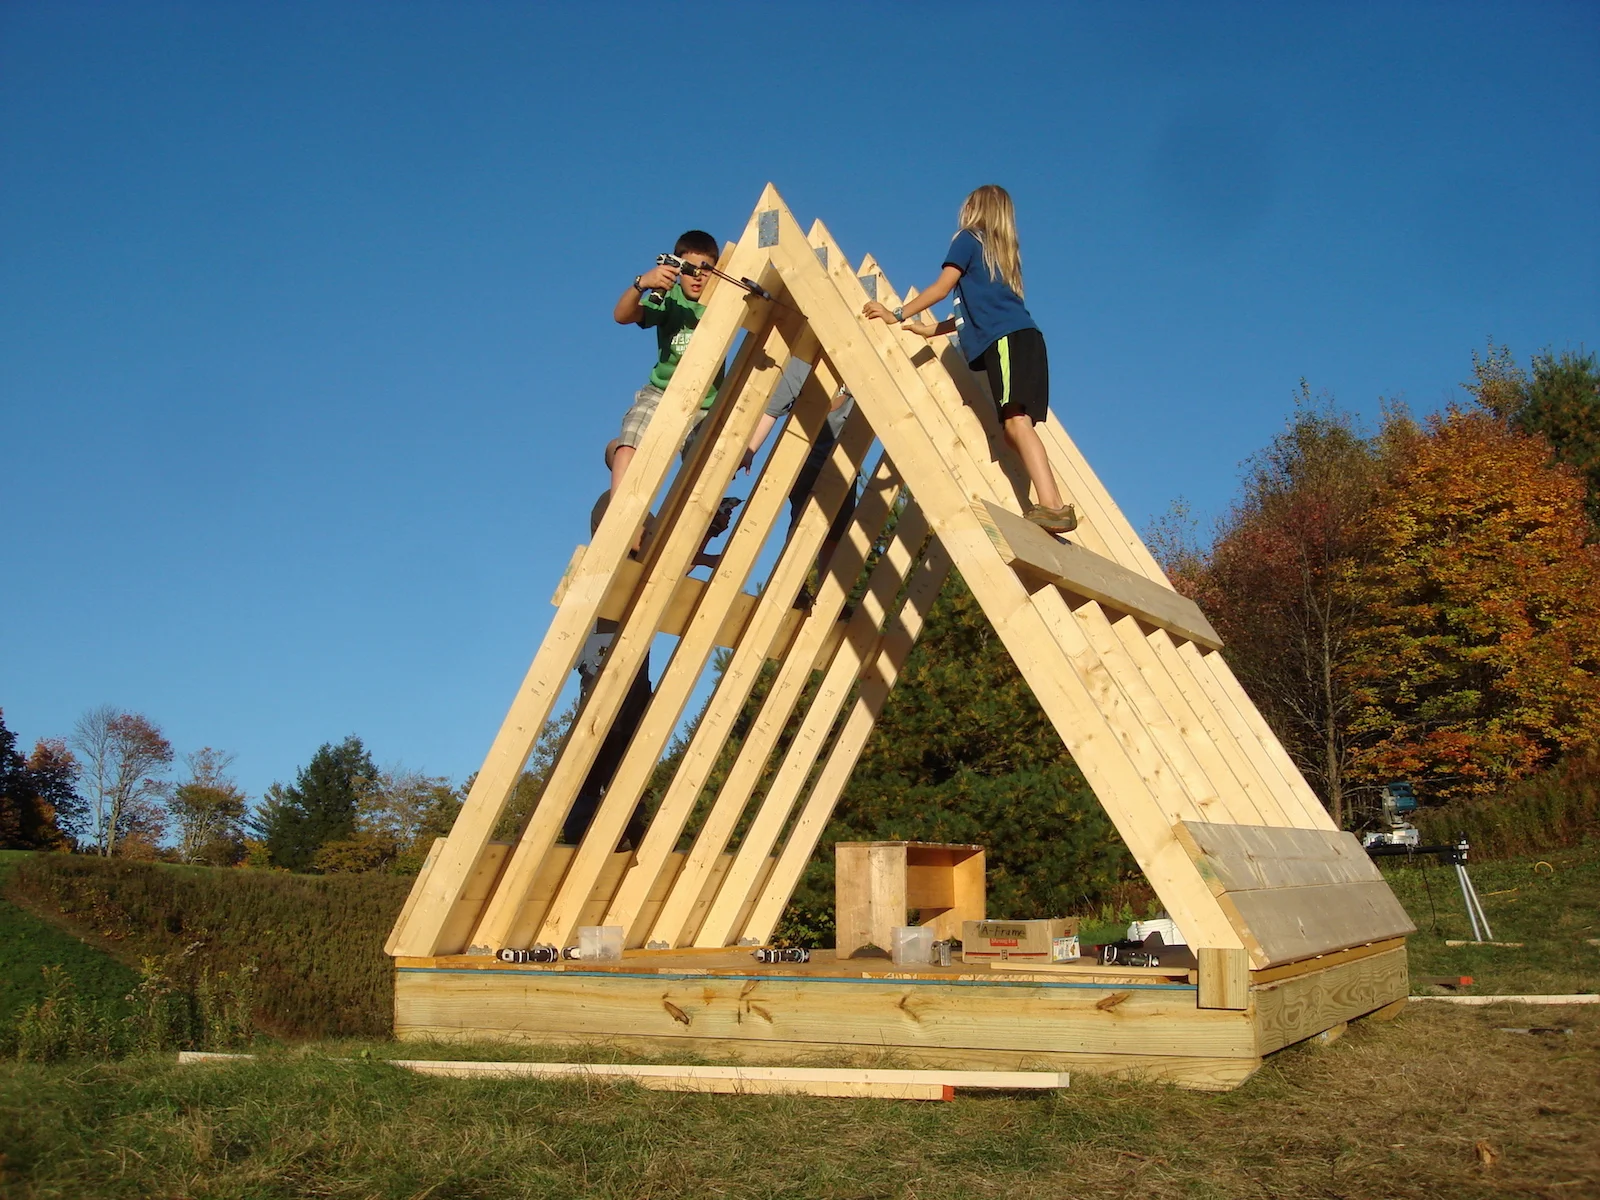
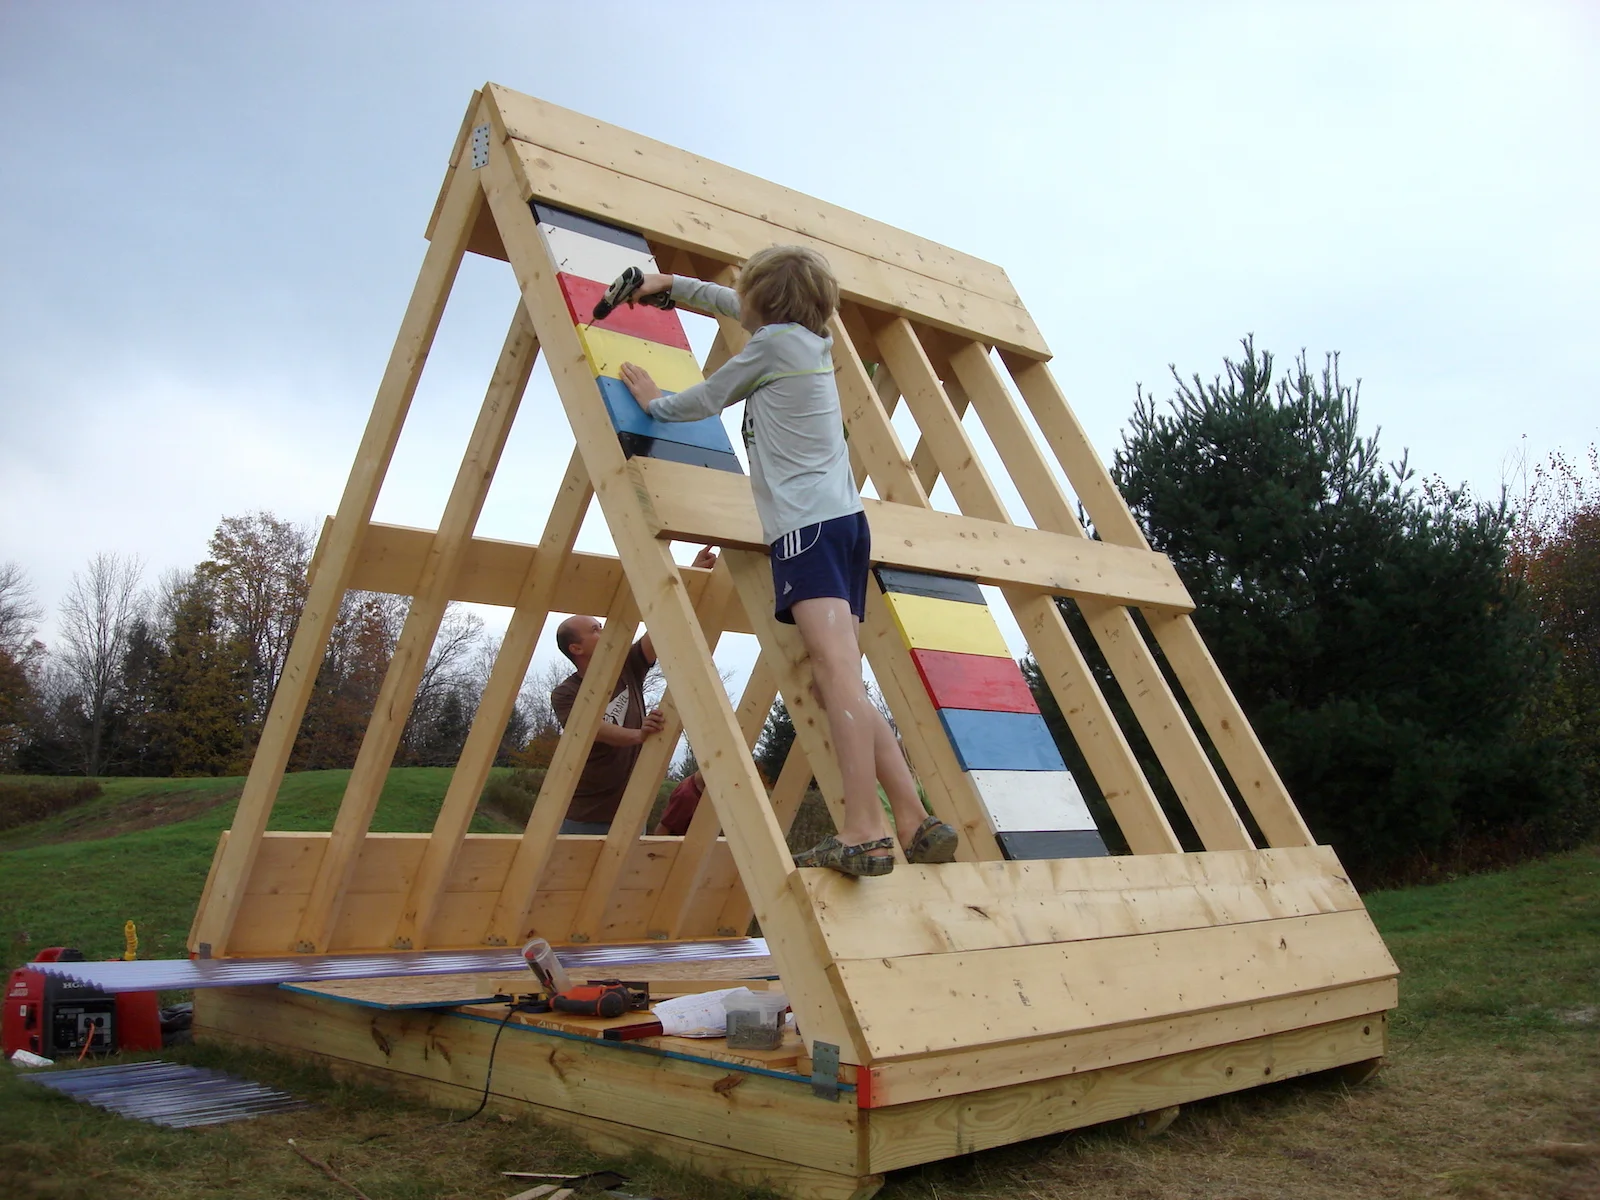
2"x6"x10' boards were pre-cut before class. The group used drills, screws, steel plates, and framing angles to assemble and attach the wall studs onto the deck. One-by-one, students made 7 upside down V's to complete the 10' equilateral triangle. 2x4's were used to hold the wall studs in place throughout the framing.
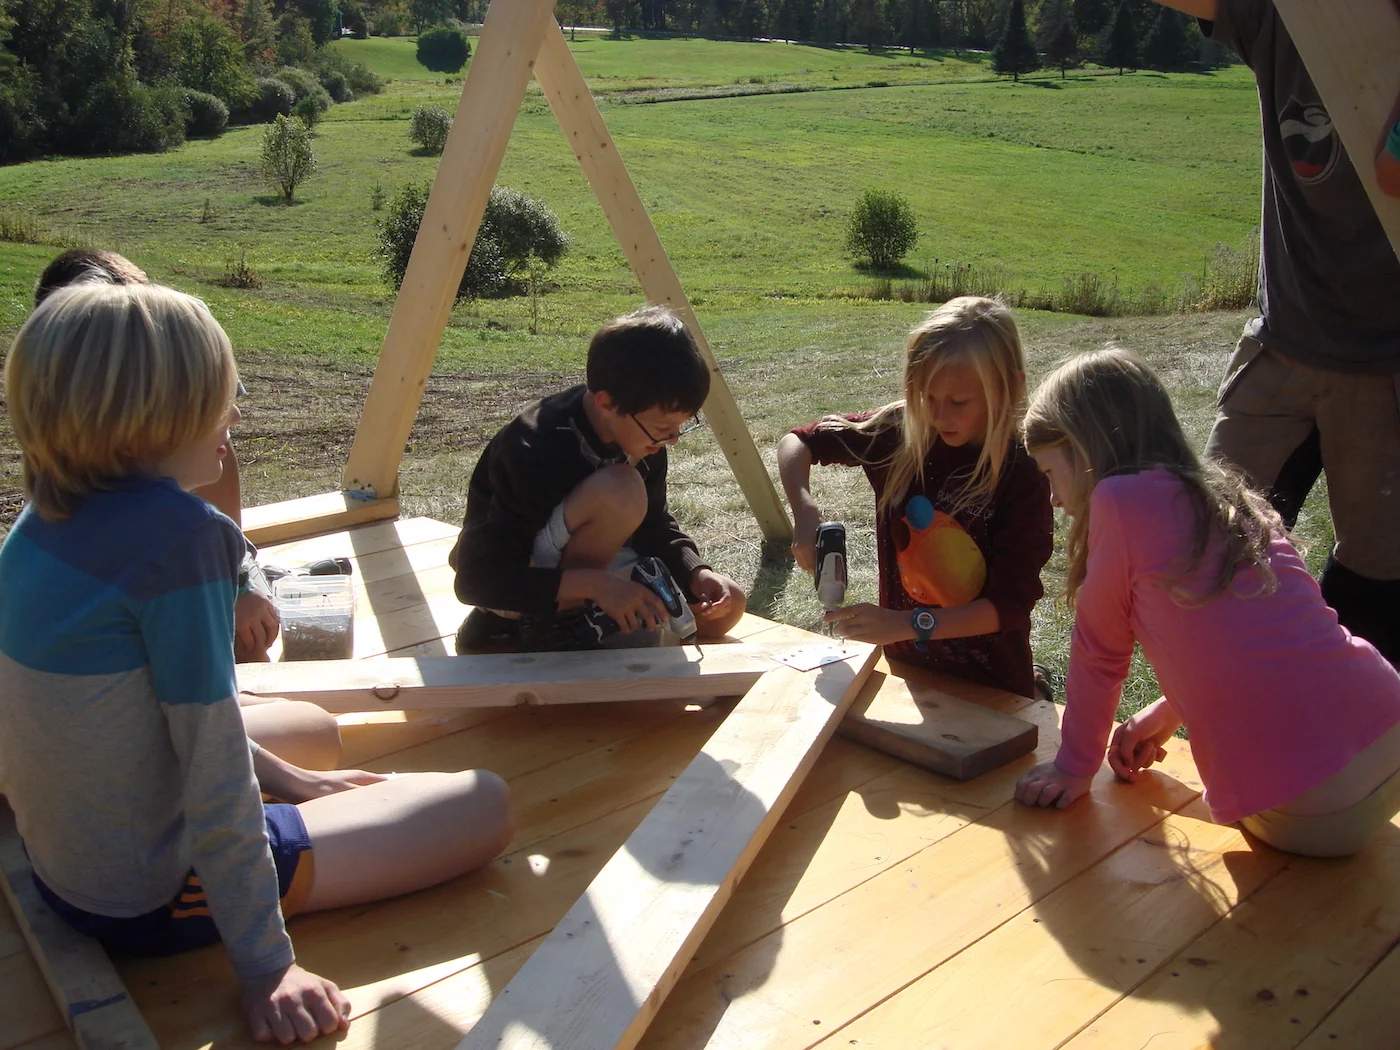
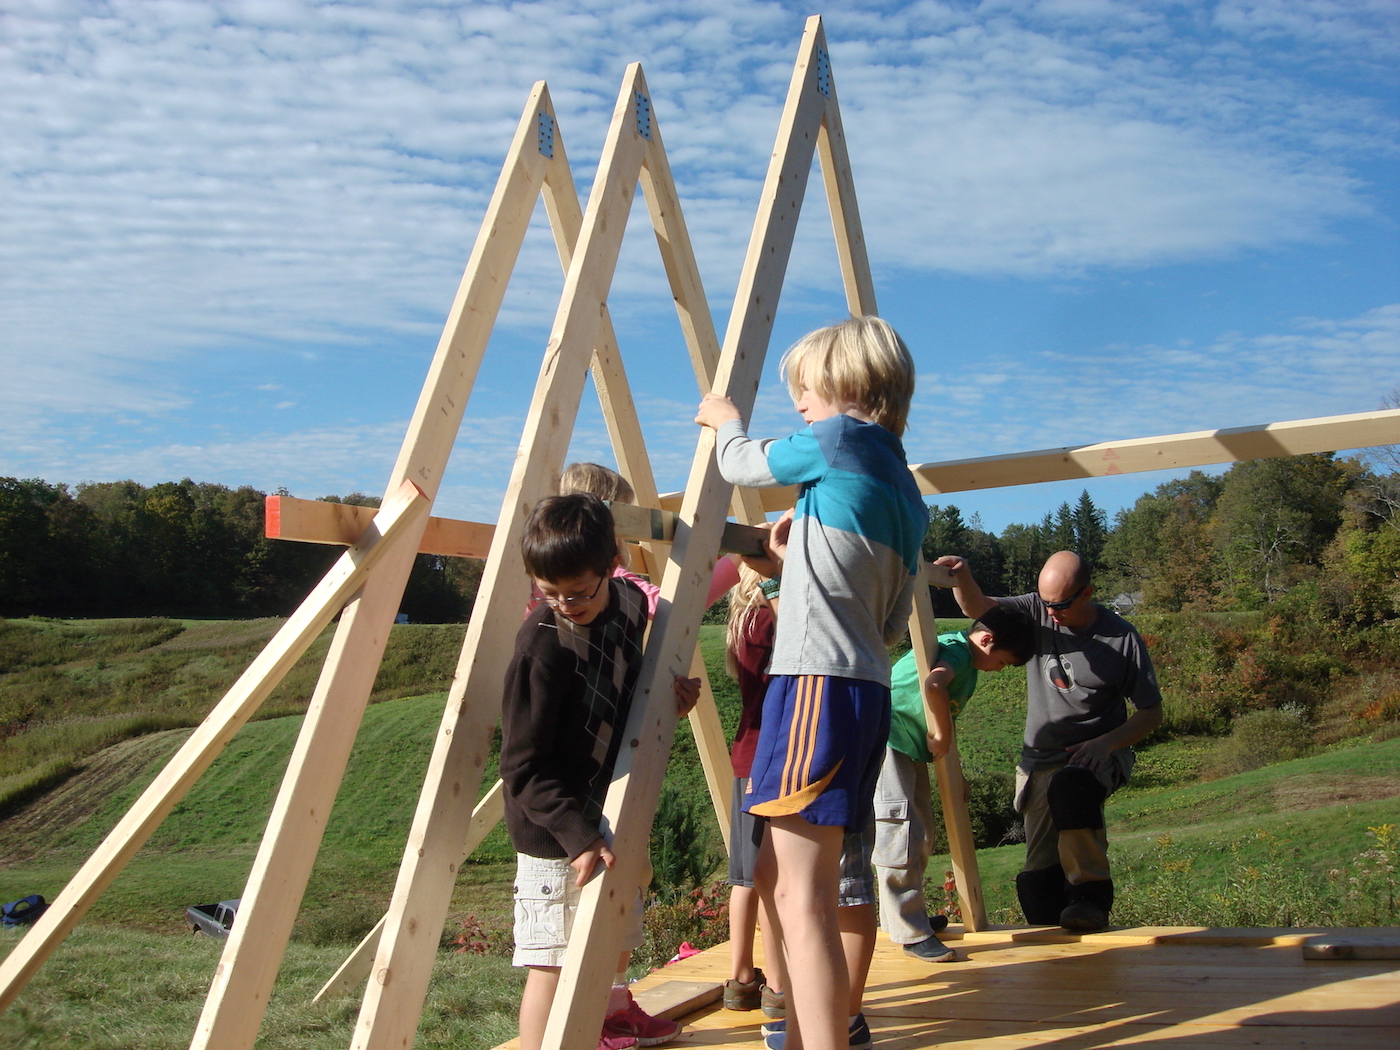

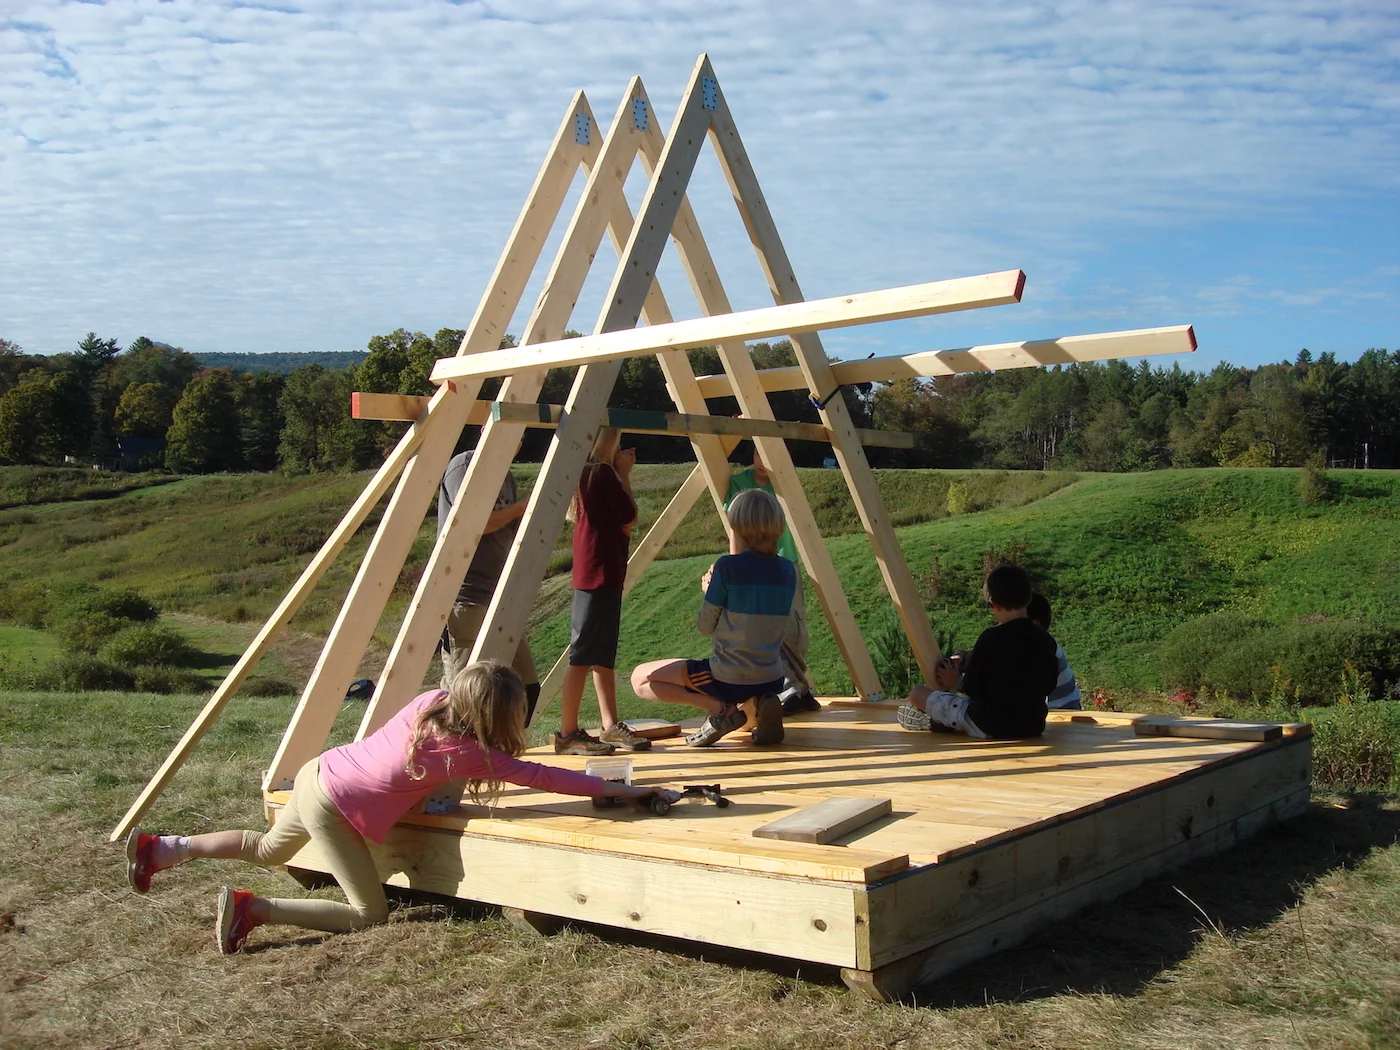


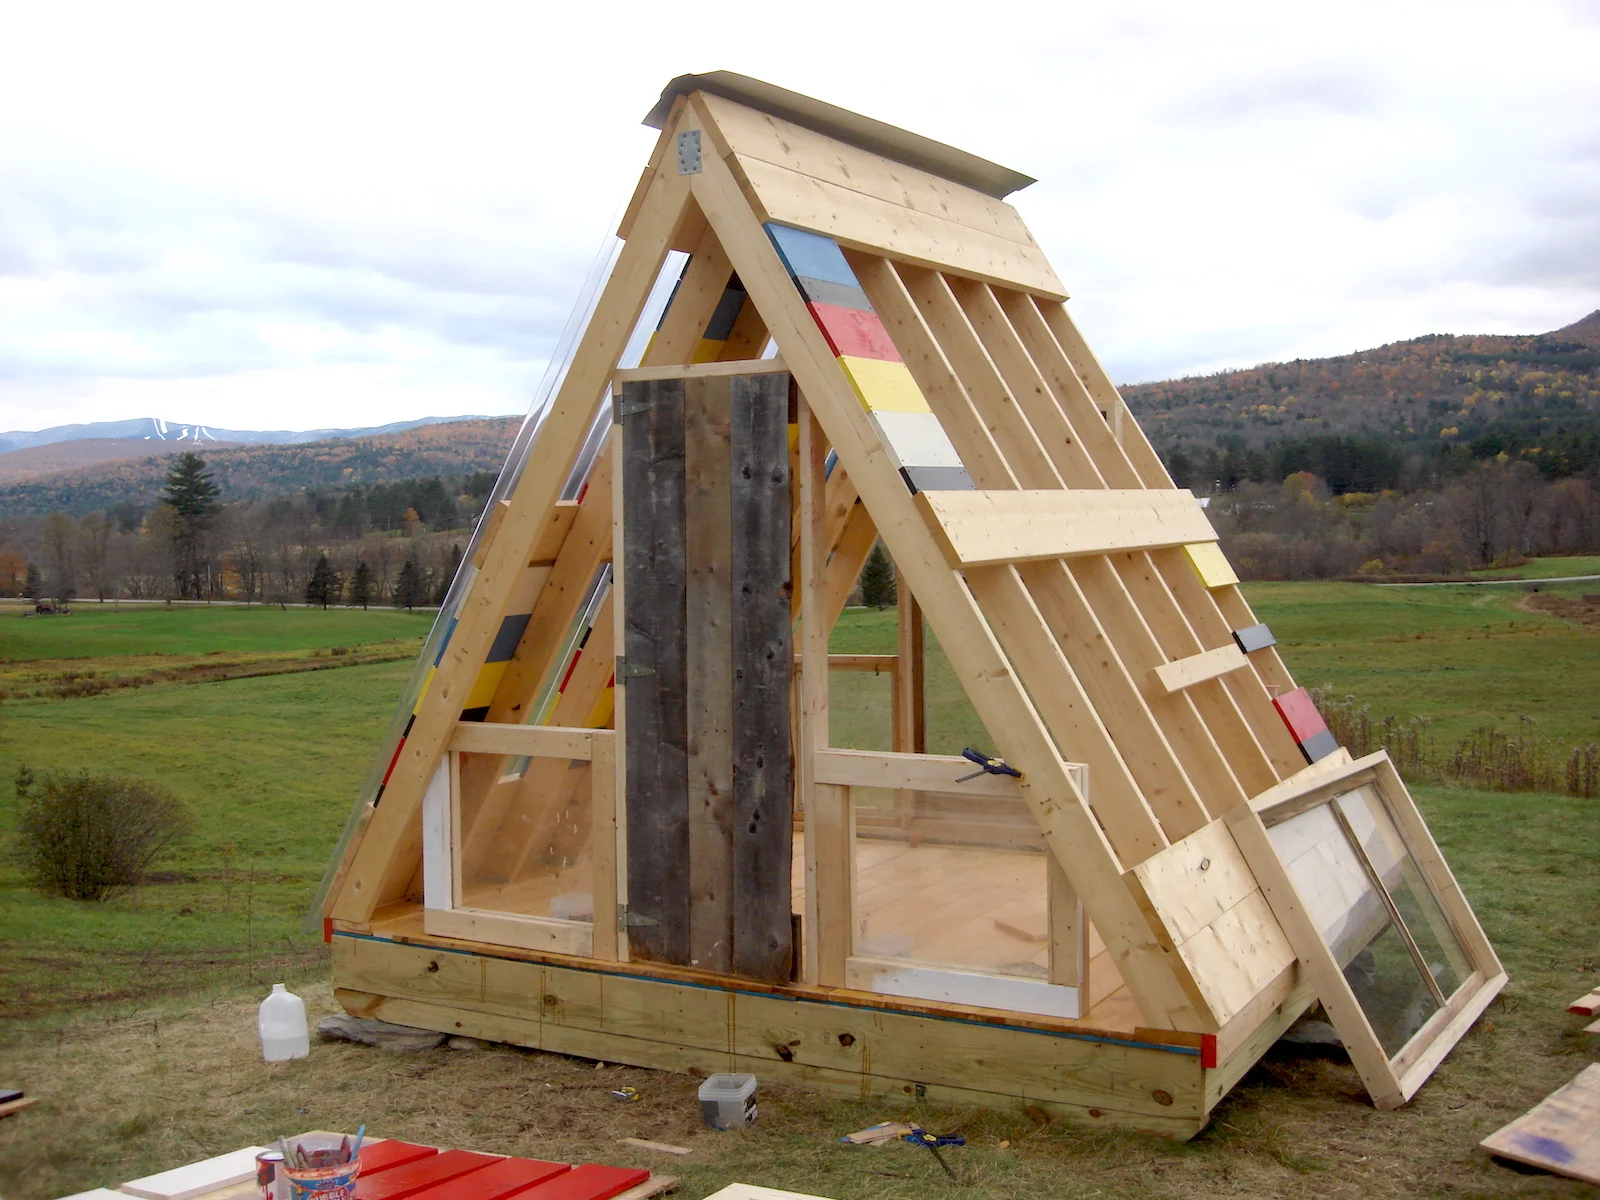
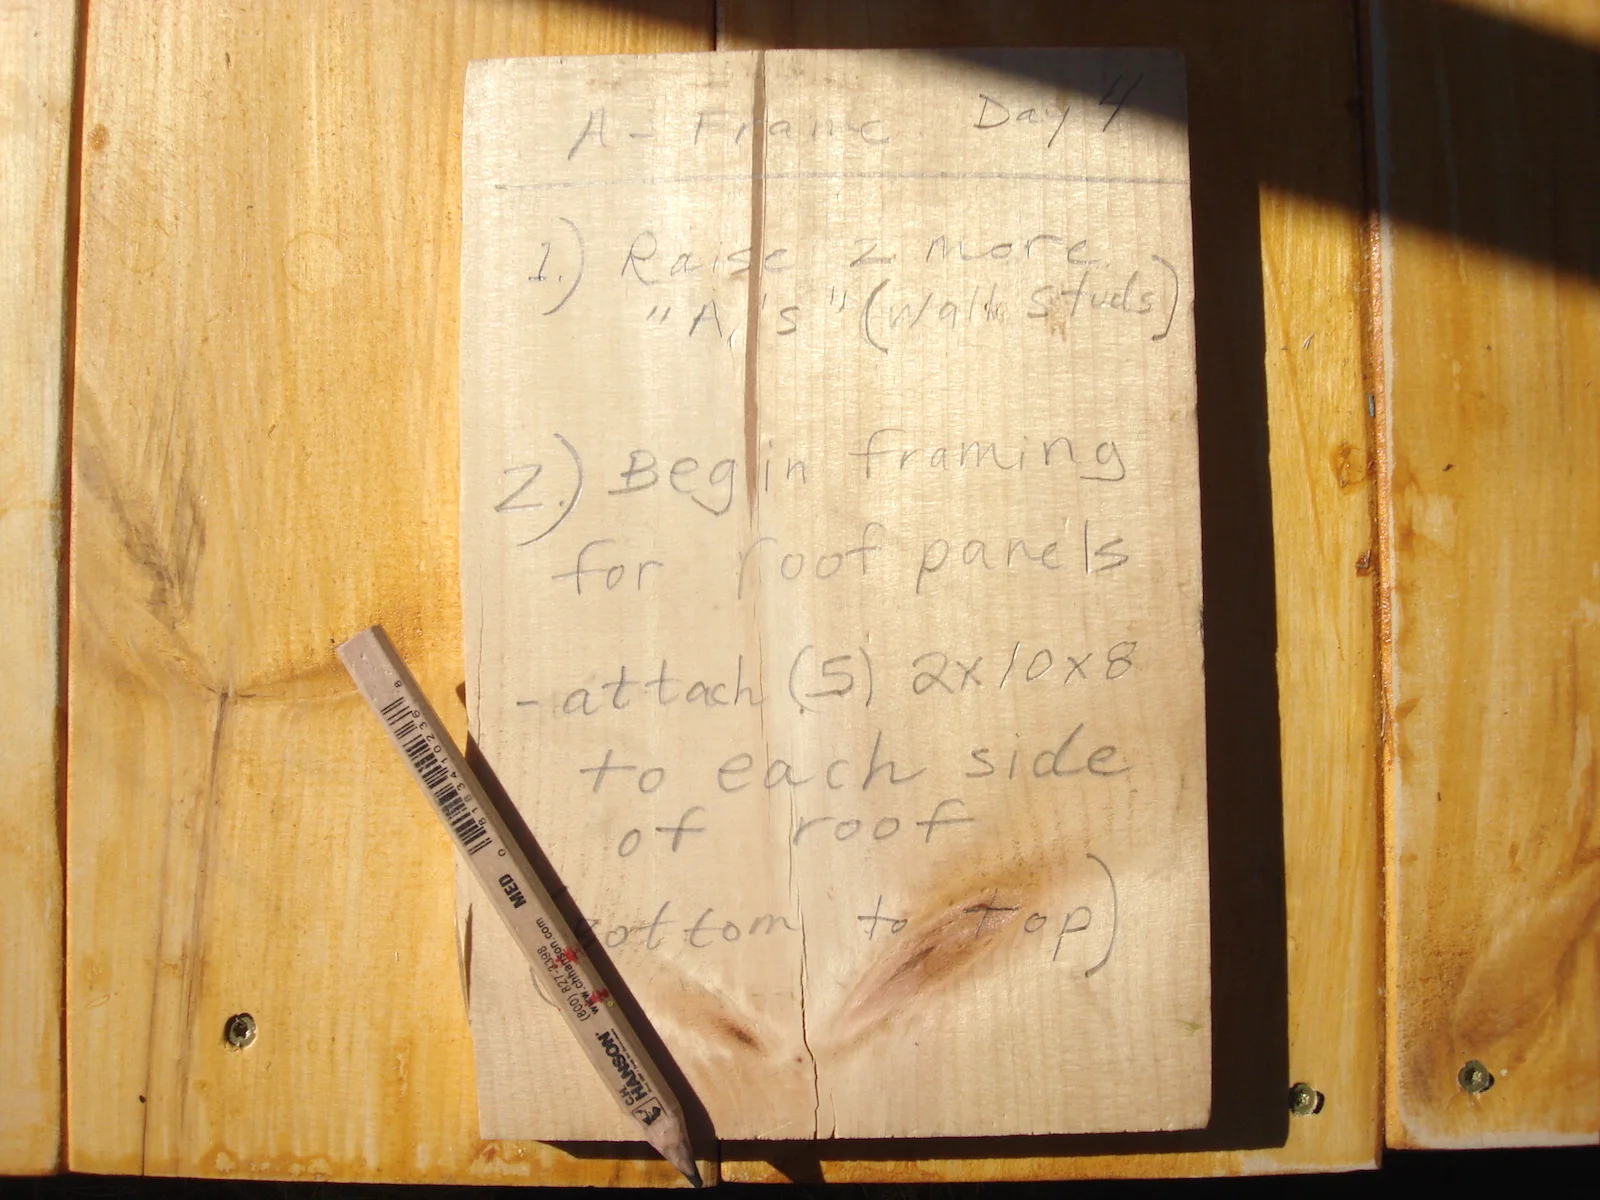
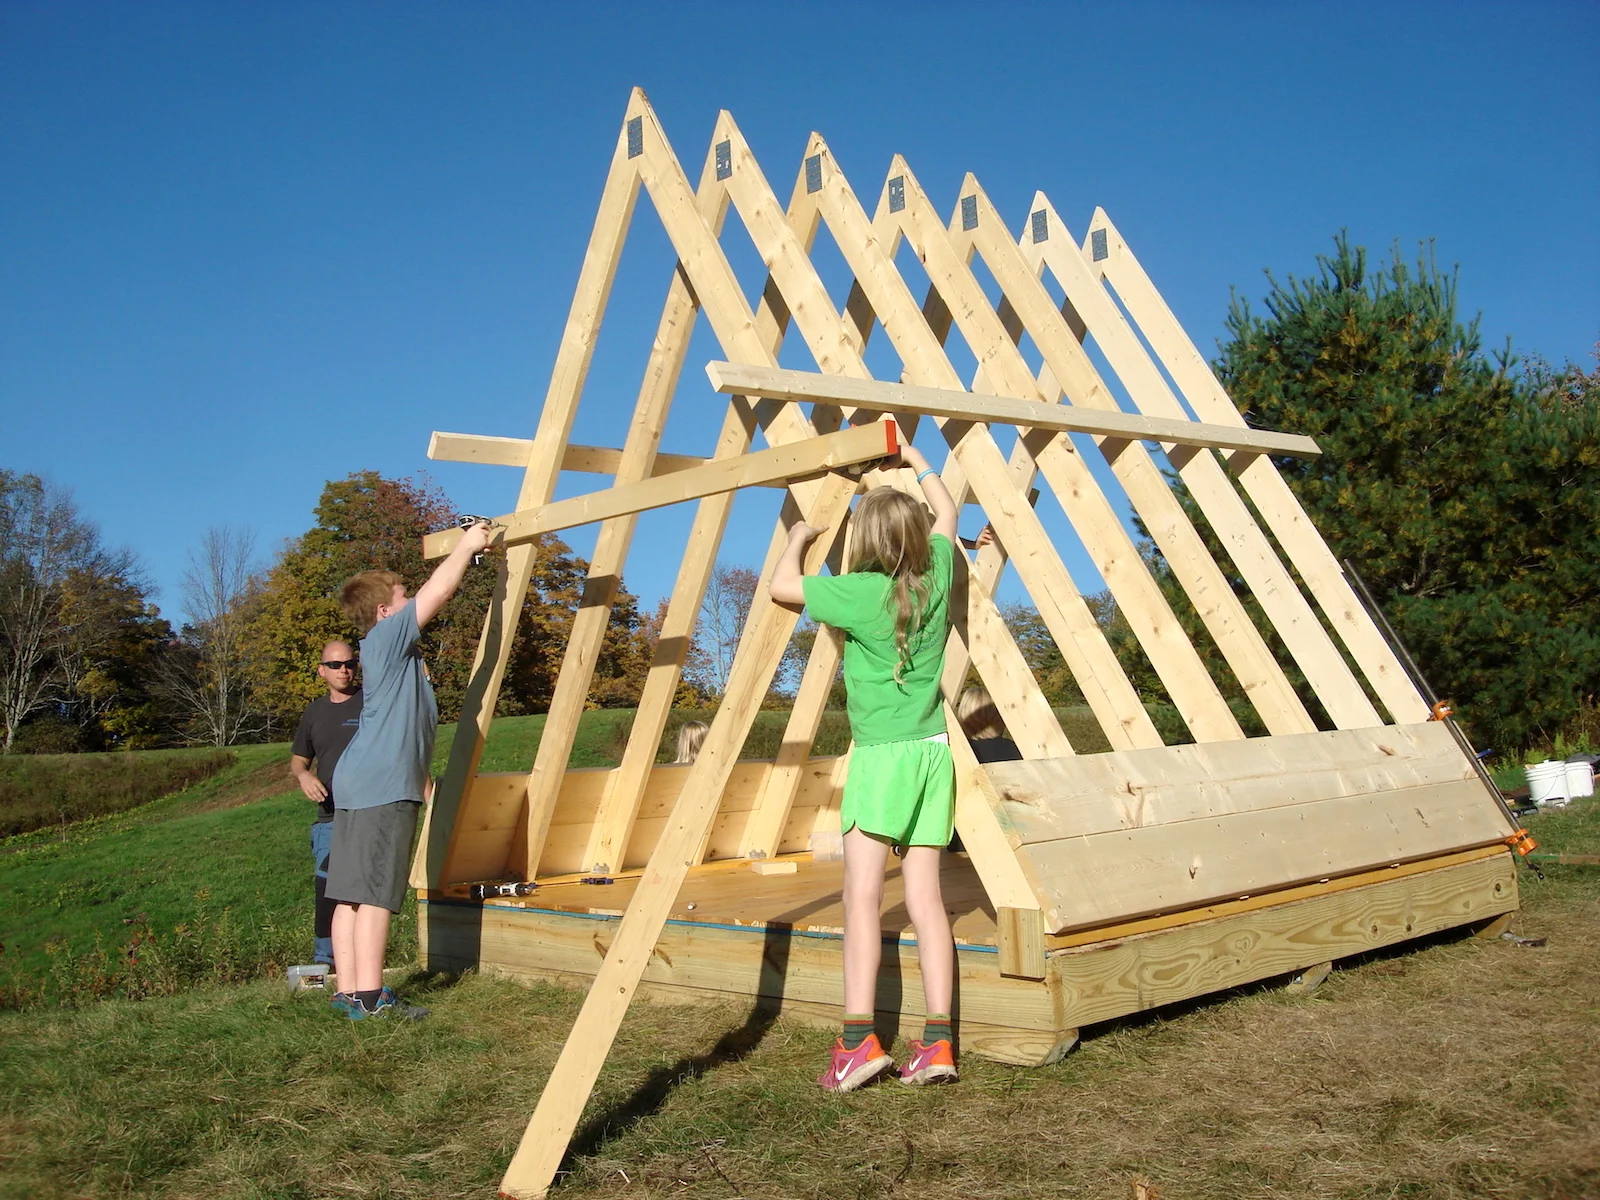
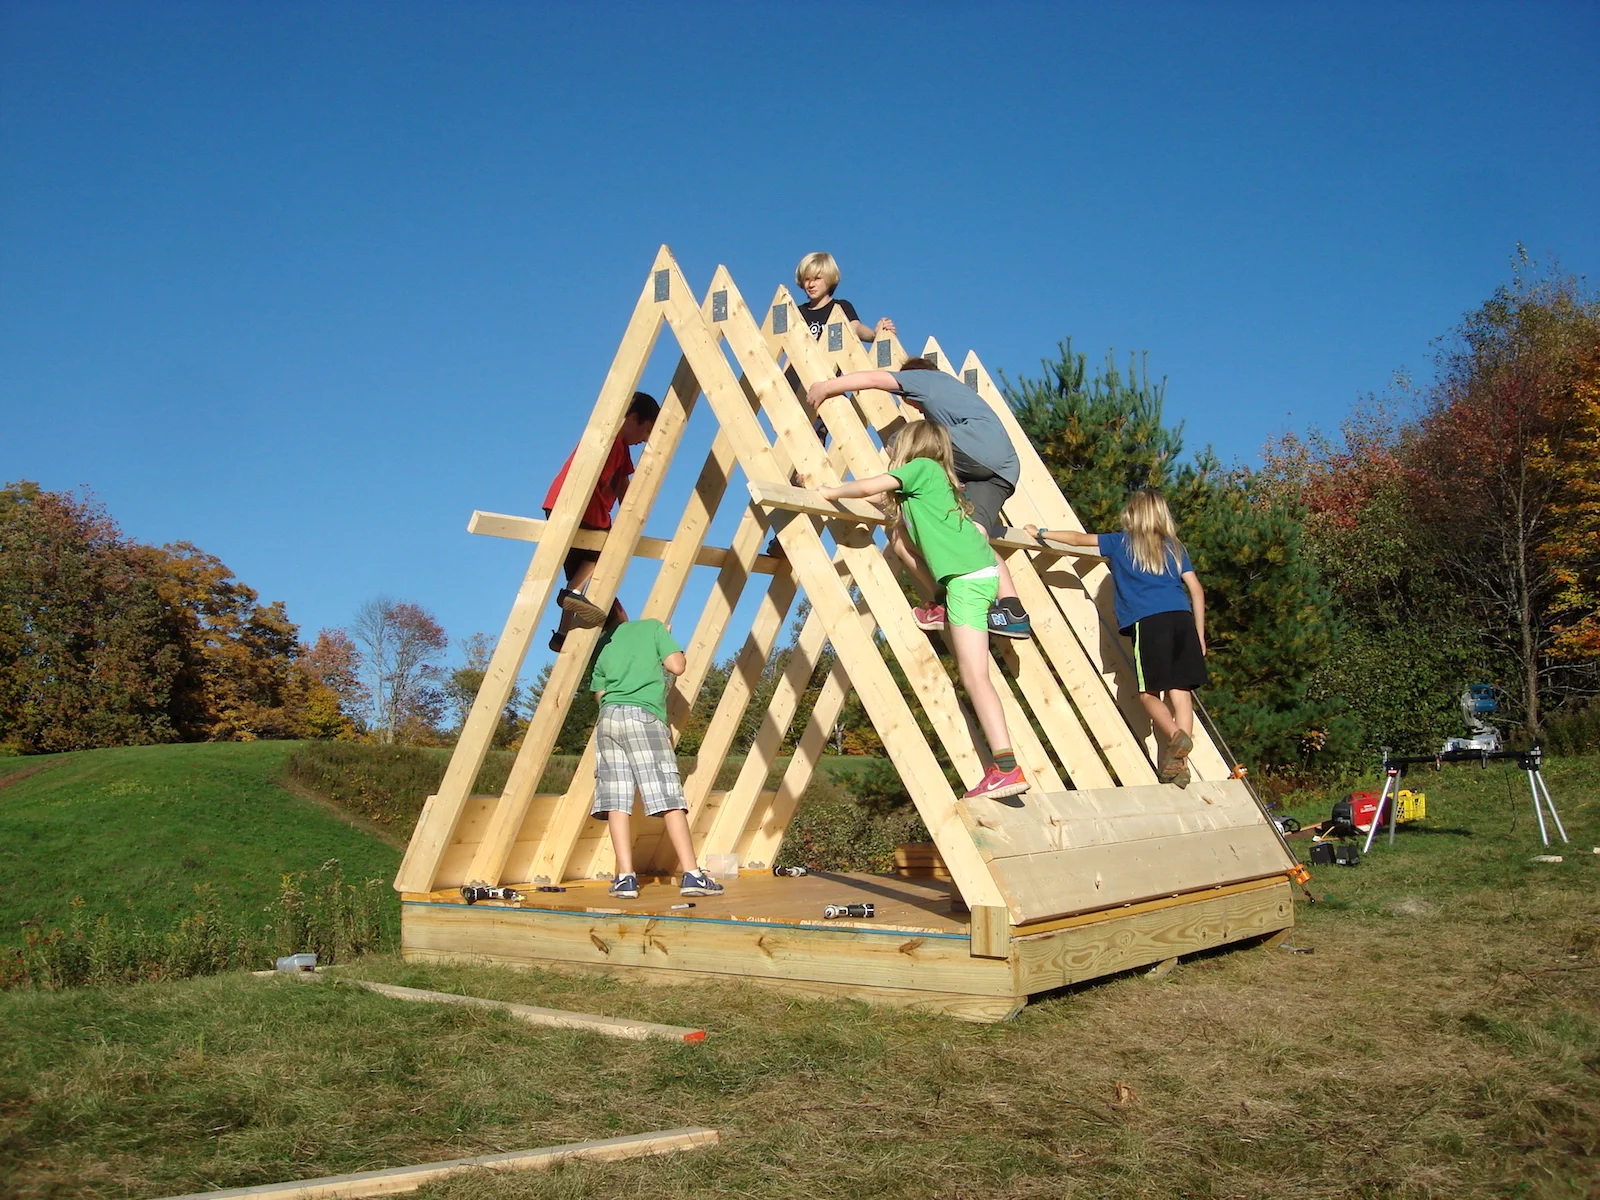
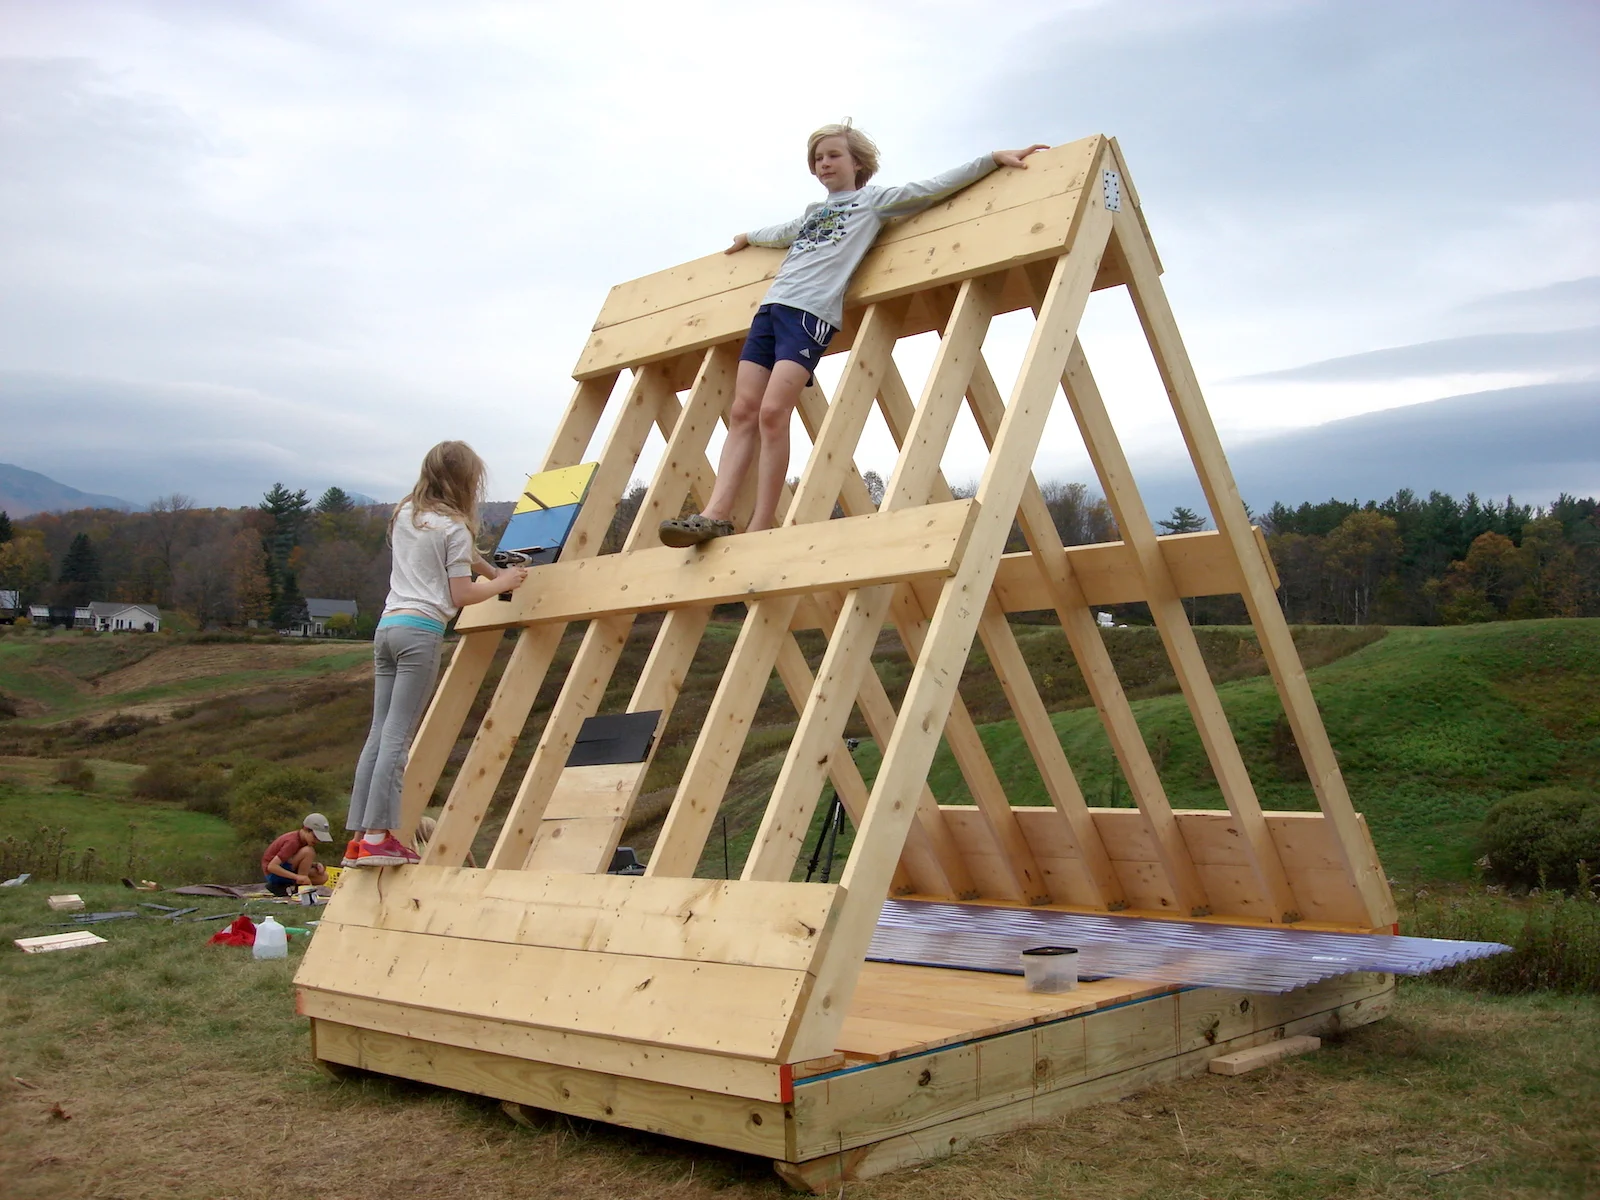
Session 4: Purlins
October 6, 2016
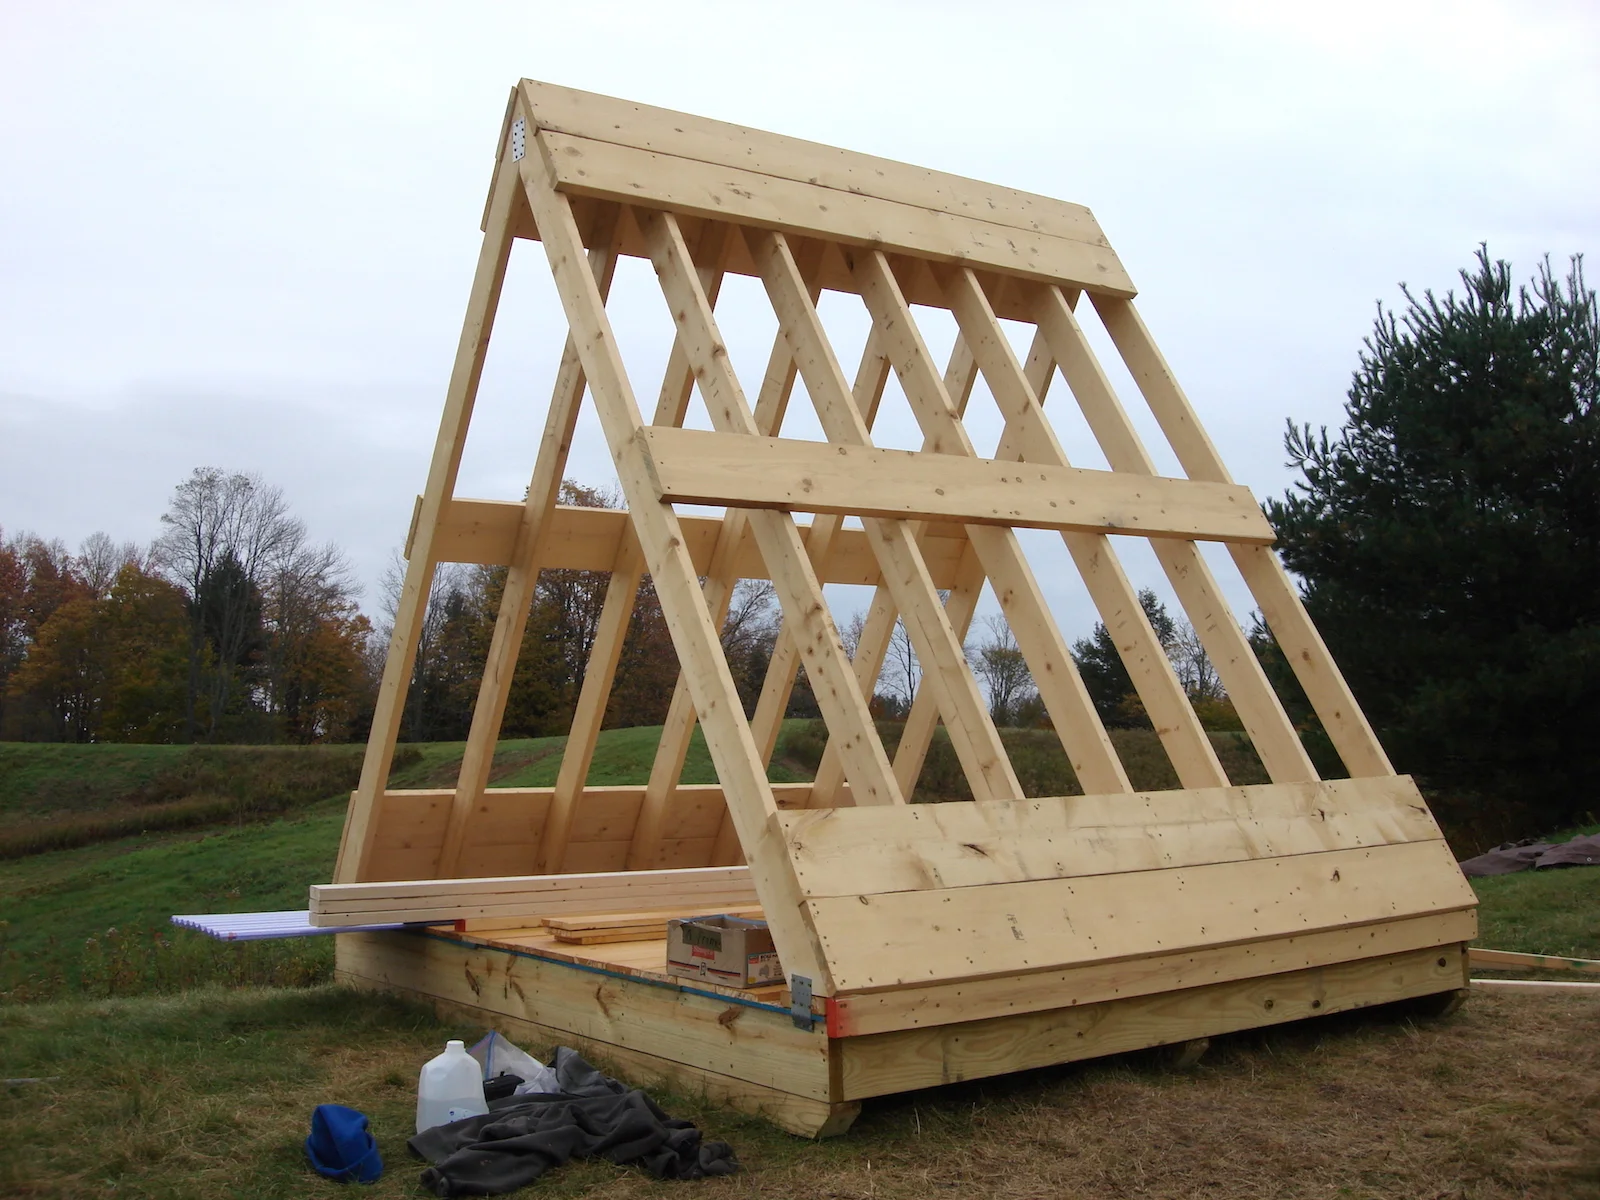
A purlin is a horizontal beam along the length of a roof that supports the rafters (they also make the structure fun to climb). After properly spacing all of the wall studs the group started installing the purlins from the bottom to the top of the structure.


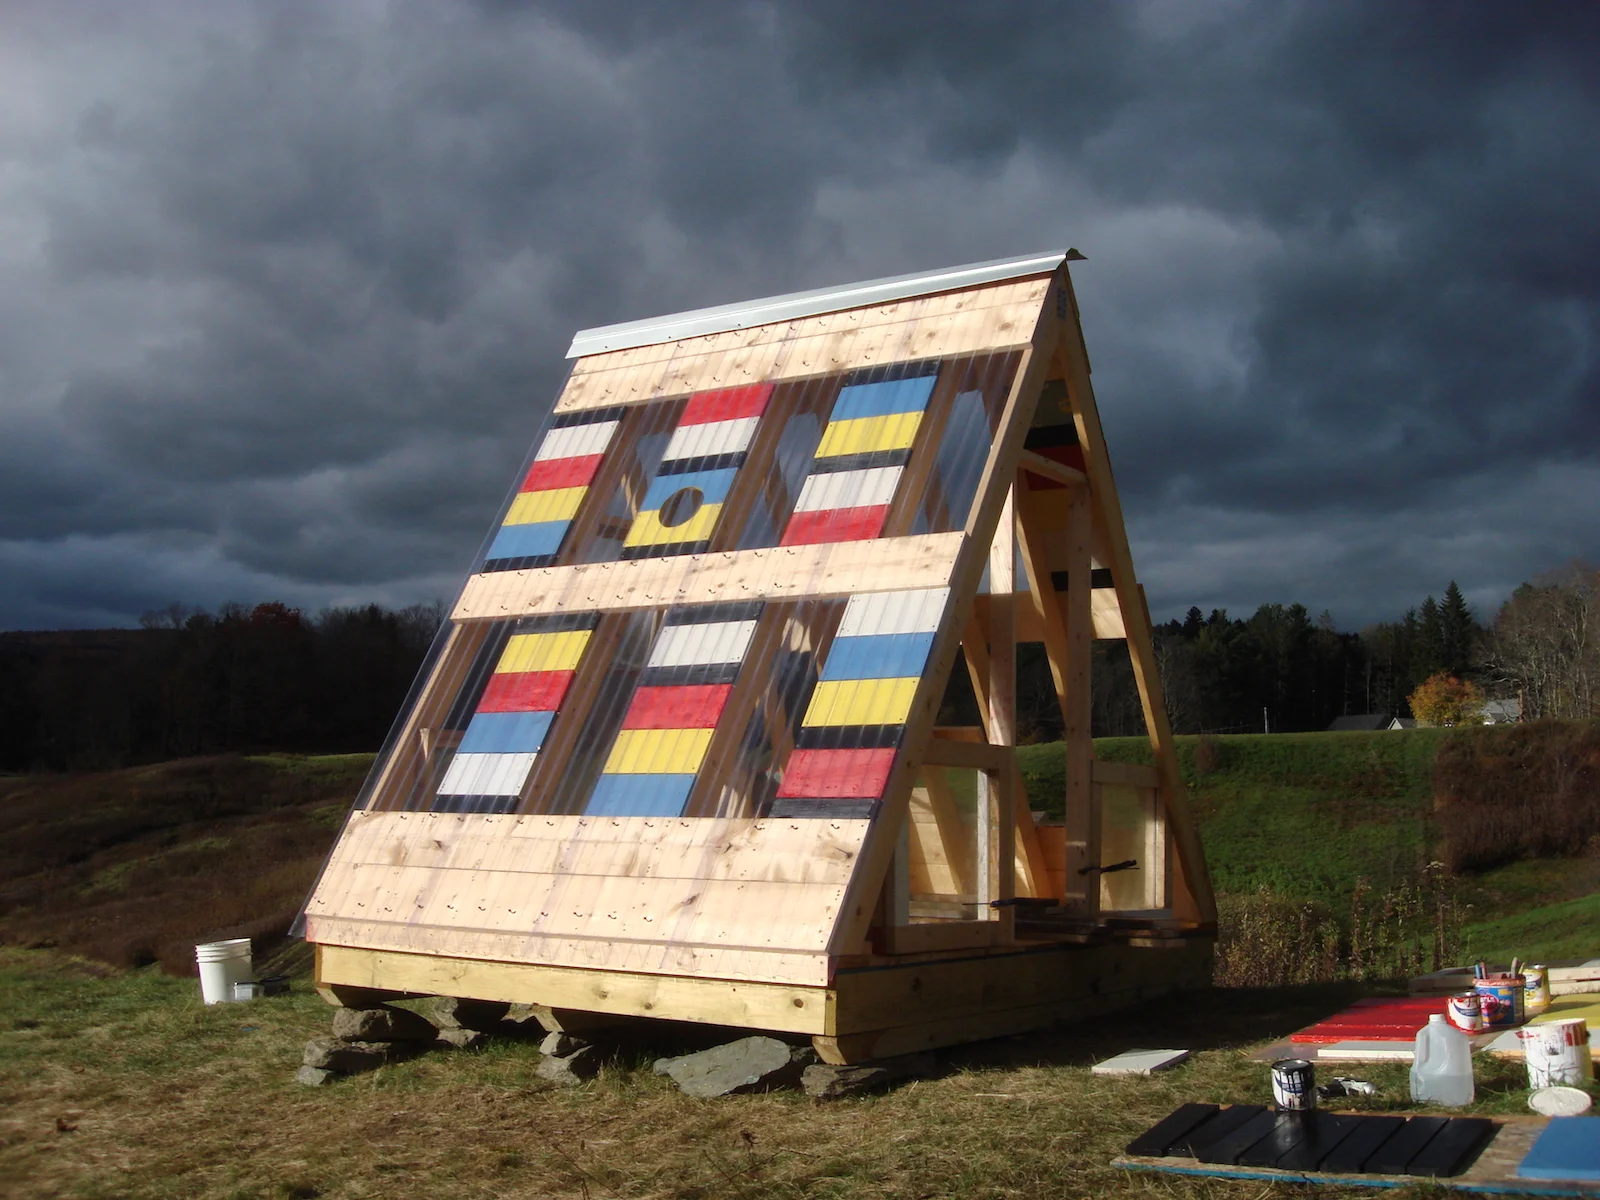
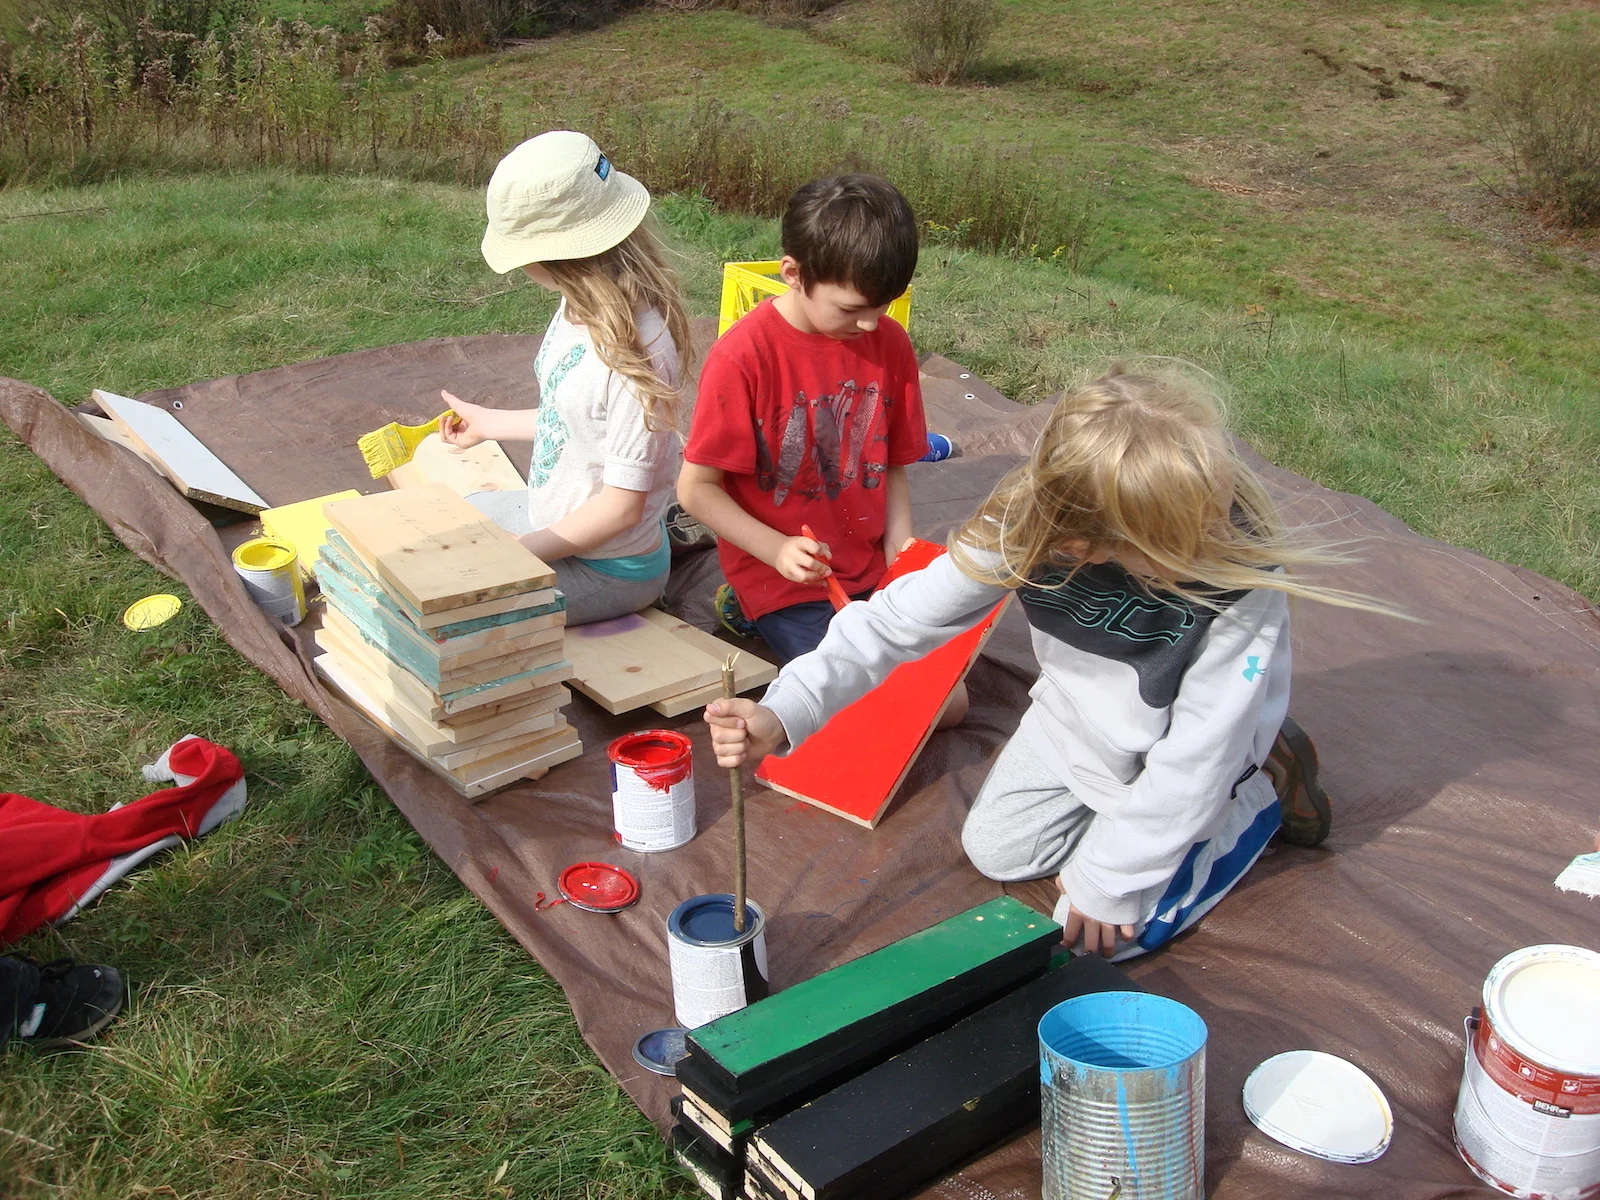
Session 5: Painting
October 16, 2016
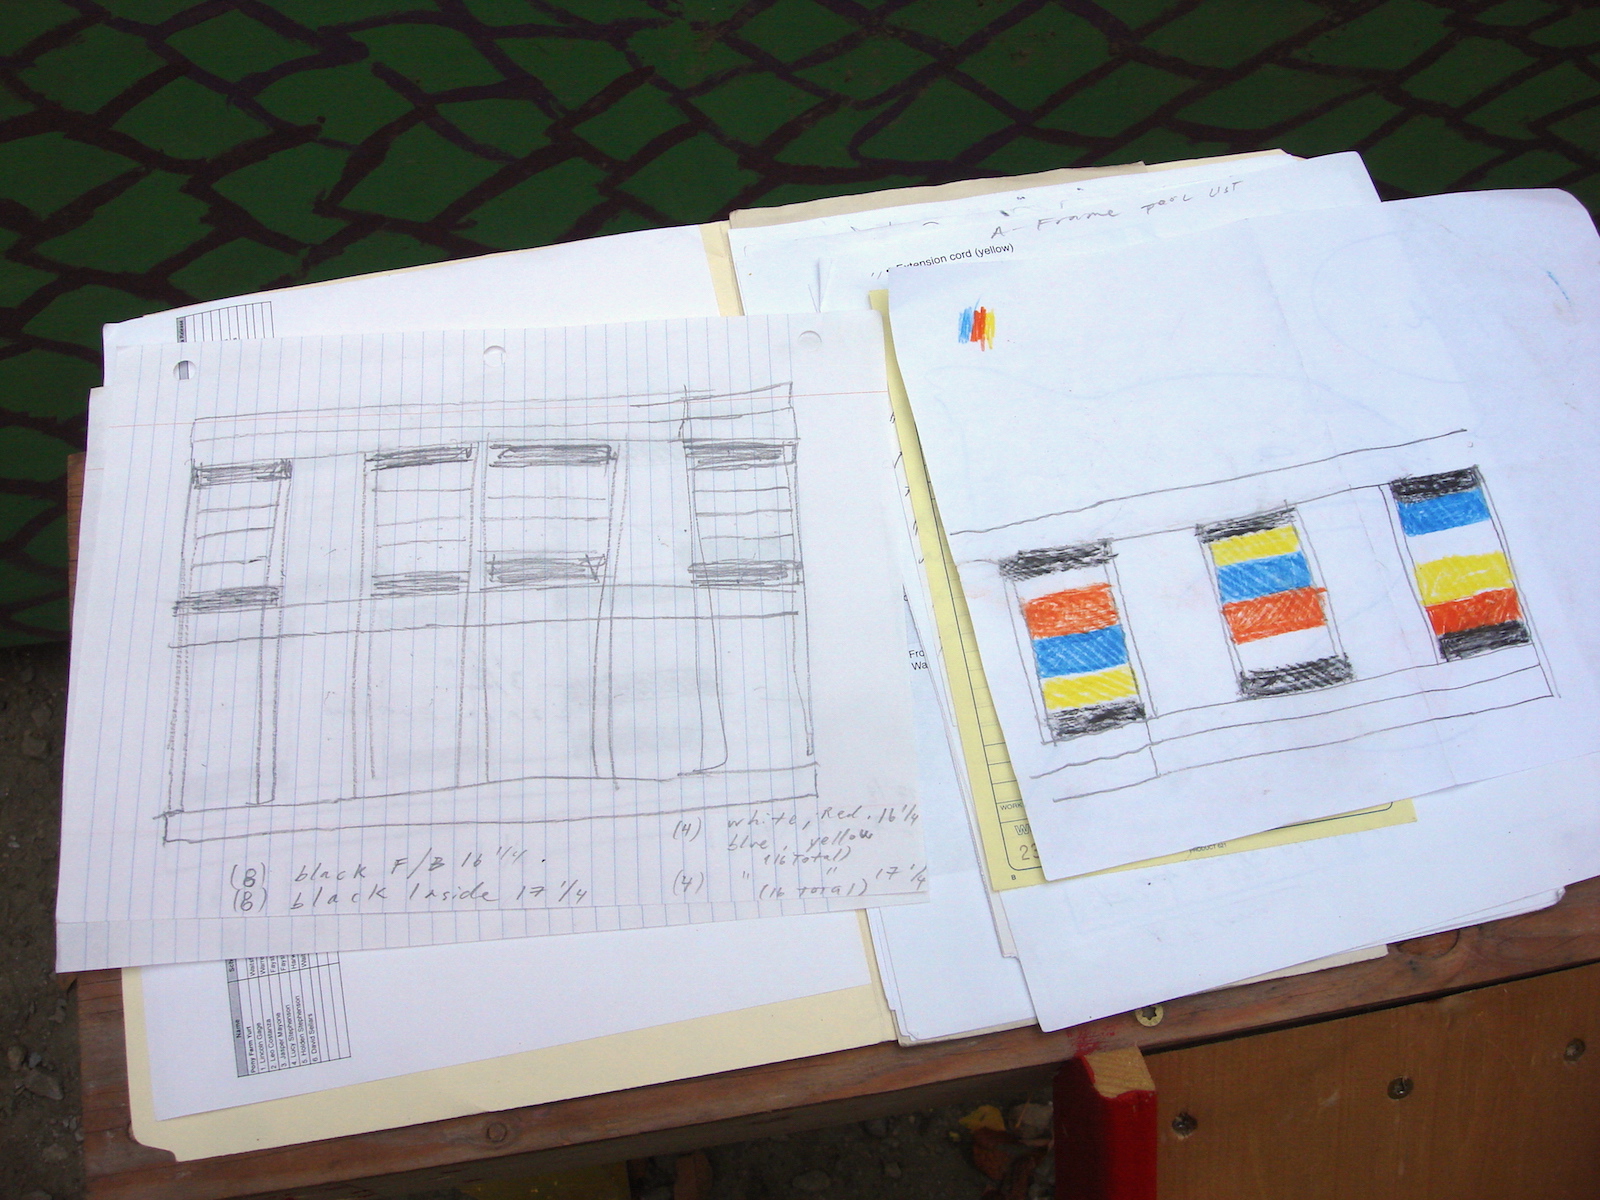
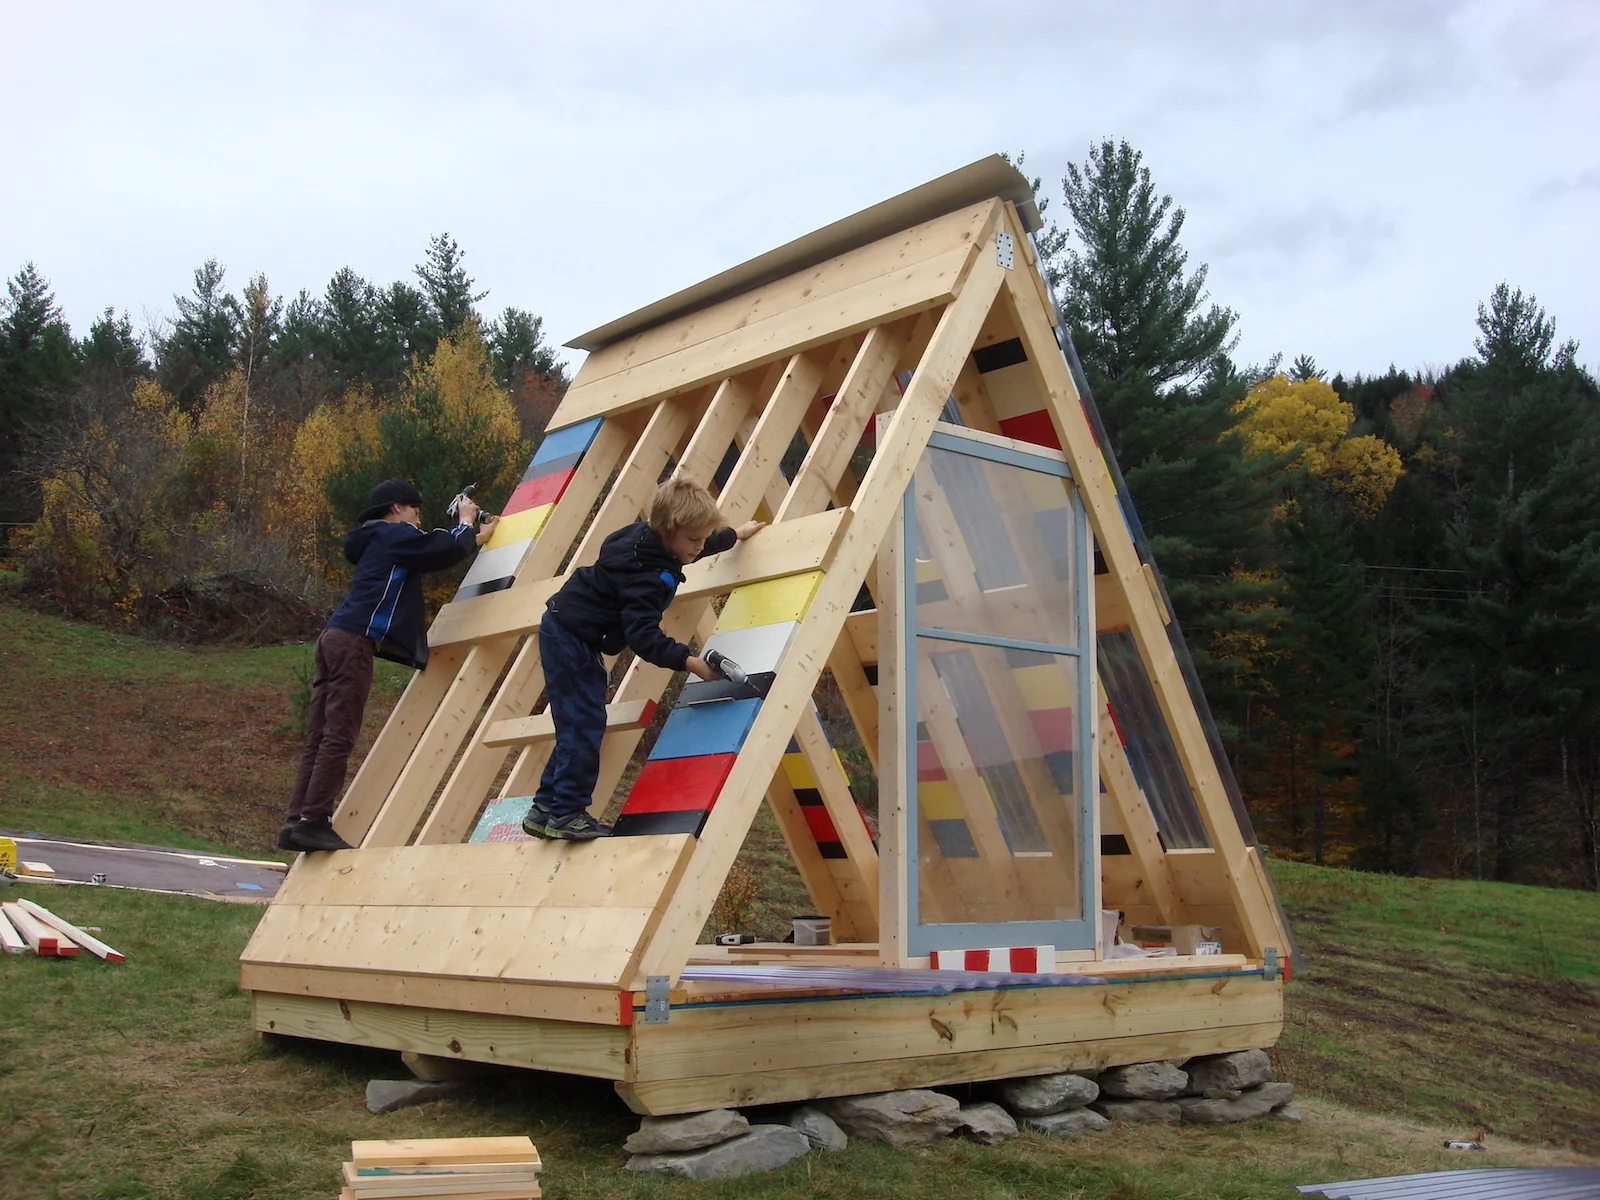
Our fifth day of building involved making some creative decisions about the roof. One of the students, David, had an idea to create a pattern between the wall studs to control the amount of light inside the structure. After a mutual agreement we started painting the 1"x10" boards to create a staggered pattern of primary colors (with white and black).


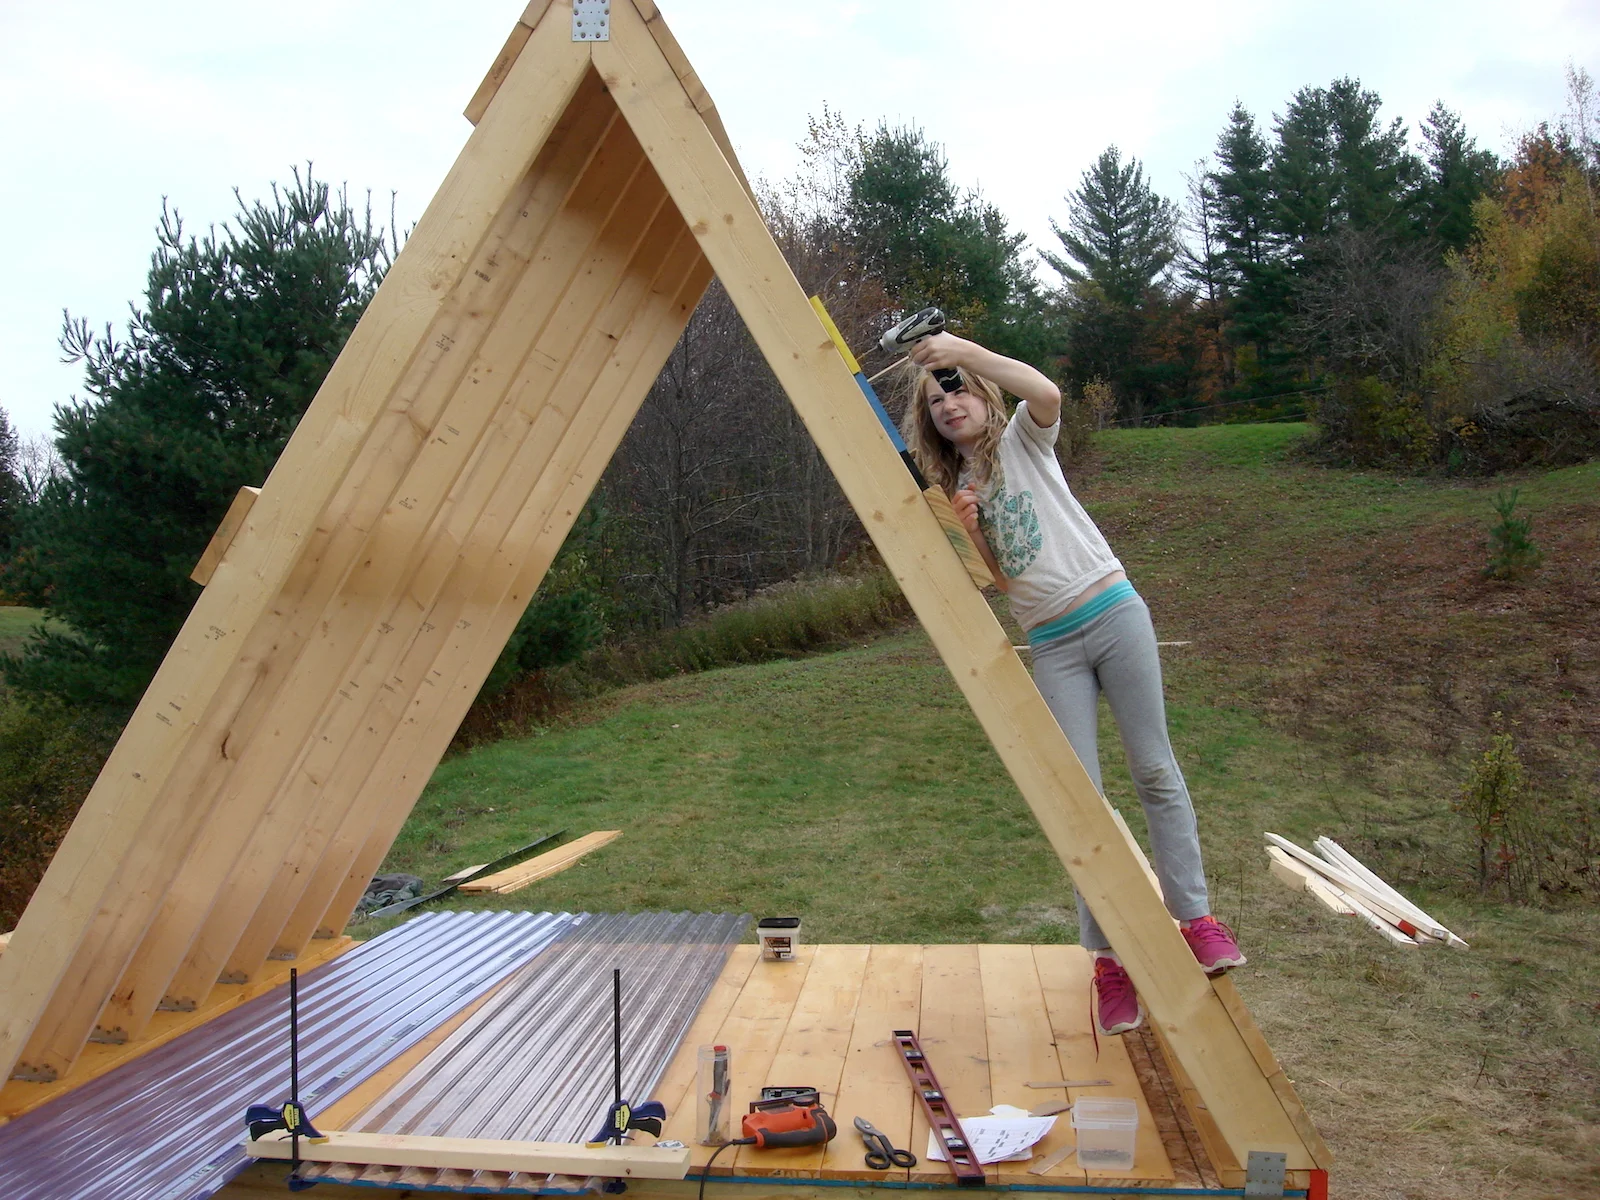


Session 6: Roofing
October 20, 2016
After 5 weeks of clear skies our luck ironically ran out on roofing day. We managed to get the clear polycarbonate panels installed just before it started pouring. Our 6 weeks of hard work culminated in an impromptu rainy afternoon celebration inside the shelter with card games, pretzels and fart jokes.
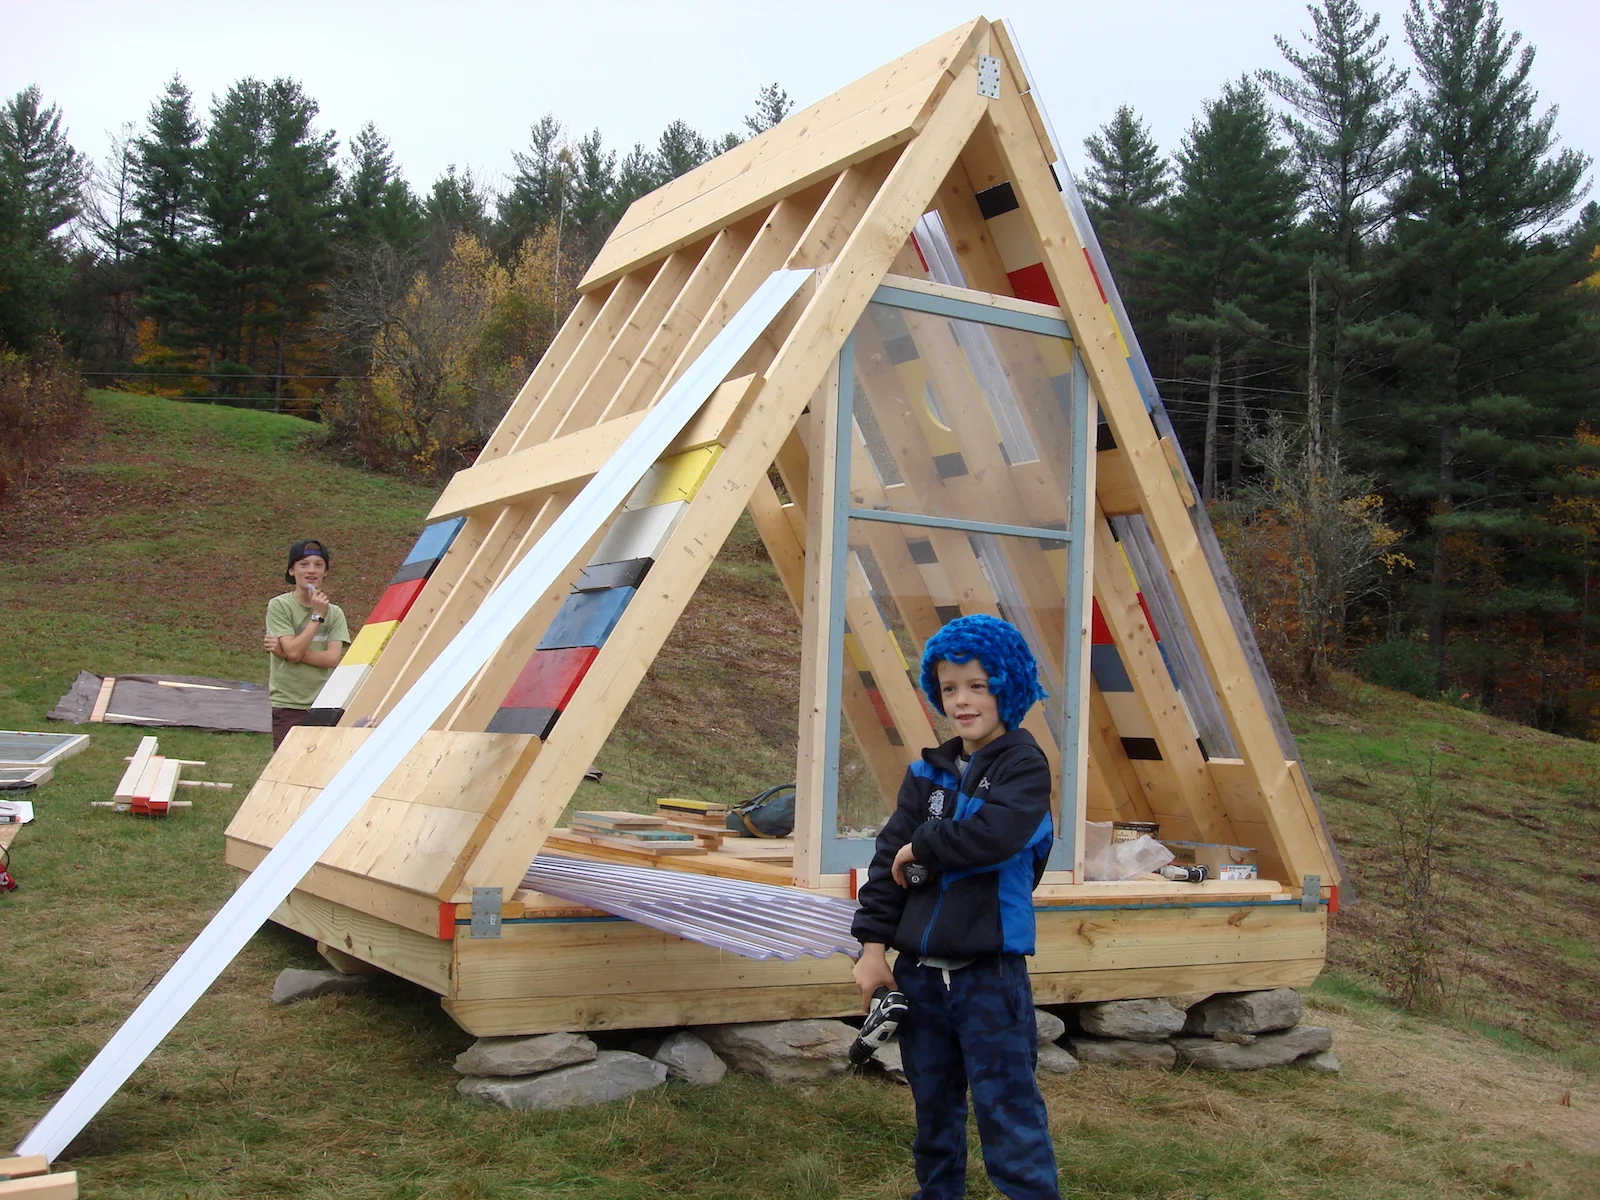


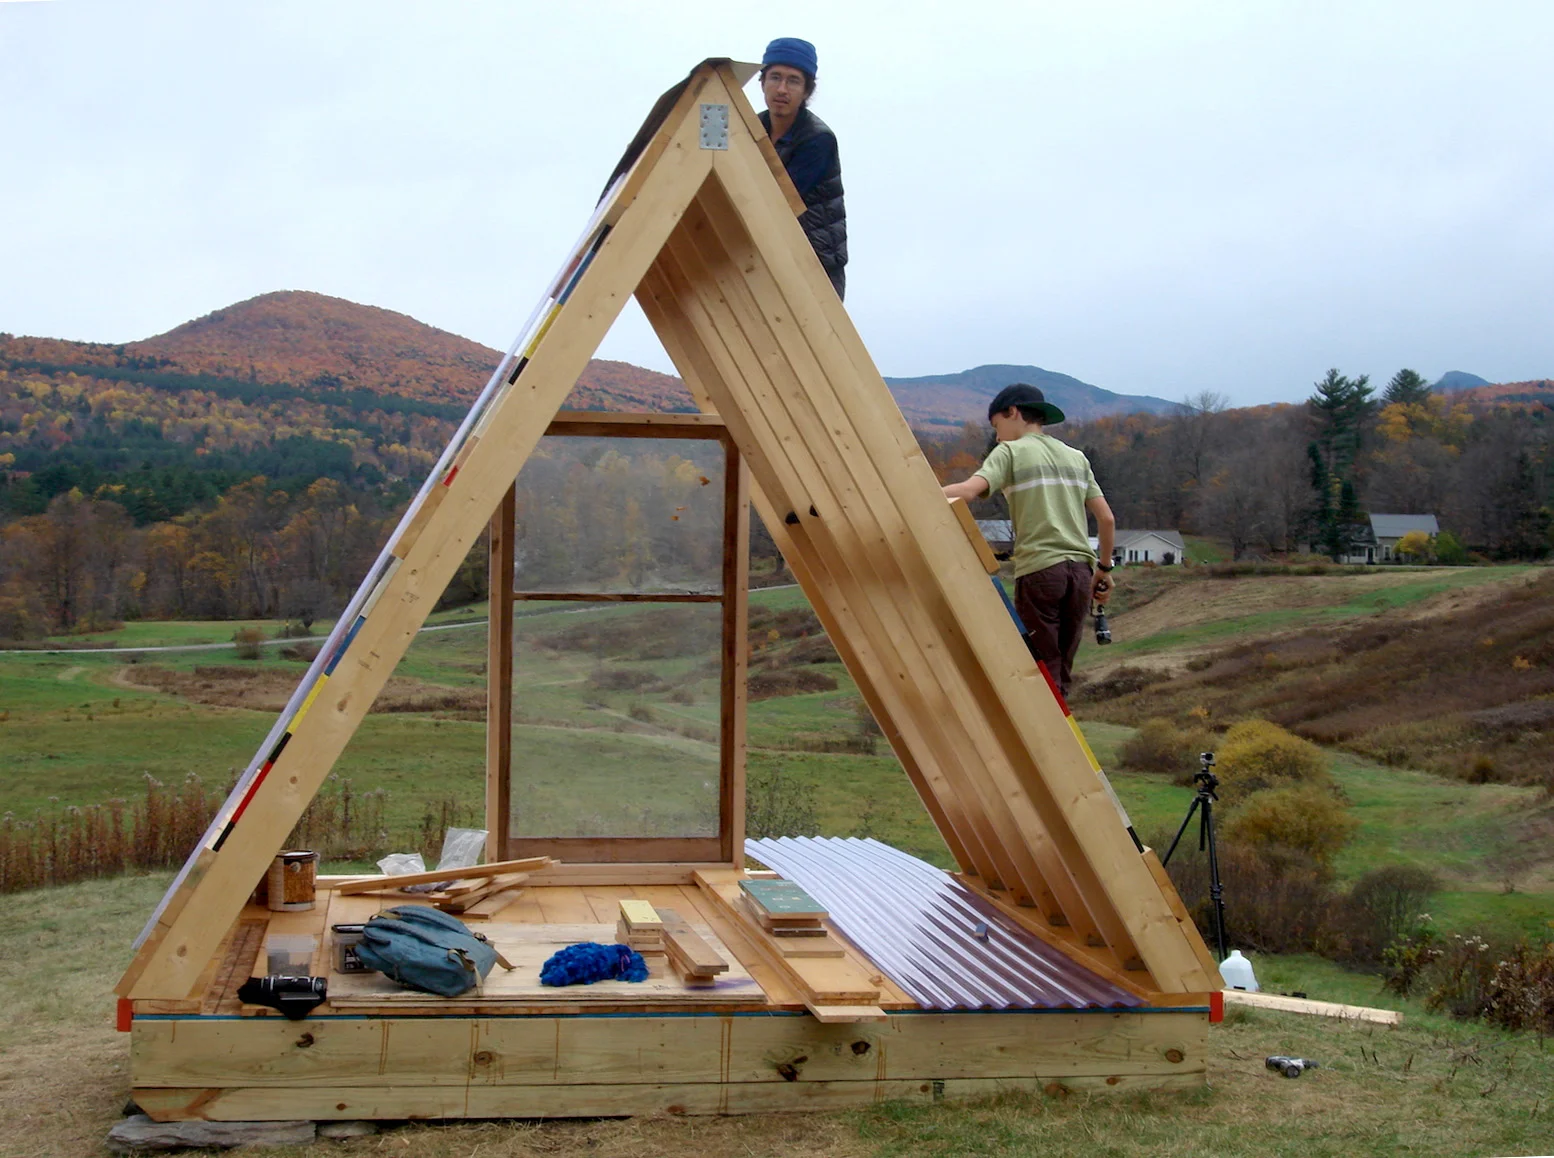


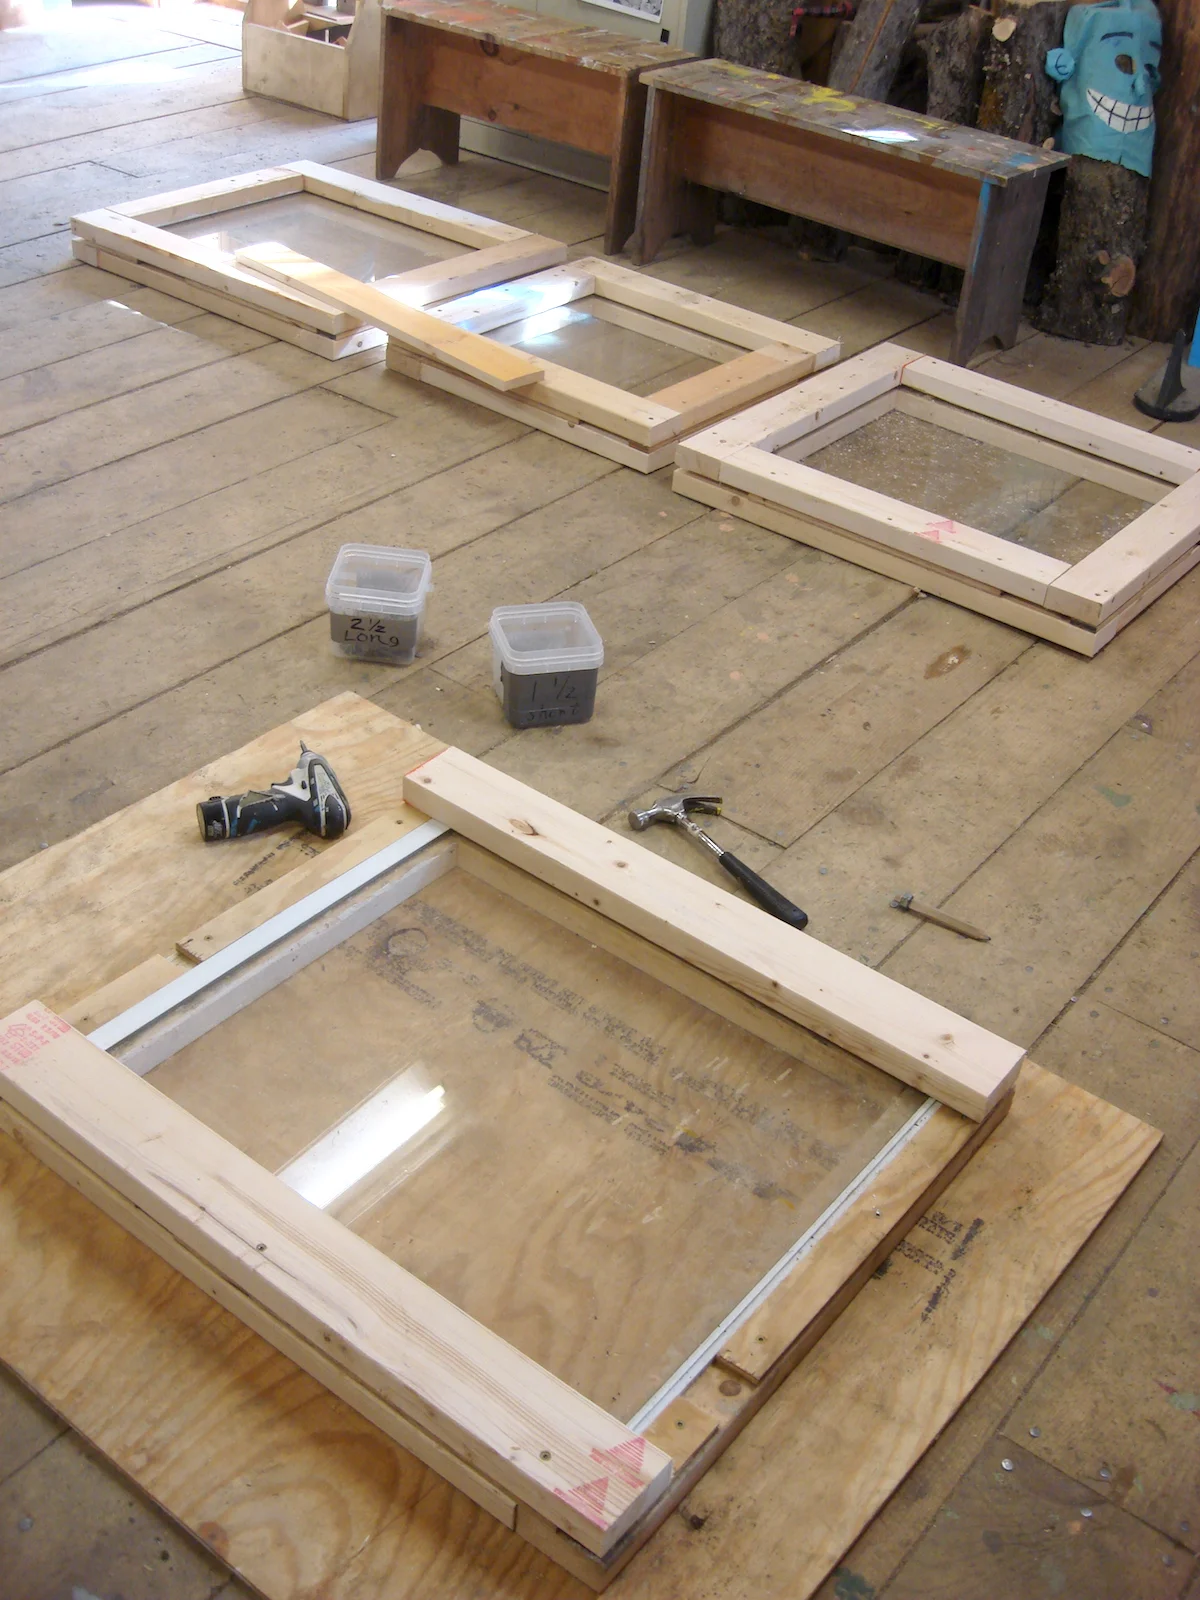
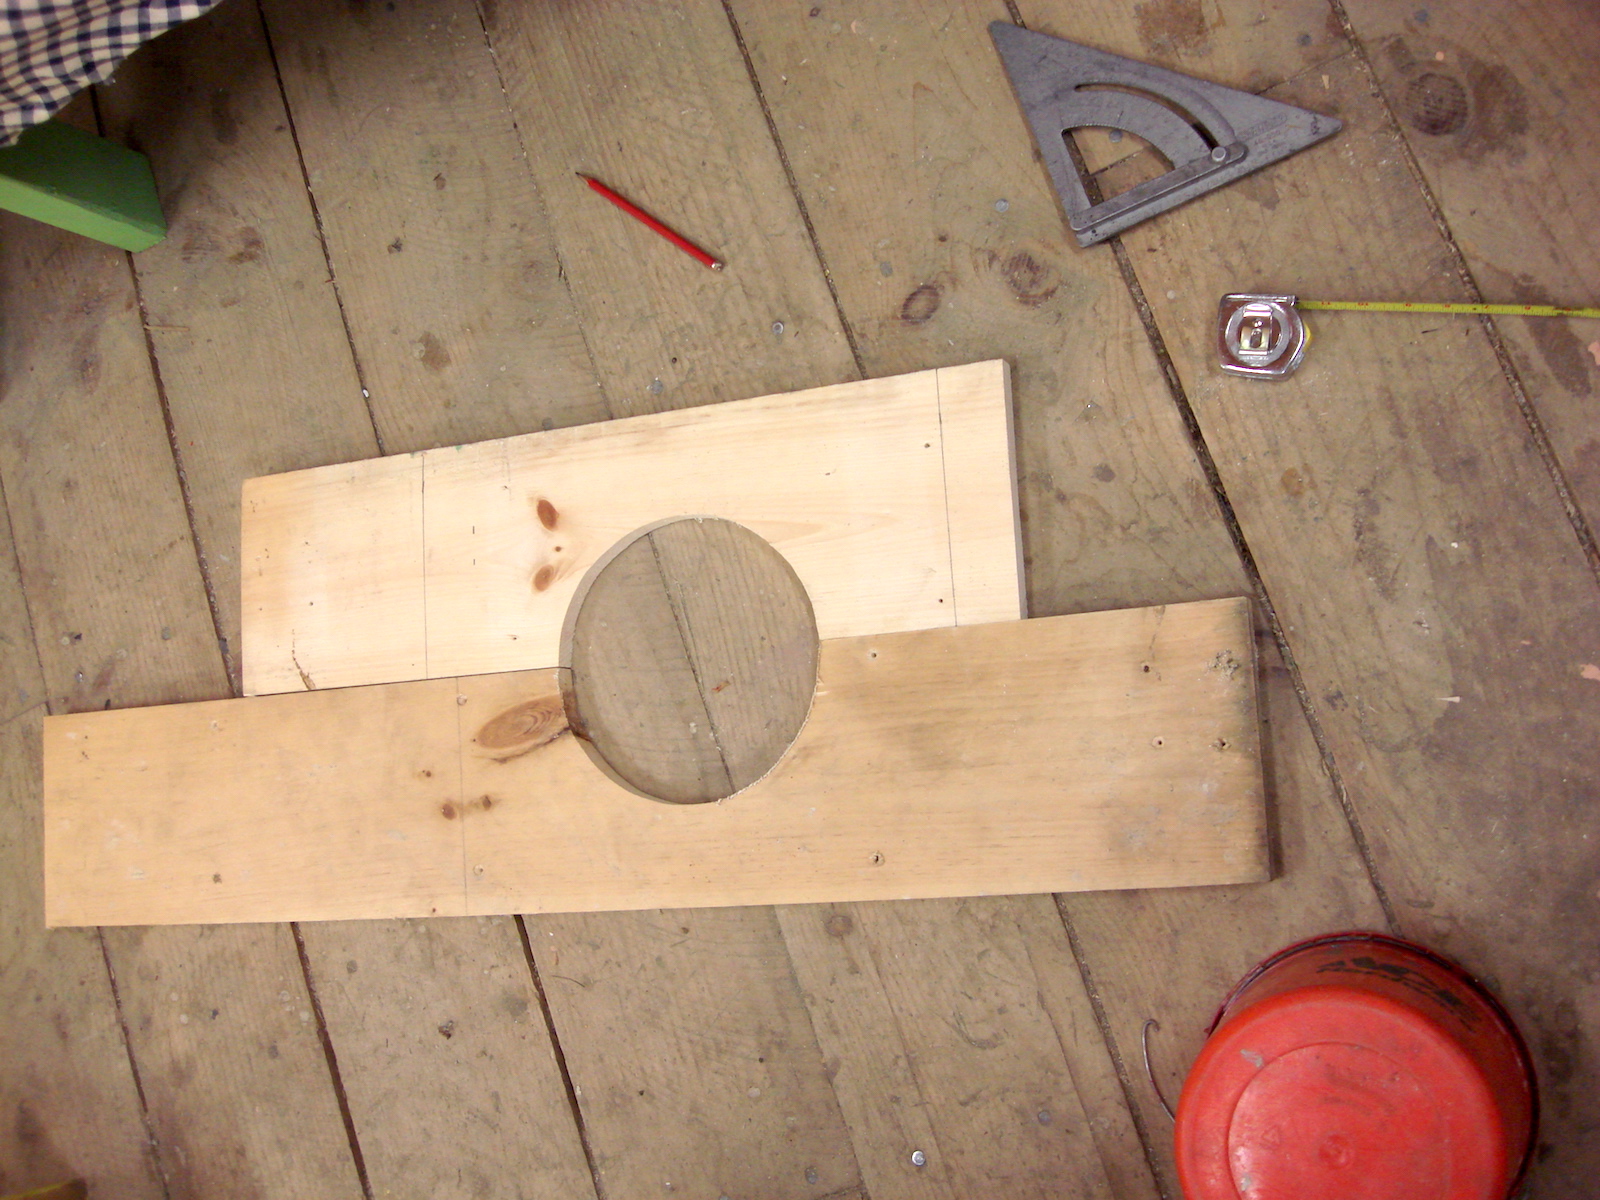
Session 7: Windows and Door
October 24, 2016
View of salvaged windows and door installation.